¶ Access the Menu:
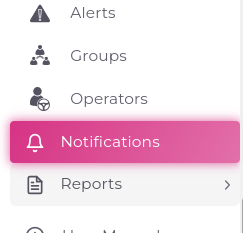
- On the left side of your screen, find and open the main menu.
- Scroll down the menu until you see Notifications.
- Click on Notifications to open the notifications list.
¶ Viewing Notifications:
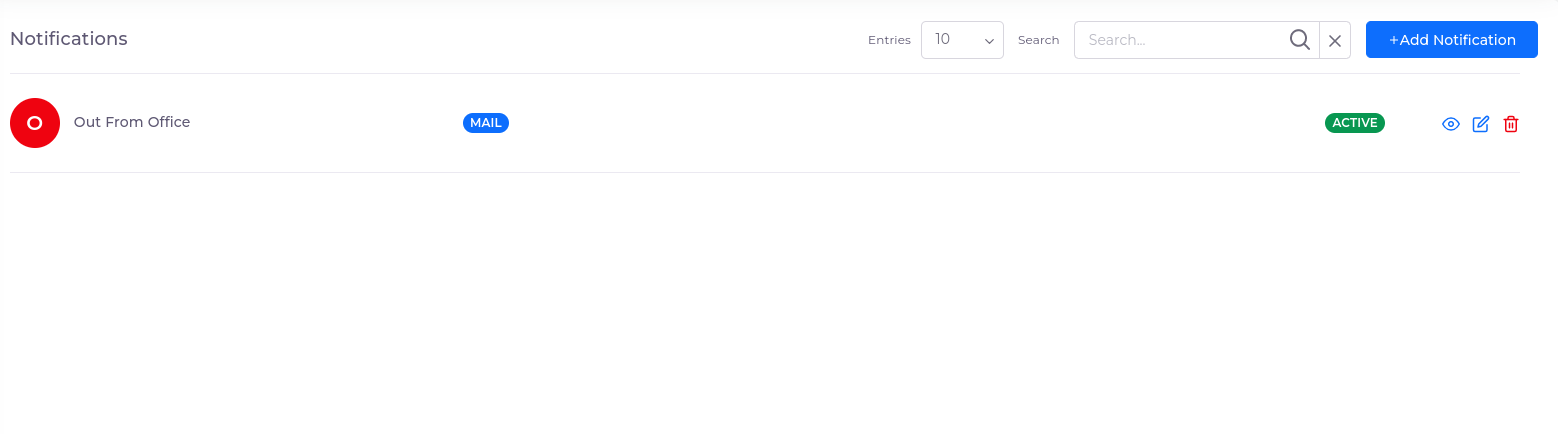
- The notification list shows the following details:
- Notification Name
- Channel (Mail, SMS, Push)
- Status
- Action Section: Contains icons to edit, view, or delete the notification (based on your permissions).
- You can search notifications by name using the search bar.
¶ Adding a Notification (If you have permission):
- Click on Add Notification.
- You will be redirected to the Add Notification page:
https://polygon.getgps.pro/app/notification/create
¶ Filling Required Fields:
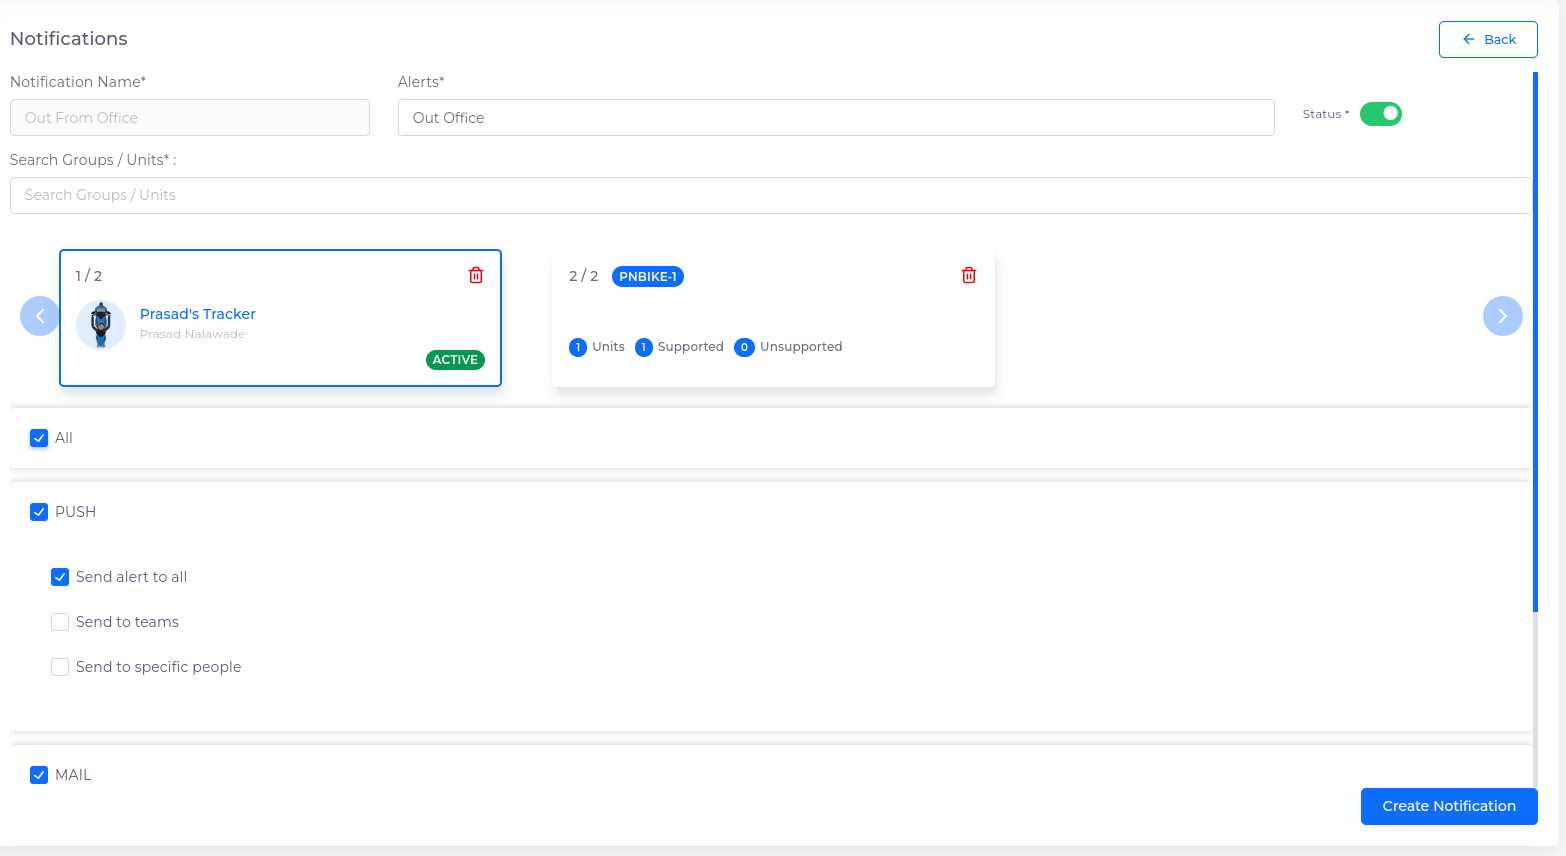
- Name: This field is required. The minimum length is 3 characters, and the maximum is 50 characters.
- Alert: This field is required. Select an alert from the list.
- After selecting an alert, the Unit and Group selection fields will be enabled.
- Select a unit or group and click the Add Unit/Group button.
- Once the unit or group is added, the Notification Channels will be enabled: All, SMS, Push, Mail.
¶ Notification Channels:
- All: If selected, all channels (SMS, Push, Mail) are enabled by default, and the notification is sent to all users via SMS, Push, and Email.
- Mail: If selected, the notification is sent via email. There are three options for sending the alert:
- Send alert to all: Sends to all users.
- Send to teams: Sends to specific teams based on roles. You can search for and add roles using the Add button.
- Send to specific people: Sends the notification to specific individuals. You can search for people by name and role using the Add button.
- Push: If selected, the notification is sent via push notification with the same options as Mail.
- SMS: If selected, the notification is sent via SMS with the same options as Mail.
Note: At least one notification channel must be selected.
¶ Saving the Notification:
- After filling in all required fields, click the Save button to create the notification.
¶ Editing a Notification:
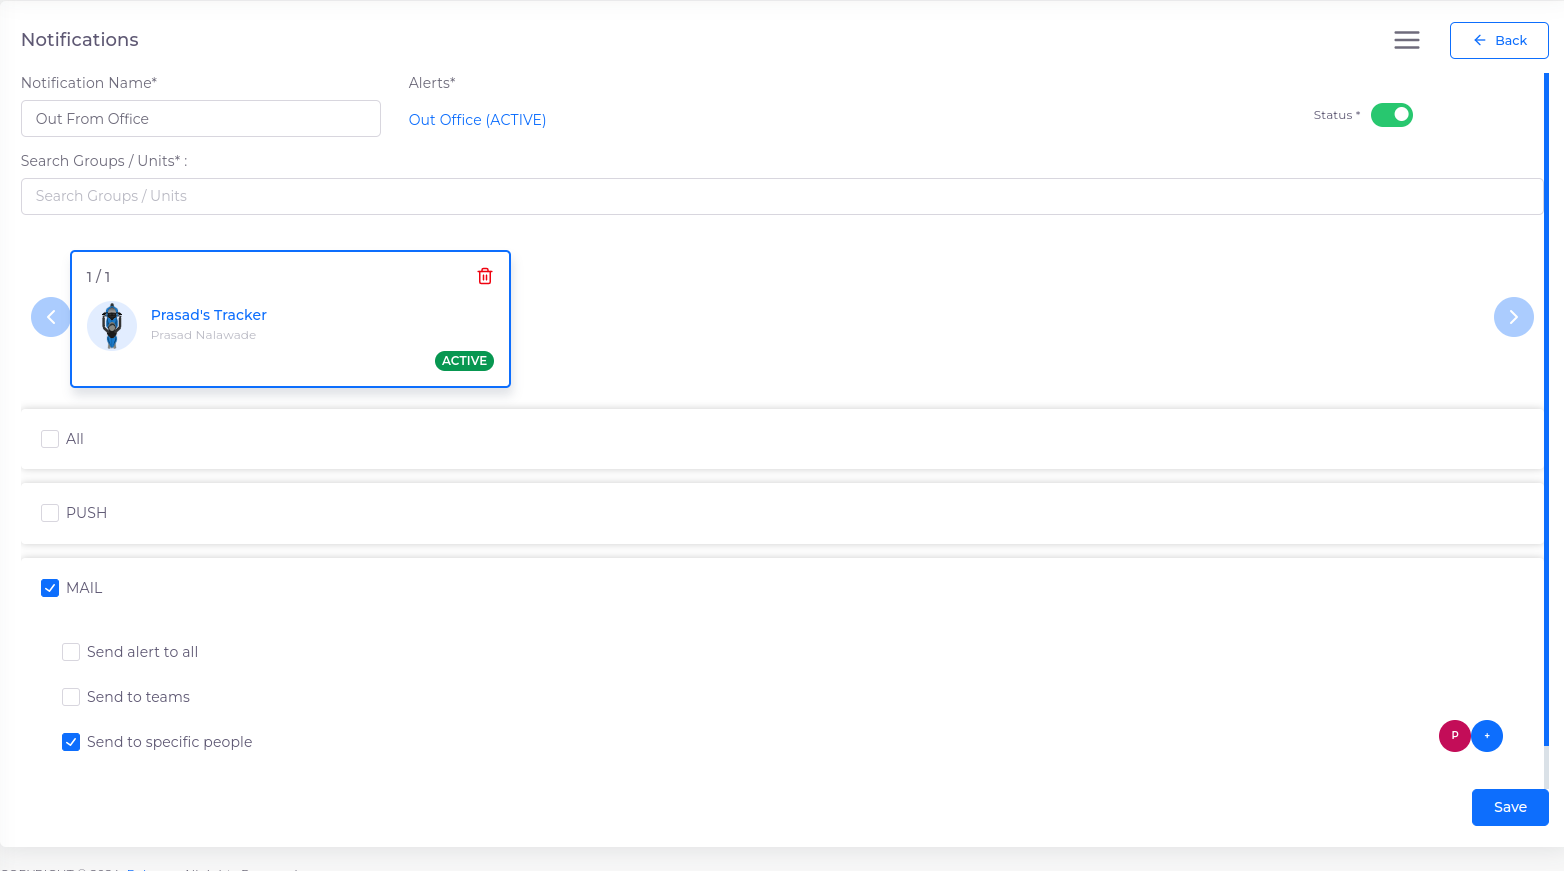
- You can edit the name, units, groups, and channels, but you cannot edit the alert.
- To edit a notification, click the Edit icon in the notification list. This will redirect you to the Edit Notification page.
¶ Viewing Notification Logs:
-
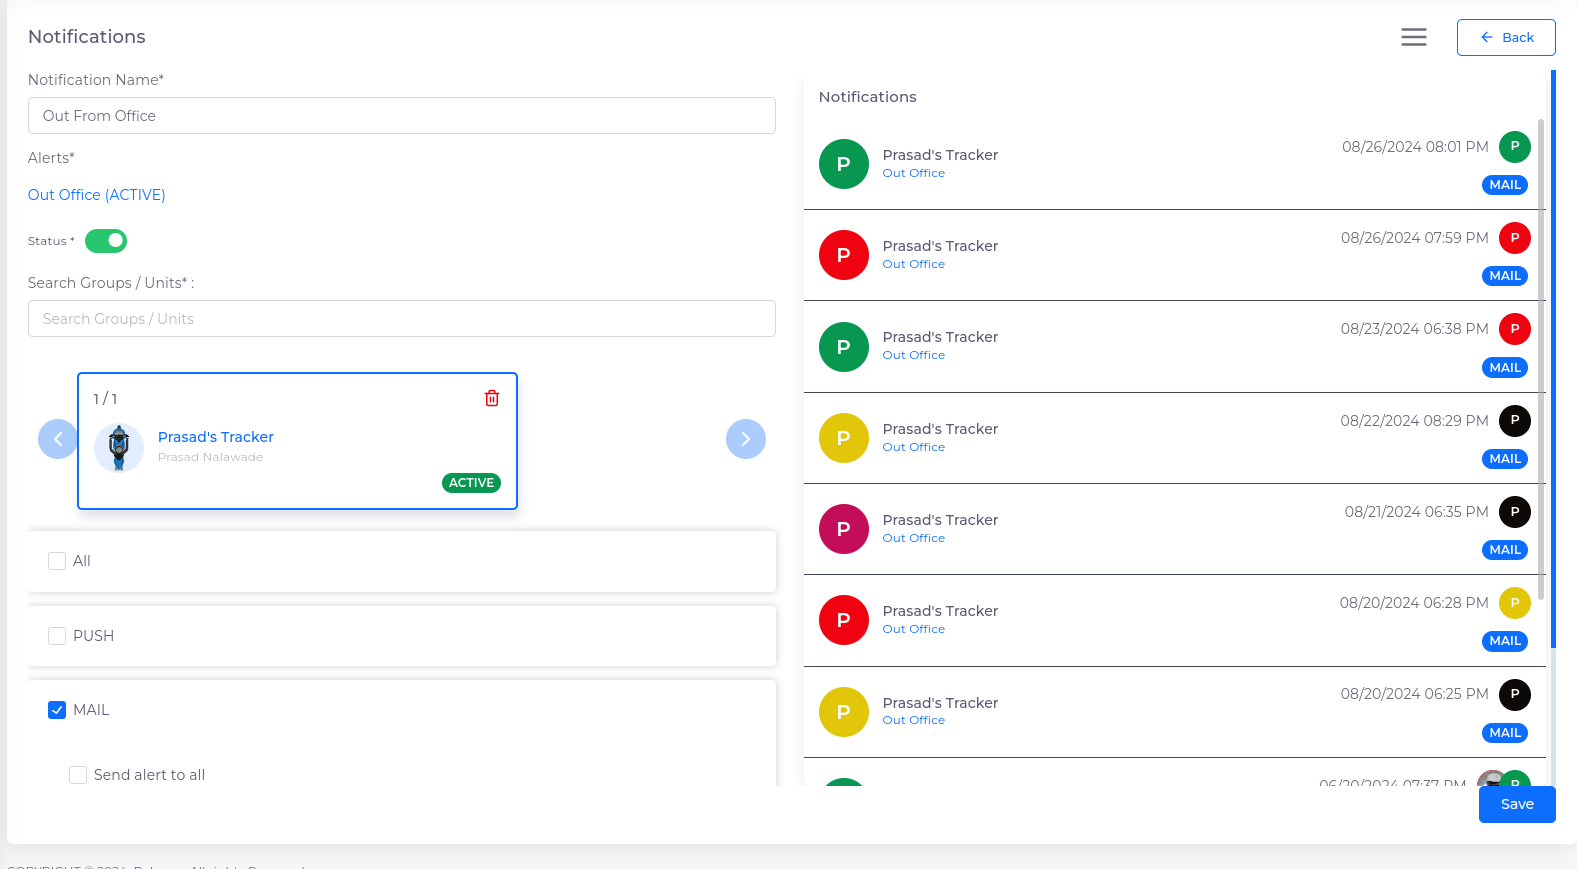
Click the three horizontal lines next to a notification to view the Notification Log, which displays:
- Unit Name
- Alert Name
- Channel
-
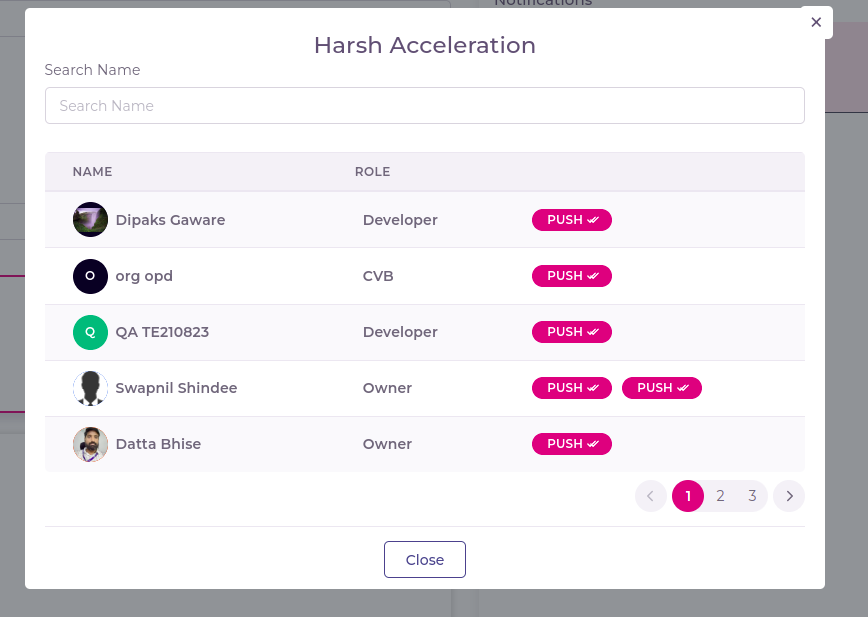
Clicking on the user profile icon will show a list of users with:
- Username
- Role
- Channel
- Status
-
You can search for users by name in this list.
¶ Notification Status:
- Error (AlertTriangleIcon): Indicates that an error occurred while sending the notification on that channel.
- Pending (CheckIcon): The notification is queued but hasn’t been sent yet.
- Sent (Double CheckIcon): The notification was successfully sent.
¶ Troubleshooting Notifications:
¶ Issue: Notification Not Sent
- Cause: No notification channel was selected.
- Solution: Ensure that at least one notification channel (All, Mail, Push, SMS) is selected before saving the notification.
¶ Issue: Error Status Appears (AlertTriangleIcon)
- Cause: There was a failure when sending the notification.
- Solution: Check the recipient's contact information (email, phone number) and ensure the necessary permissions are configured correctly.
¶ Issue: Notification Stuck on Pending (CheckIcon)
- Cause: The notification is queued but hasn’t been processed.
- Solution: Wait and refresh the page. If the status does not update, attempt resending the notification.
¶ Issue: Unable to Add or Edit Notifications
- Cause: Insufficient permissions.
- Solution: Contact the administrator to ensure you have the appropriate permissions to add or edit notifications.
This guide will help you efficiently manage notifications, from adding new notifications to troubleshooting common issues. For additional support, contact your administrator.