¶ Step-by-Step Guide: Managing and Adding New Units
¶ Step 1: Open the Units Section
-
Access the Menu:
- On the left side of your screen, find and open the main menu.
-
Navigate to Units:
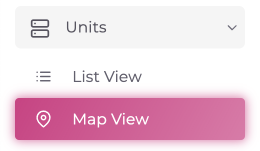
- Scroll down the menu until you see "Units."
- Click on "Units" to open it.
¶ Step 2: Choose How to View Units
- View Options:
- After opening "Units," choose from two view options:
- List View: Displays all units in a list format for detailed visibility.
- Map View: Shows all units on a map for visual location tracking.
- After opening "Units," choose from two view options:
¶ Step 3: Add a New Unit
- Start the Process:
- On the right side of the "Units" page, click the "Add Unit" button. This will initiate the unit creation wizard.

- Open the Wizard:
- The wizard will guide you step-by-step through creating and allocating a new unit.
¶ Step 4: Create the Unit
-
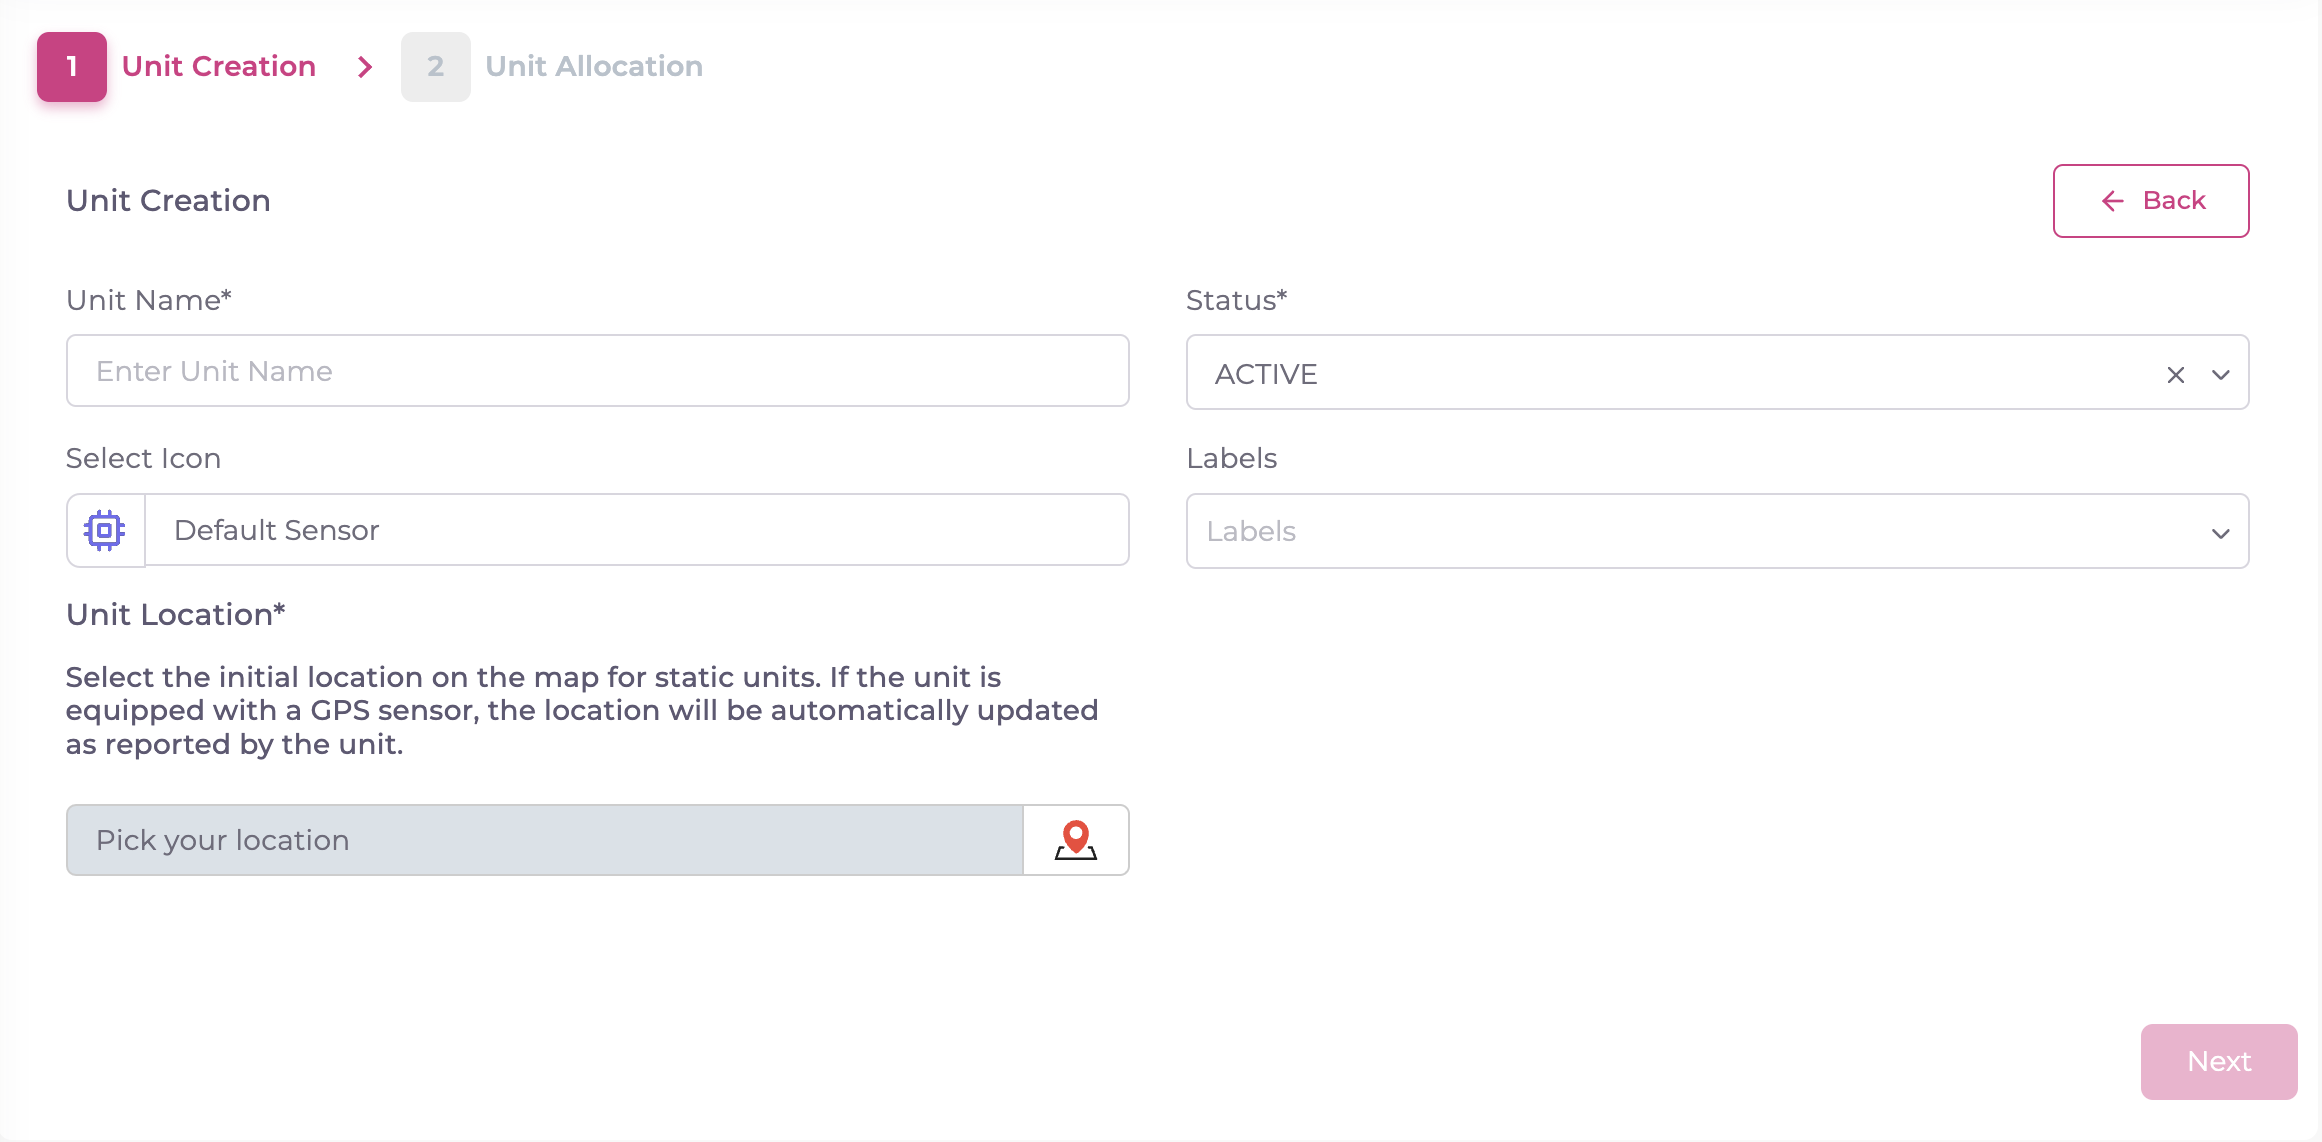
Enter Unit Details:
- Unit Name (mandatory): Enter the desired name for the unit.
- Validation: Unit name must be between 3 and 50 characters long.
- Status (mandatory): Set the status (e.g., active or inactive).
- Validation: Status is a required field.
- Select Icon (optional): Choose an icon that represents the unit (e.g., a car, bike, or truck).
- Labels (optional): Add tags or labels for identification. Labels help to categorize the units.
- Unit Location (mandatory): Select the starting location on the map. If the unit has GPS, this will update automatically.
- Validation: The location must be chosen before proceeding to the next step.
- Unit Name (mandatory): Enter the desired name for the unit.
-
Proceed to Next Step:
- Click "Next" after entering all required details.
¶ Step 5: Allocate the Unit
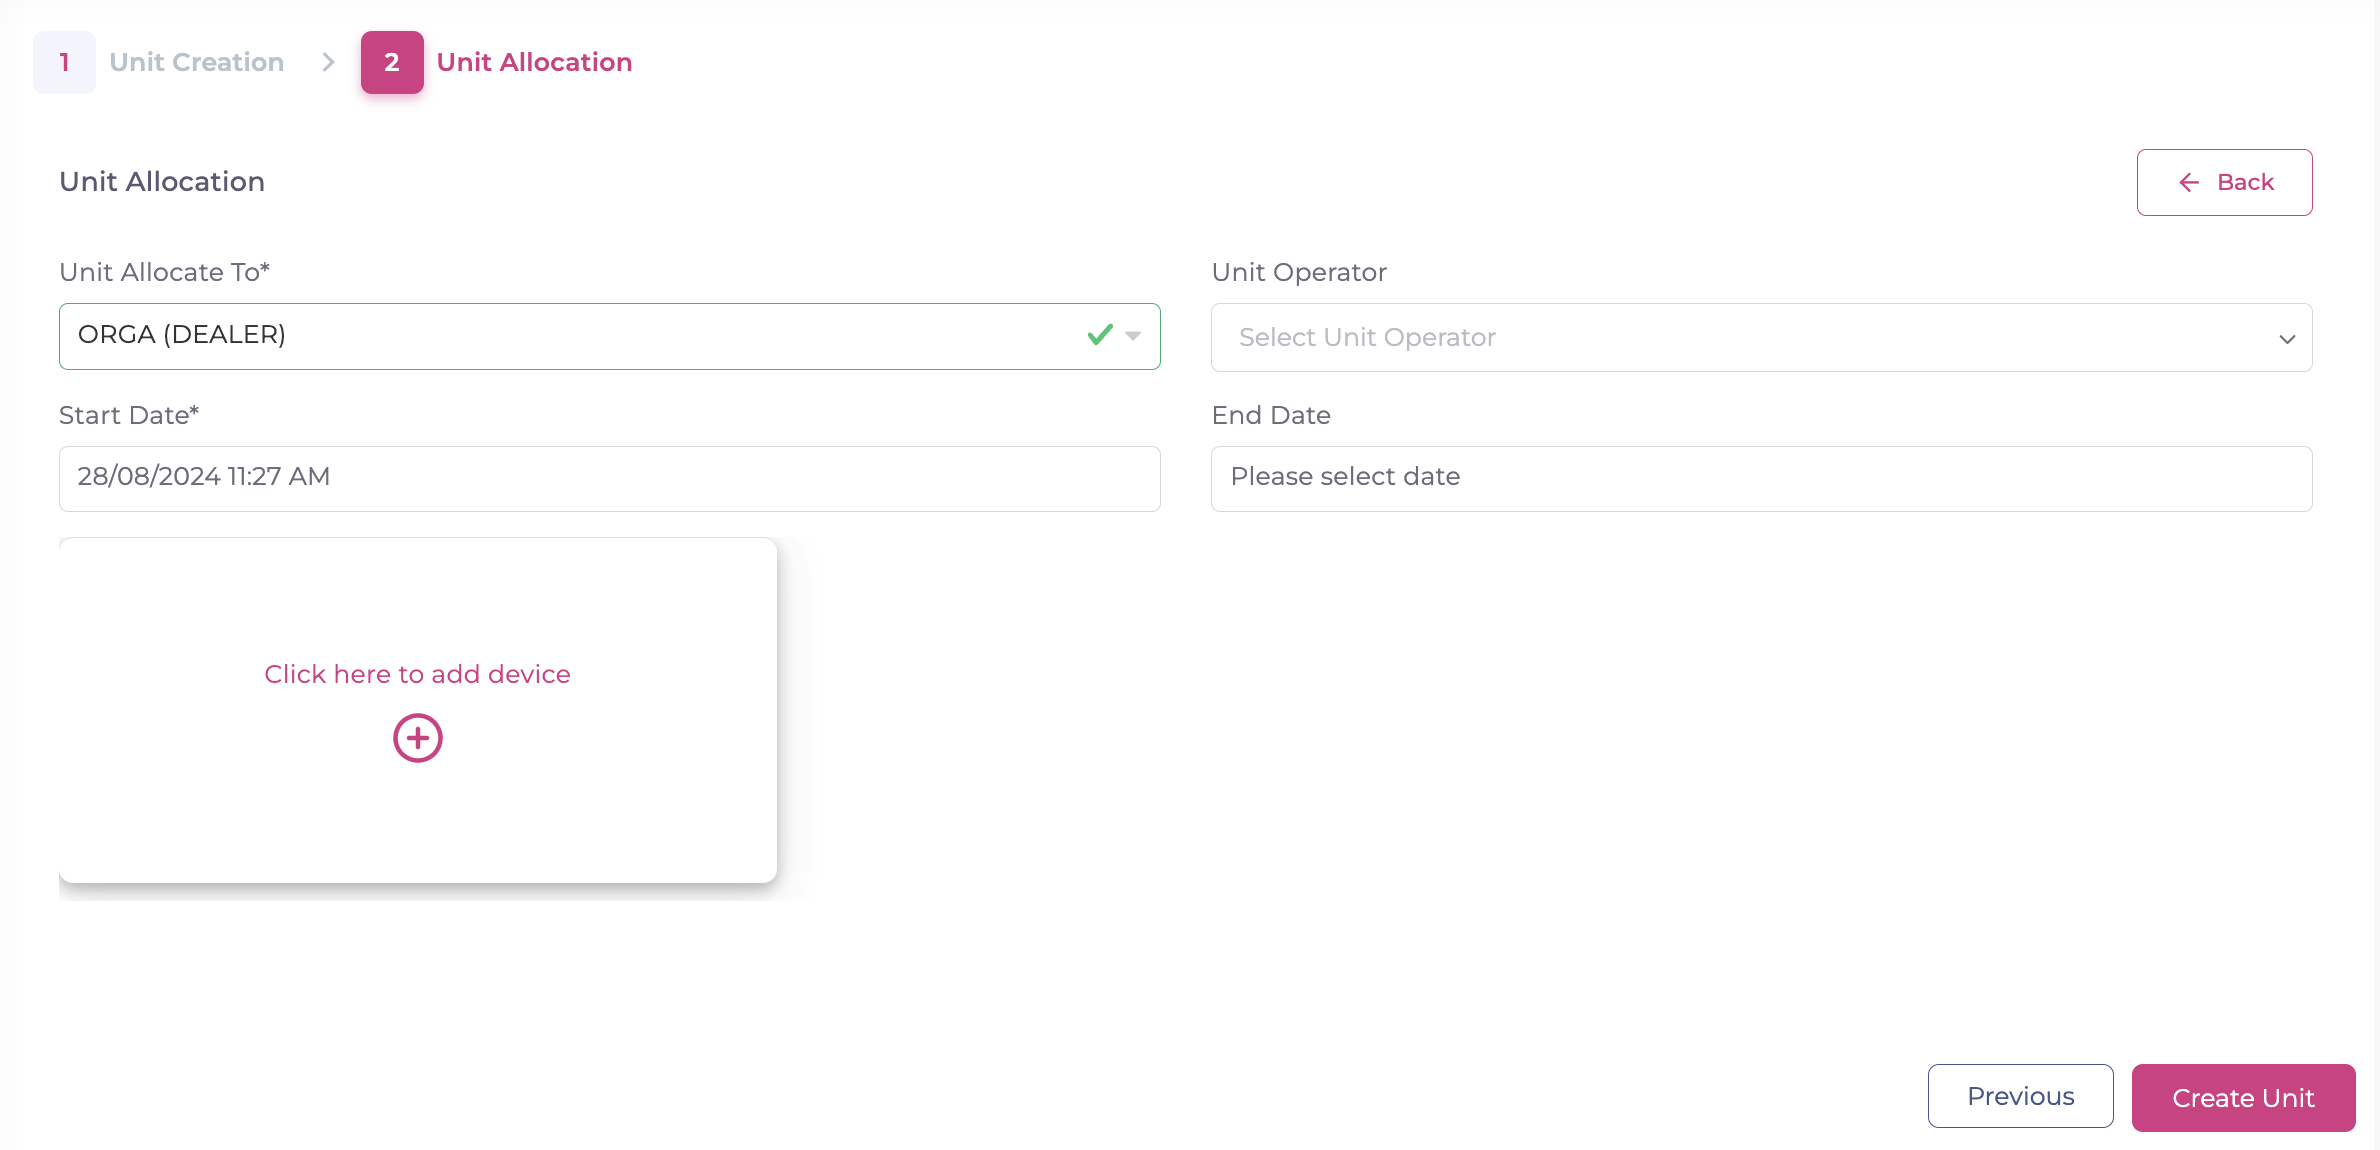
- Allocate the Unit (mandatory):
- Assign To: Choose your account or a sub-account, which will display the operator list. Only specific account-allocated devices will be available to add. This means that if a device is linked to another account, it won’t be available for selection.
- Unit Operator (optional): Select the allocated account operator.
- Start Date (mandatory): Set the start date for unit allocation (only current and future dates are accepted).
- If the user selects a future start date: The unit will be created, but it won’t be active until the selected date arrives. This allows you to schedule unit allocation in advance, ensuring smooth transitions without manual activation.
- End Date (optional): Choose the end date for unit allocation.
- Add a Device (optional):
- Click to Add Device: Click the block labeled "Click to add device."
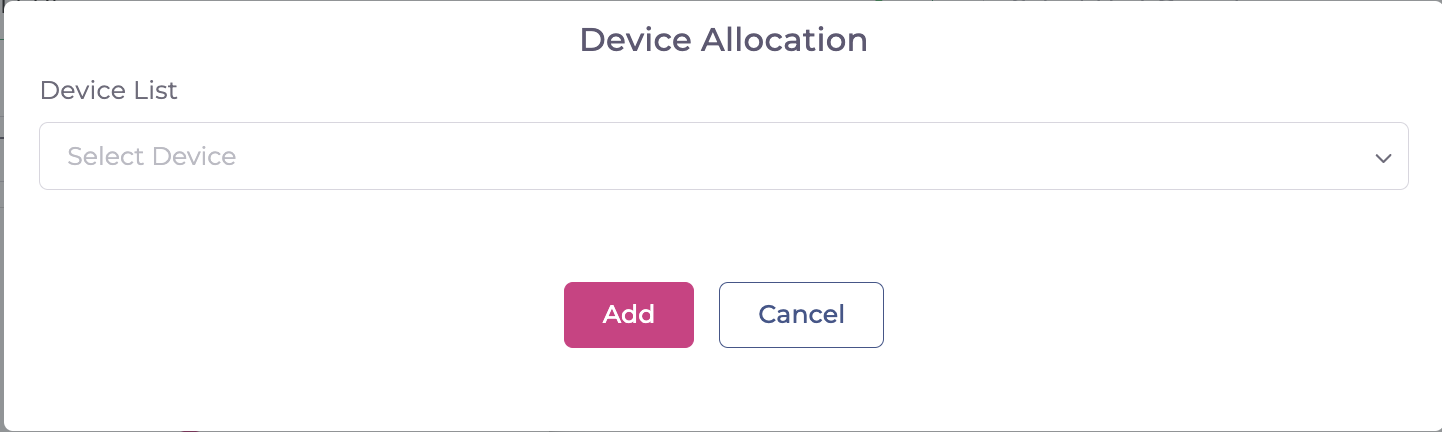
- Select a Device: Choose a device from the list in the pop-up menu. Only devices allocated to the selected account or sub-account will appear here.
- Confirm or Cancel: Click "Add" to confirm or "Cancel" to exit.
- Finish the Process:
- Click "Finish" to complete the unit creation and allocation process.
¶ Understanding Unit Statuses
- Active: The unit is operational, and all tracking, monitoring, and management features are enabled. This status is ideal for live units actively being used in your fleet.
- Inactive: The unit is not currently in use but remains within the system. It can be reactivated at any time. This status is useful for units that are temporarily offline or not needed.
- Blocked: The unit has been intentionally disabled or blocked by the service provider or the user. This could be due to a security concern, non-payment of service fees, or other reasons that require the device to be temporarily or permanently disabled from transmitting data.
- Damaged: The unit is damaged or malfunctioning and is unable to operate correctly.
¶ Troubleshooting Common Issues
-
Problem 1: Map Not Loading:
- What to Do: If the map doesn’t load properly when you’re setting the location, try refreshing the page or checking your internet connection.
-
Problem 2: Previous Details Reappearing:
- What to Do: If you notice that previous unit details show up when you click "Next," go back and double-check that all information is entered correctly. If the problem persists, contact support for assistance.