¶ Overview
The Fuel Monitoring Report allows you to analyze the relationship between fuel usage and distance traveled by vehicles. This report helps fleet managers optimize fuel consumption and monitor vehicle efficiency.
¶ Instructions
In the Fuel Monitoring Report, you can generate two types of reports:
- Distance vs Fuel Analysis: This report allows you to analyze the relationship between the distance traveled and the fuel consumption over a selected period.
- Fuel Report: This report provides a detailed summary of fuel usage, including fuel levels, consumption, and refueling events, over the selected date range.
¶ A. Distance vs Fuel Analysis
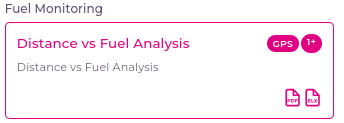
- Description: The Distance vs Fuel Analysis Report allows you to analyze fuel consumption in relation to the distance traveled. This report helps in evaluating fuel efficiency and identifying patterns in fuel usage.
- Supported Files: PDF, Excel
- Sensors: GPS, Fuel sensors are required for generating the report.
¶ Report Creation Steps
-
Accessing the Report Creation Page
- Click on Distance vs Fuel Analysis to navigate to the Add New Report page.
-
Generating the Report
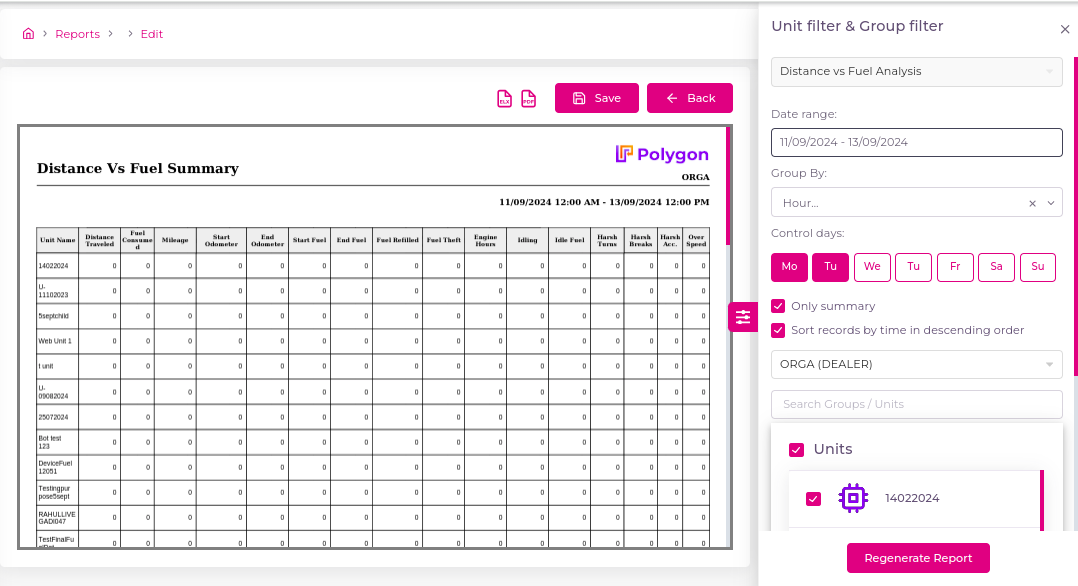
- On the right side of the page, a dynamic form will appear for creating the report.
¶ 2.1 Report Type
- From the Report Type dropdown, select Distance vs Fuel Analysis.
¶ 2.2 Date Range
- In the Date Range field, choose the start and end dates for the report.
¶ 2.3 Group By
- Use the Group By field to group the report by:
- Hourly
- Daily
- Weekly
- Monthly
¶ 2.4 Control Days
- Select the days you want to include in the report. You can choose multiple days as needed.
¶ 2.5 Summary Options
- Choose one of the following options:
- Only Summary: Displays only the summary of the report.
- Sort Records by Time (Descending Order): Generates the report with records sorted in descending order by time.
¶ 2.6 Account Field
- The Account field displays all accounts available for generating the report for specific units and groups.
¶ 2.7 Unit Search
- Use the Search Field to search for units.
- Select the unit(s) needed for the report from the displayed list.
¶ 3. Generating and Viewing the Report
- After selecting all required fields, click the Generate Report button.
- A progress loader will appear while the report is being generated.
- Once ready, a preview of the report will be displayed in PDF format.
¶ 4. Downloading or Saving the Report
- You have three options at the top of the preview:
- Download PDF: Save the report as a PDF file.
- Download Excel: Save the report as an Excel file.
- Save the Report: Save the report for future reference.
¶ 4.1 Saving the Report
- When you click Save, a pop-up will appear.
- Report Name: Enter a name for your report (3 to 20 characters).
- Labels: Add multiple labels to categorize the report.
- After clicking Save, the report will be saved, and you will be redirected to the list of reports where your newly generated report will be visible.
¶ Troubleshooting
- No Data Displayed: Ensure that you have selected the correct date range and units. Check your account permissions if you cannot access specific units.
¶ B. Fuel Report
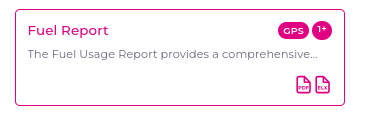
- Description: The Fuel Report delivers a detailed analysis of fuel consumption and usage patterns for vehicles or equipment over a specified time range. It provides critical insights into fuel efficiency, associated costs, and potential areas for improvement in fuel consumption.
- Supported Files: PDF, Excel
- Sensors: GPS, Fuel sensors are required for generating the report.
¶ Report Creation Steps
-
Accessing the Report Creation Page
- Click on Fuel Report to navigate to the Add New Report page.
-
Generating the Report
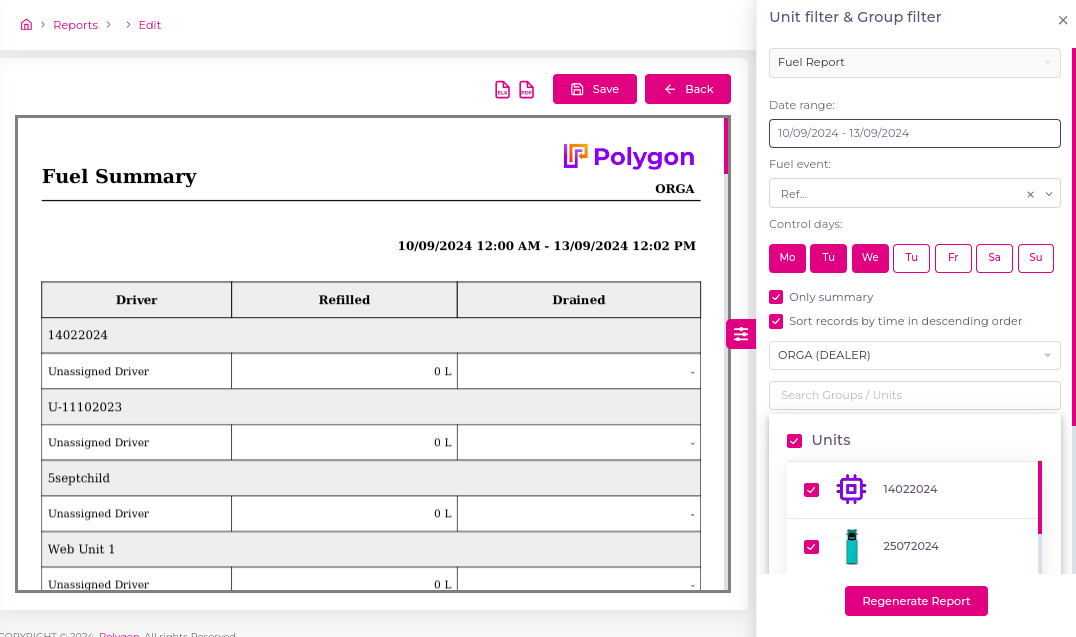
- On the right side of the page, a dynamic form will appear for creating the report.
¶ 2.1 Report Type
- From the Report Type dropdown, select Fuel Report.
¶ 2.2 Date Range
- In the Date Range field, choose the start and end dates for the report.
¶ 2.3 Group By
- Use the Group By field to group the report by:
- Hourly
- Daily
- Weekly
- Monthly
¶ 2.4 Control Days
- Select the days you want to include in the report. Multiple days can be chosen as needed.
¶ 2.5 Summary Options
- Choose one of the following options:
- Only Summary: Displays only the summary of the report.
- Sort Records by Time (Descending Order): Generates the report with records sorted in descending order by time.
¶ 2.6 Account Field
- The Account field displays all accounts available for generating the report for specific units and groups.
¶ 2.7 Unit Search
- Use the Search Field to search for units.
- Select the unit(s) relevant to your report from the displayed list.
¶ 3. Generating and Viewing the Report
- After selecting all required fields, click the Generate Report button.
- A progress loader will appear while the report is being generated.
- Once the report is ready, a preview will be shown in PDF format.
¶ 4. Downloading or Saving the Report
- You have three options at the top of the preview:
- Download PDF: Save the report as a PDF file.
- Download Excel: Save the report as an Excel file.
- Save the Report: Save the report for future reference.
¶ 4.1 Saving the Report
- When you click Save, a pop-up will appear.
- Report Name: Enter a name for your report (3 to 20 characters).
- Labels: Add multiple labels to categorize the report.
- After clicking Save, the report will be saved, and you will be redirected to the list of reports where your newly generated report will be visible.
¶ Troubleshooting
- No Data Displayed: Ensure that you have selected the correct date range and units. Verify your account permissions if you cannot access specific units.