¶ SIM Management
¶ Overview
The SIM Management module provides a robust system for managing SIM cards within your organization. Each SIM is uniquely identified across the organization to prevent duplication or conflicts. This documentation serves as a comprehensive guide to help users efficiently:
- Add SIMs.
- View and categorize SIMs.
- Perform filtering and search operations.
- Execute bulk operations.
- Import SIM data in bulk.
- Assign SIMs to devices or child accounts.
- Update, recharge, or delete SIM records.
The module is designed for scalability and ease of use, offering granular control over SIM data and seamless integration with devices.
¶ Core Features
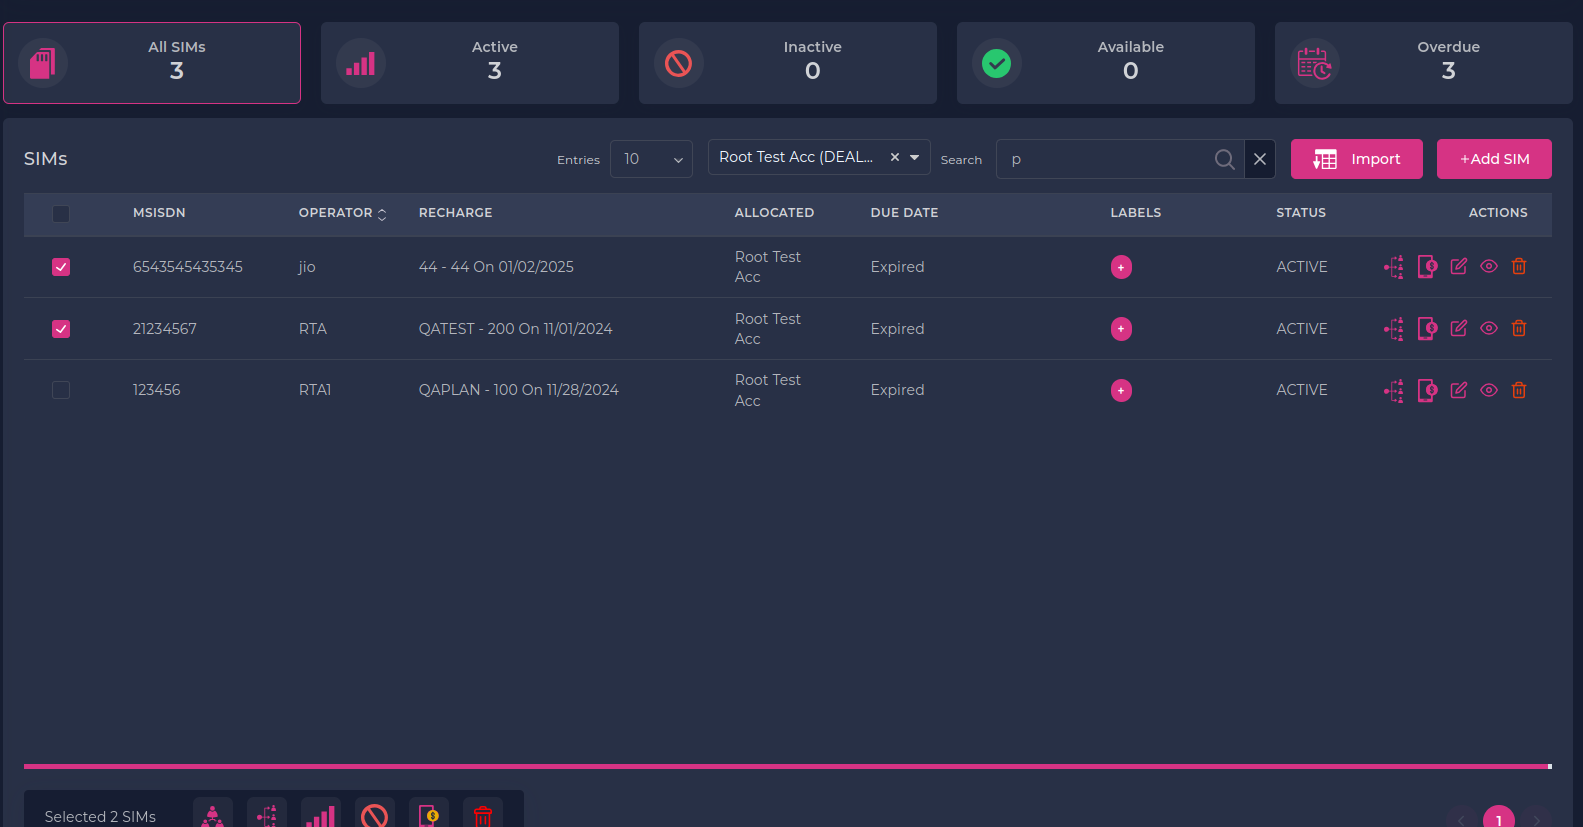
¶ 1. SIM Card Views
The SIM Management page provides a categorized view of all SIMs, enabling quick and easy navigation:
- Active SIMs: SIMs currently operational and assigned within the system.
- Inactive SIMs: SIMs that have been deactivated or are not operational.
- Available SIMs: SIMs that are not allocated to any device and are ready for assignment.
- Overdue SIMs: SIMs requiring a recharge due to overdue counts.
¶ Each category can be accessed through dedicated tabs or filters, ensuring streamlined navigation and organization.

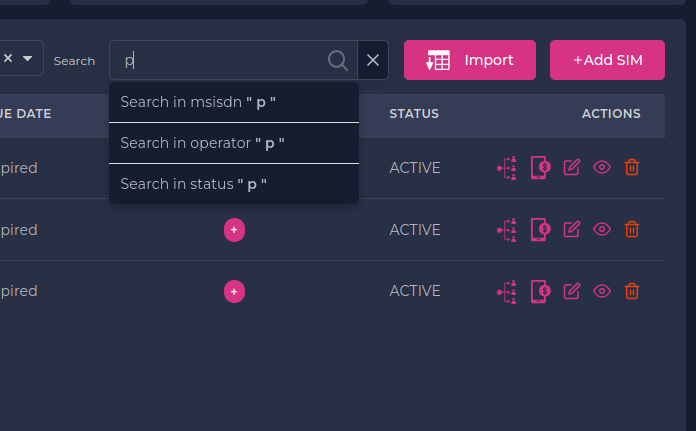
¶ 2. Filter and Search Options
Refine your SIM list using powerful filtering and search functionalities:
- Filter by Account: Filter SIMs based on the parent or child account they are associated with.
- Search by Attributes: Quickly locate specific SIMs by entering details in the search bar, such as:
- MSISDN
- Operator
- Status (Active, Inactive, Overdue)
¶ This helps users save time when managing large datasets.
¶ 3. Bulk Operations
Perform actions on multiple SIMs simultaneously using the Bulk Operations feature:
- Bulk Recharge: Recharge selected SIMs in a single operation.
- Bulk Allocation: Assign multiple SIMs to a single account.
- Bulk Status Updates: Change the status of selected SIMs to Active or Inactive.
- Bulk Deletion: Delete multiple SIMs after confirming via a prompt.
- Bulk Group: Add lable to SIMs.
Note: Bulk actions are accompanied by confirmation prompts to prevent accidental changes.

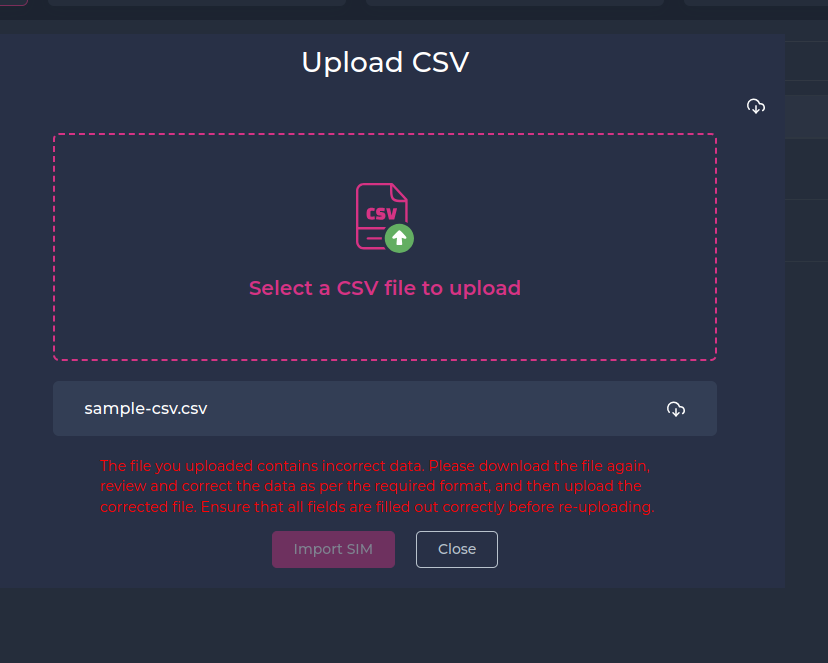
¶ 4. SIM Import Functionality
Streamline SIM creation by importing data in bulk via a CSV file.
¶ Steps for Importing SIM Data:
- Navigate to the SIM Management page.
- Click the Import SIMs button.
- Upload a CSV file containing the required SIM data. Ensure the file adheres to the template format provided by the system.
- Preview the imported data for accuracy.
- Confirm the import to add the SIM records to the system.
Tip: Download the sample CSV template for guidance on formatting your data.
¶ 5. SIM List with Pagination and Actions
The SIM list offers a paginated table view, ensuring faster loading and easy navigation of large datasets.
¶ Table Columns:
- MSISDN: Unique mobile number identifier.
- Operator: Service provider for the SIM.
- Recharge Status: Displays recharge details or overdue status.
- Allocated: Indicates whether the SIM is assigned to a account.
- Due Date: The next recharge due date.
- Labels: User-defined labels for categorization.
- Status: Indicates if the SIM is Active or Inactive.
¶ Available Actions:
Each SIM has dedicated actions accessible via the Actions Menu:
- Allocate SIM: Assign the SIM to a child account.
- Recharge SIM: Update recharge details for the SIM.
- Edit SIM: Modify details such as MSISDN, SIM Number, Operator, Labels, etc.
- View SIM Details:
- Display comprehensive SIM details.
- Access recharge history and add recharge records.
- Delete SIM: Permanently remove a SIM record, provided it is not currently allocated to any device.
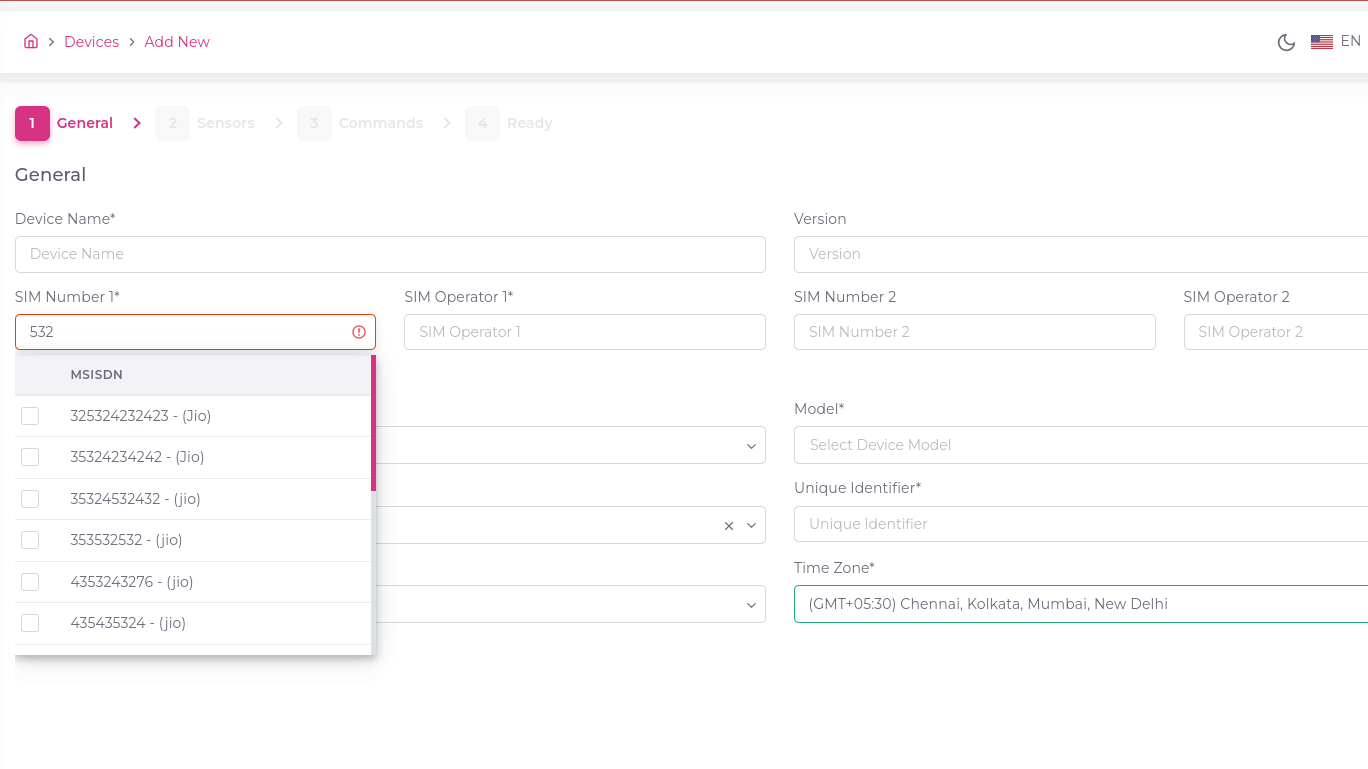
¶ 6. SIM Selection for Devices
Easily associate SIMs with devices during creation or updates.
¶ SIM Assignment During Device Creation:
- Navigate to the Create Device page.
- Open the SIM selection dropdown.
- Use filters or the search bar to refine the SIM list.
- Select an unallocated SIM for assignment.
¶ SIM Reassignment During Device Update:
- Navigate to the Update Device page.
- Open the SIM dropdown menu in the device details section.
- Select a new SIM from the filtered list of SIMs.
¶ 
¶ Instructions
¶ Viewing SIM Categories
- Navigate to the SIM Management page.
- Use the tabs at the top to switch between categories such as Active, Inactive, Available, and Overdue SIMs.
- Apply additional filters as needed.
¶ Performing Bulk Operations
- Select the checkboxes for the desired SIMs in the list.
- Open the Bulk Actions dropdown.
- Choose the desired action (e.g., Recharge, Allocate).
- Confirm the operation in the prompt.
¶ Download Dummy SIM Data
- Click the Download Icon button on the SIM Management page.

¶ Importing SIM Data
- Click the Import SIMs button on the SIM Management page.
- Select and upload your CSV file.
- Validate the imported data in the preview screen.
- Click Confirm to finalize the import.
¶ Troubleshooting
¶ Common Errors and Solutions
¶ SIM Not Found
- Issue: Search yields no results.
- Solution: Ensure the MSISDN or keyword entered in the search bar is correct and matches the data format.
¶ SIM Allocation Failed
- Issue: Unable to allocate a SIM to a device.
- Solution: Verify that the SIM is listed as Available and not already allocated to another device.
¶ CSV Import Errors
- Issue: Import process fails.
- Solution: Check for errors in the CSV file, such as missing required fields or incorrect formatting. Download and follow the sample template for guidance.
¶ SIM Deletion Failed
- Issue: Unable to delete a SIM.
- Cause: The SIM is currently allocated to a device.
- Solution: Ensure that the SIM is deallocated from the device before attempting deletion.
- Navigate to the device management section.
- Unassign the SIM from the device.
- Retry deleting the SIM.
¶ SIM Already Allocated
- Issue: Error displayed while adding a device.
- Cause: The selected SIM is already allocated to another device.
- Solution:
- Select a different SIM from the Available SIMs list.
- If no suitable SIMs are available, create or import a new SIM.