You create a role in a three-step wizard and look after it on the role page. To start the wizard, select Users in the side menu, open the Roles tab and select Add Role. To open an existing role, select View or Edit on its row.
¶ Step 1: name and parent role
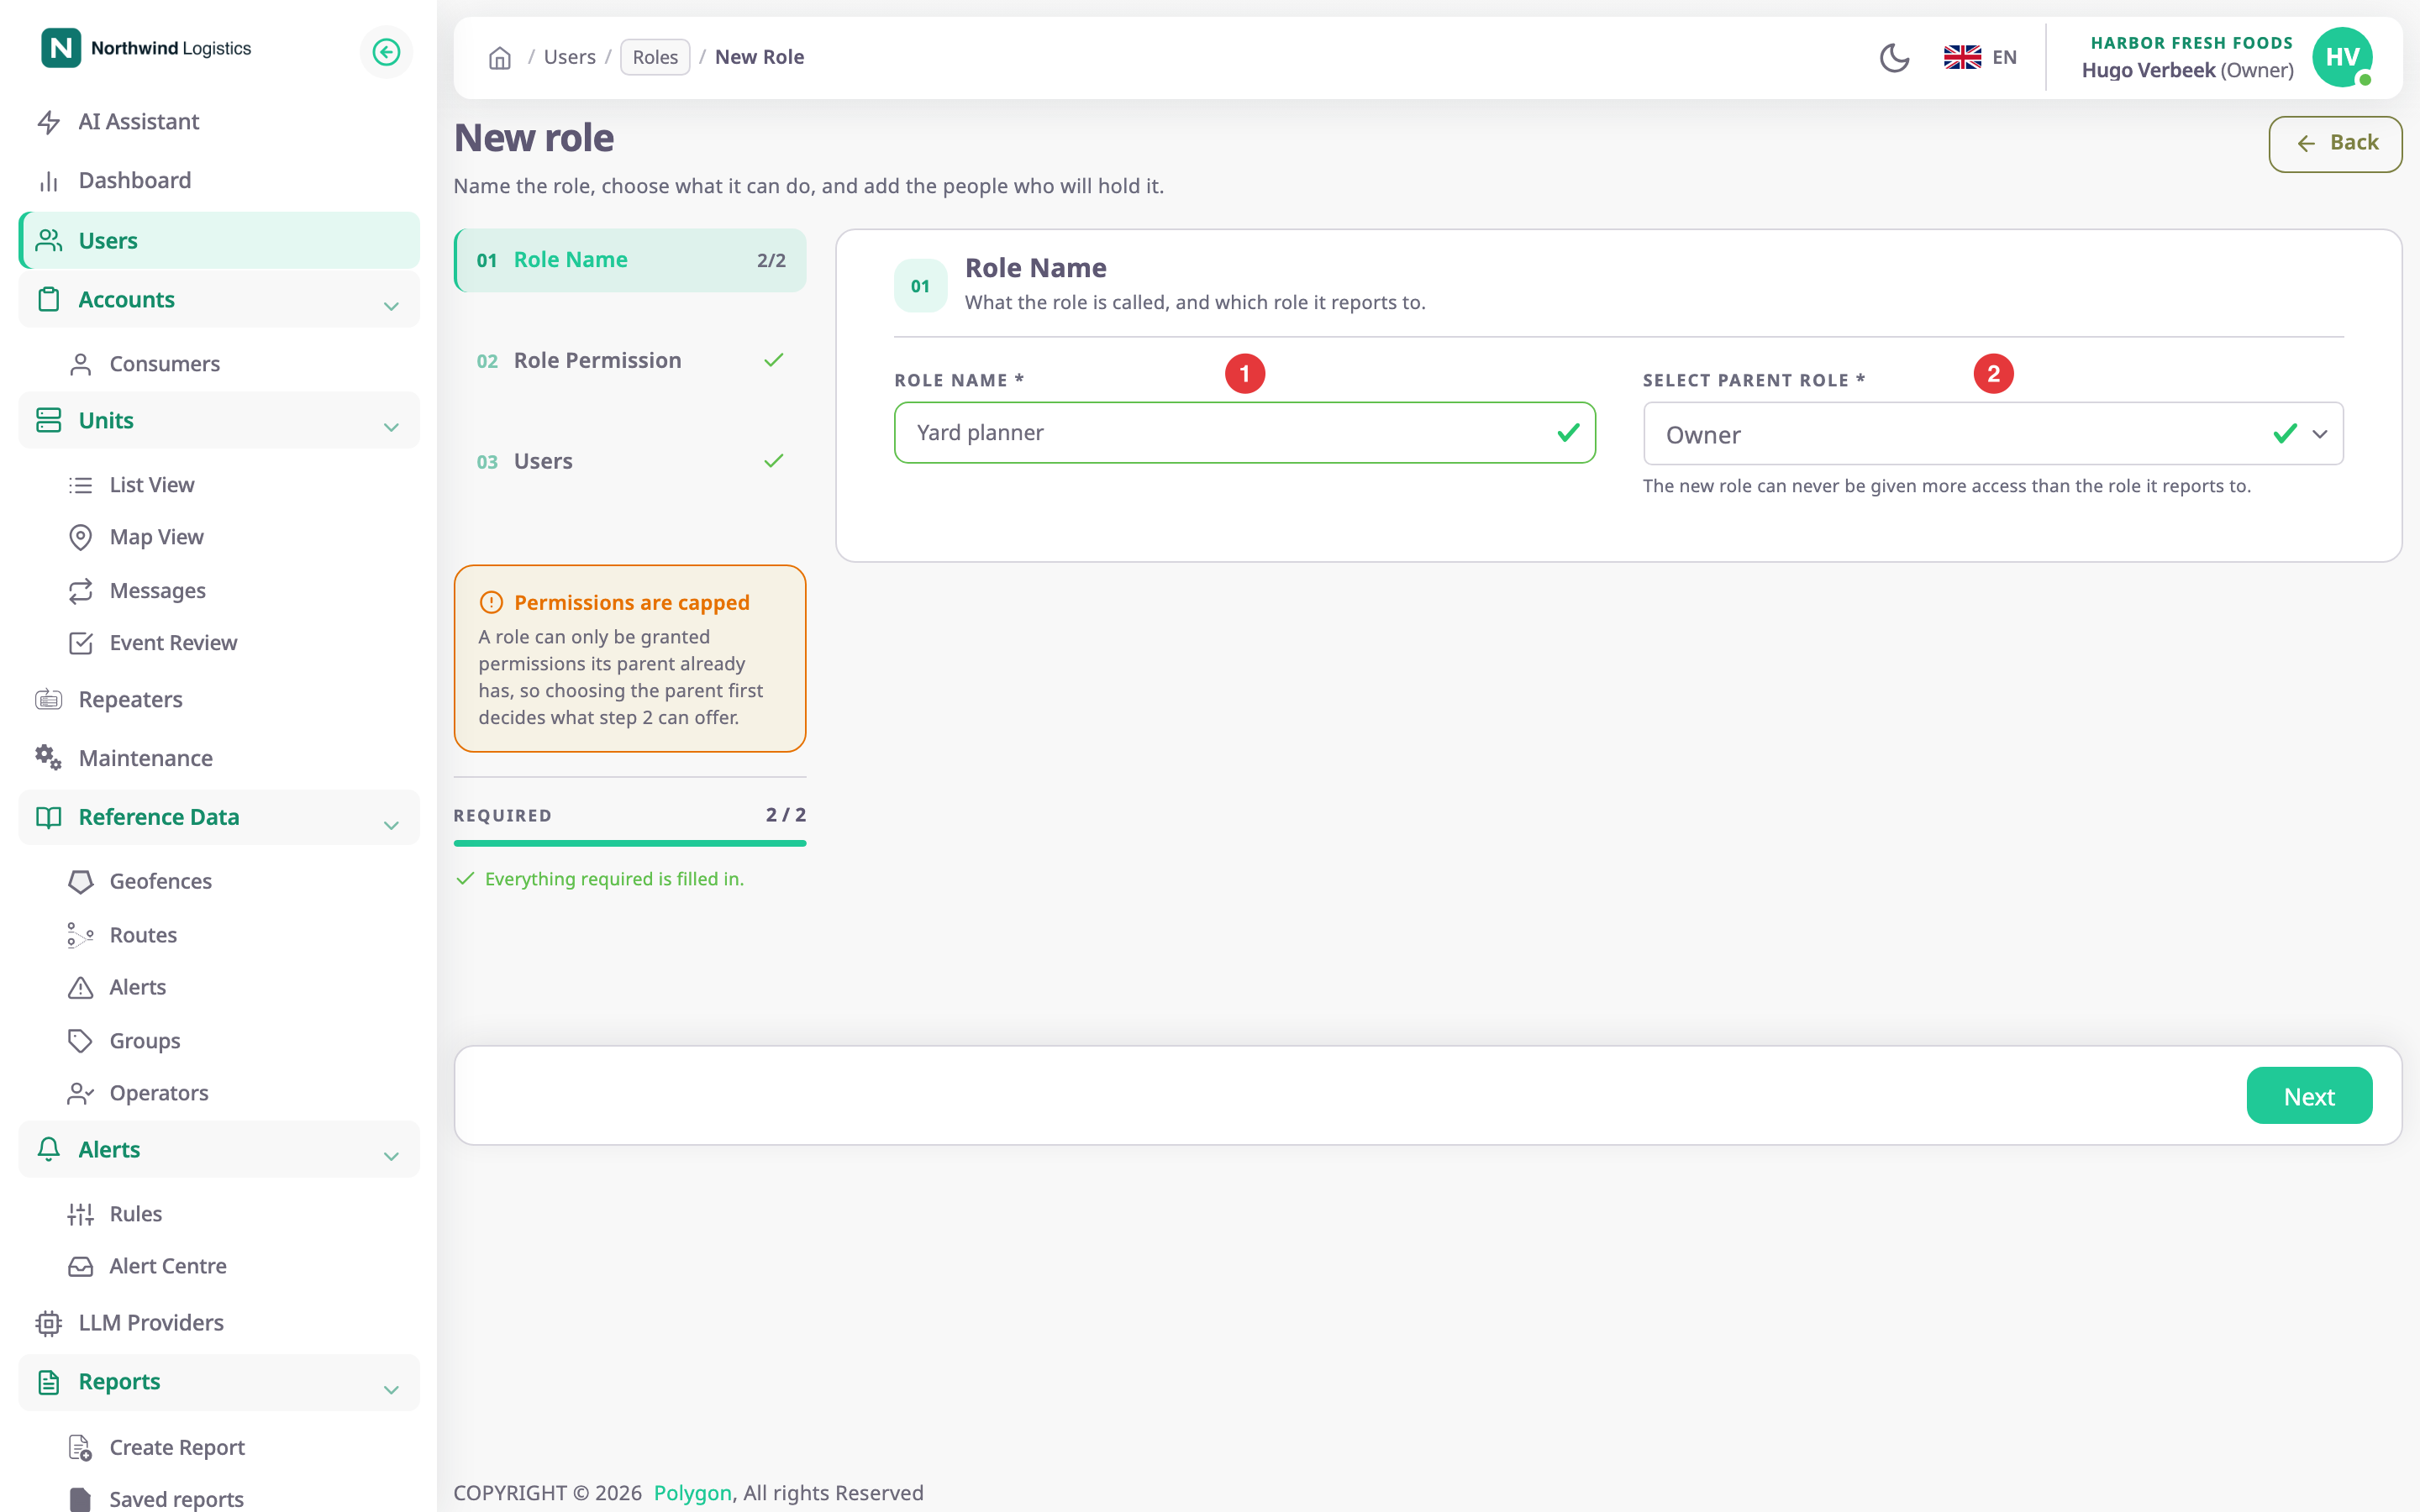
| Field | Required | What it does | Allowed values / example | Notes |
|---|---|---|---|---|
| Role Name | Yes | Names the role in the Roles tab and in every role list. | 3 to 20 characters. Example: Yard planner | Must differ from every other role in the account and from the built-in roles. You cannot rename a role later. |
| Select Parent Role | Yes | The role this one reports to. The new role can never hold a permission its parent lacks. | One role from the list. Example: Owner | The list holds the roles you may manage. |
The panel beside the steps counts the required fields and reminds you that the parent caps the permissions. Next goes to step 2. The app saves nothing yet.
¶ Step 2: Role Permission matrix controls
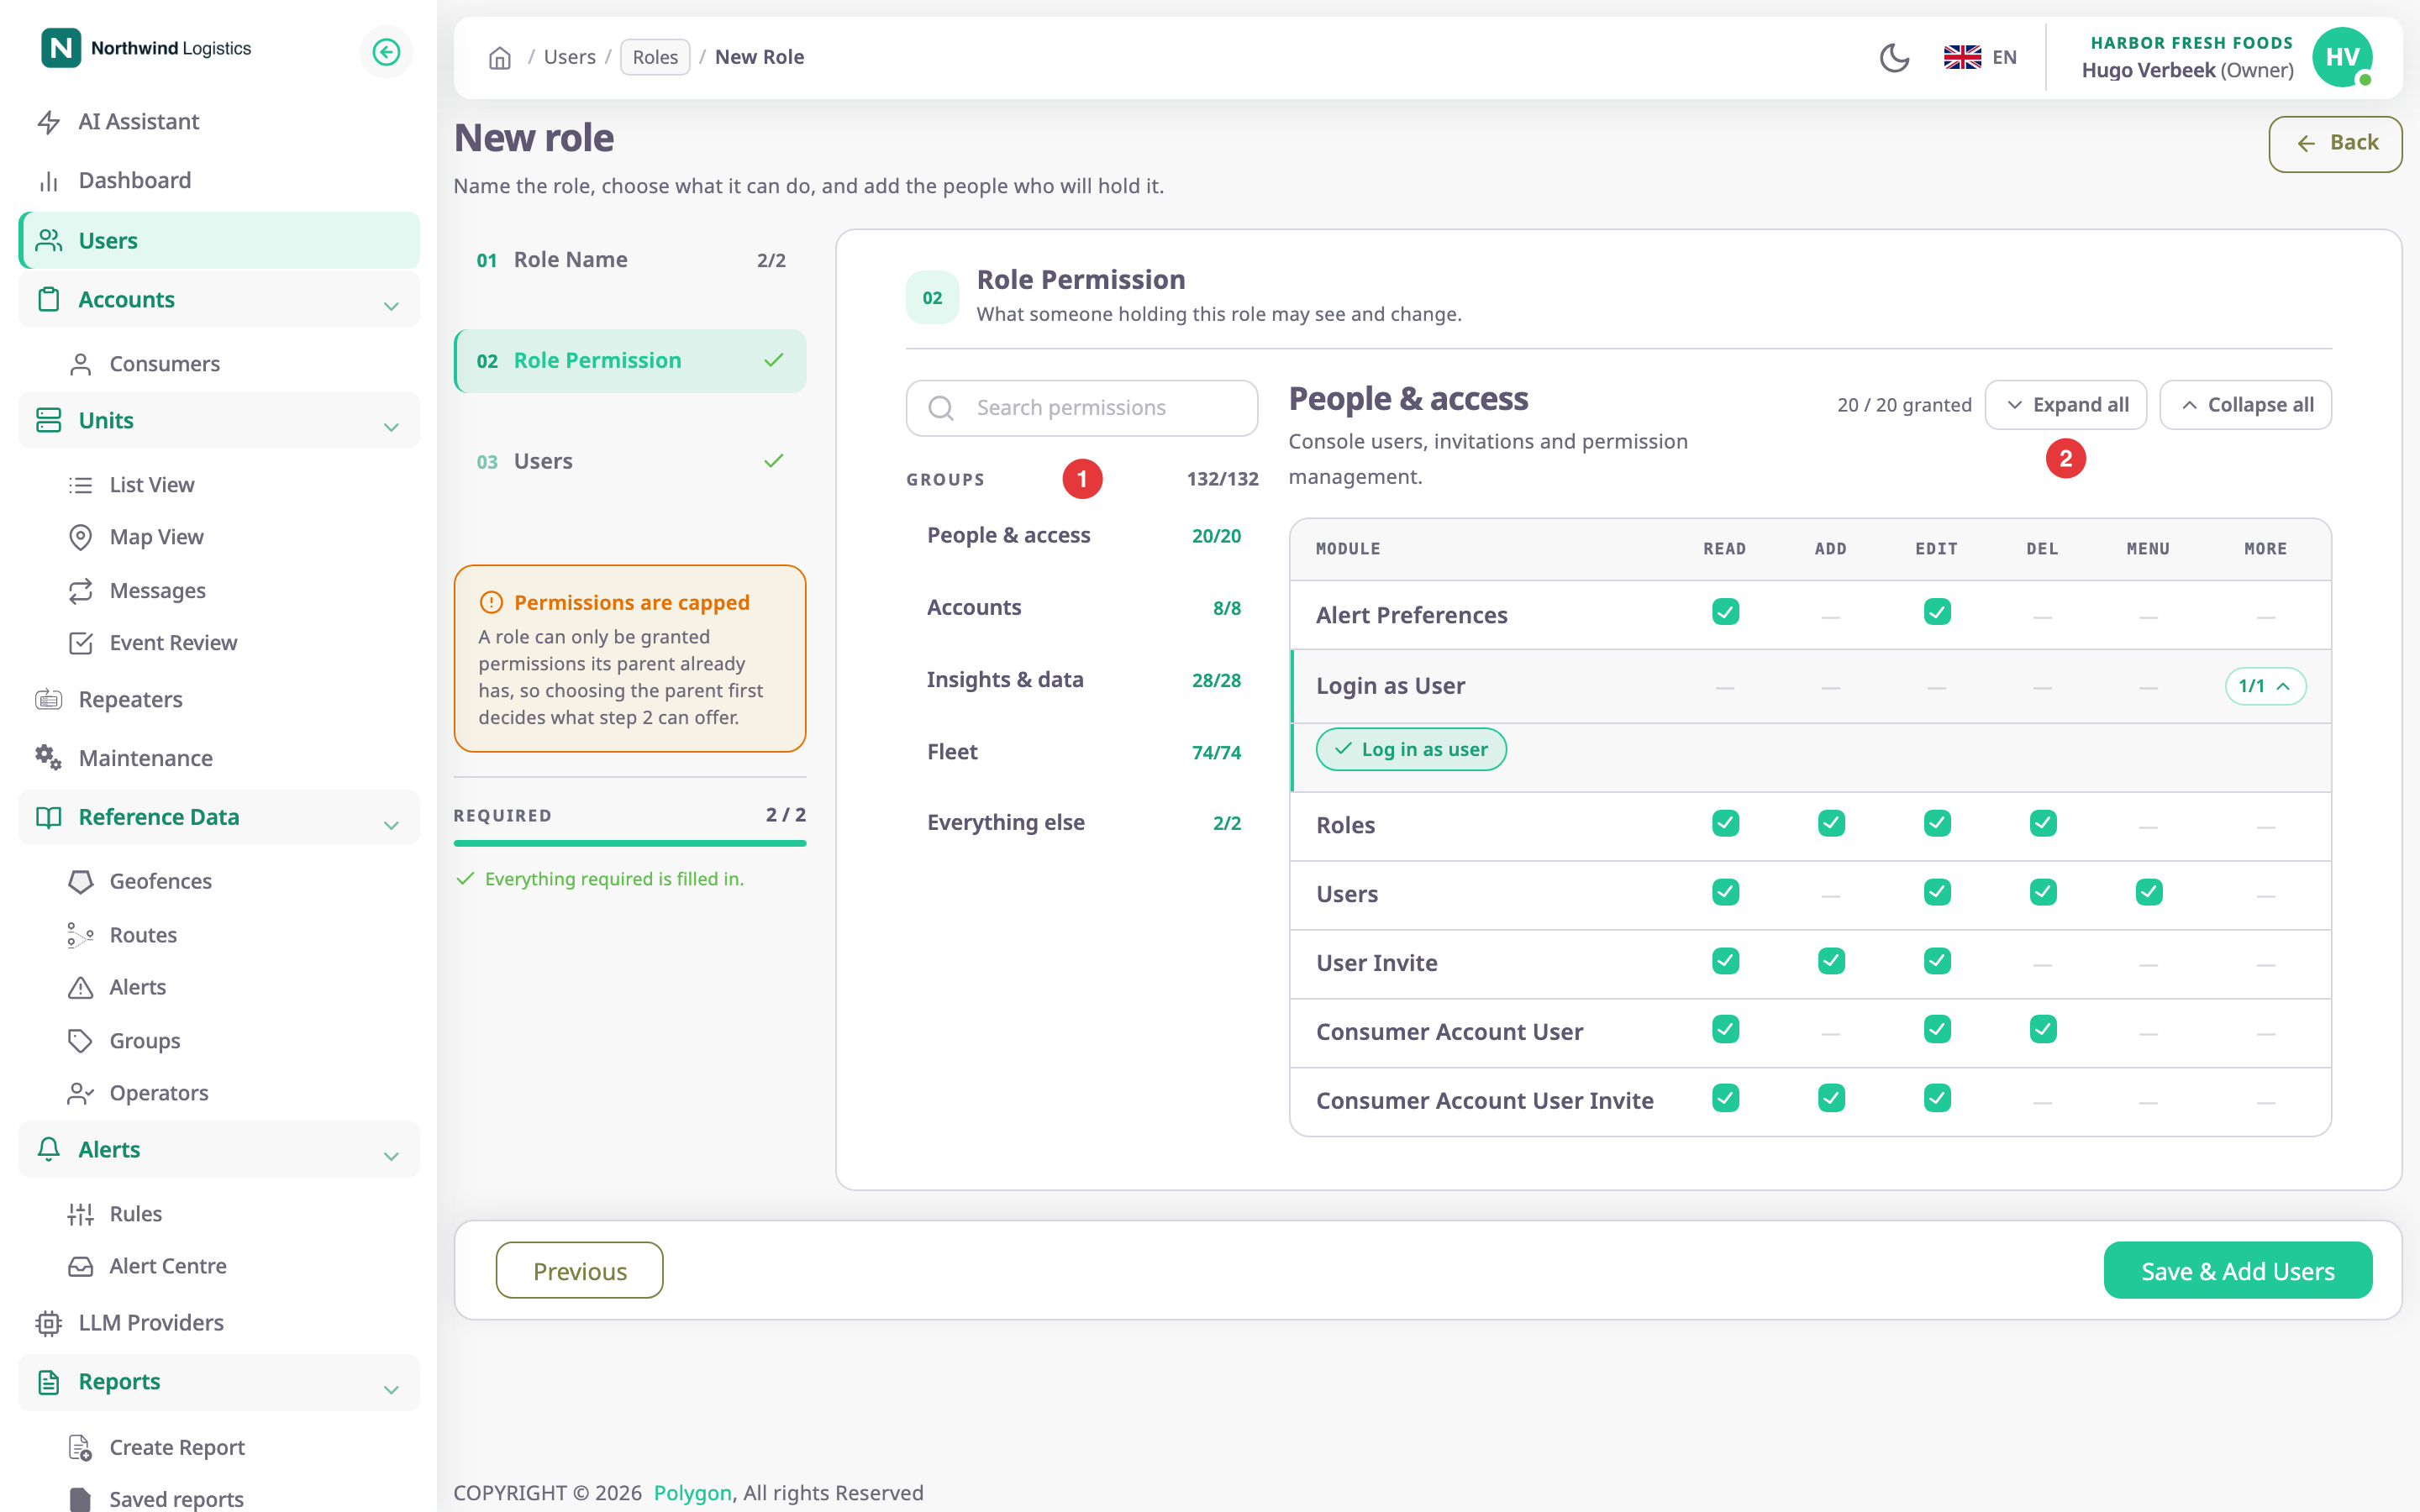
| Control | What it does |
|---|---|
| Search permissions | Shows only modules and actions whose name contains what you enter. |
| Group list (marked 1) | Switches between People & access, Accounts, Insights & data and Fleet. Each group shows how many of its permissions are on. |
| Expand all, Collapse all (marked 2) | Opens or closes the extra actions of every module in the group. |
| Checkboxes in Read, Add, Edit, Del, Menu | Turns one action on or off for that module. |
| More | Opens the module's extra actions, shown as chips you turn on or off. The count shows how many are on. |
The wizard starts with every permission of the parent role turned on. Turn off what the role should not do. If you try to turn on something the parent lacks, the app shows "You are not allowed to use this permission."
Save & Add Users saves the role and moves to step 3. If no permission is on, the app shows "Please select at least one permission" and stays on step 2. Previous goes back to step 1.
What each permission does is in the Permissions reference.
¶ Step 3: Users
Step 3 adds users to the new role.
| Field | Required | What it does | Allowed values / example | Notes |
|---|---|---|---|---|
| Users | No | Gives the chosen users this role in the account. | Users of the account. Example: Milan Visser | Choose a user in Select Users, then select the plus button. Added users show in a list below; the bin icon takes one off again. A user holds one role per account, so this replaces their current role. |
Submit saves the users and returns to the Roles tab. You can also skip this step and add users later.
¶ View and edit a role
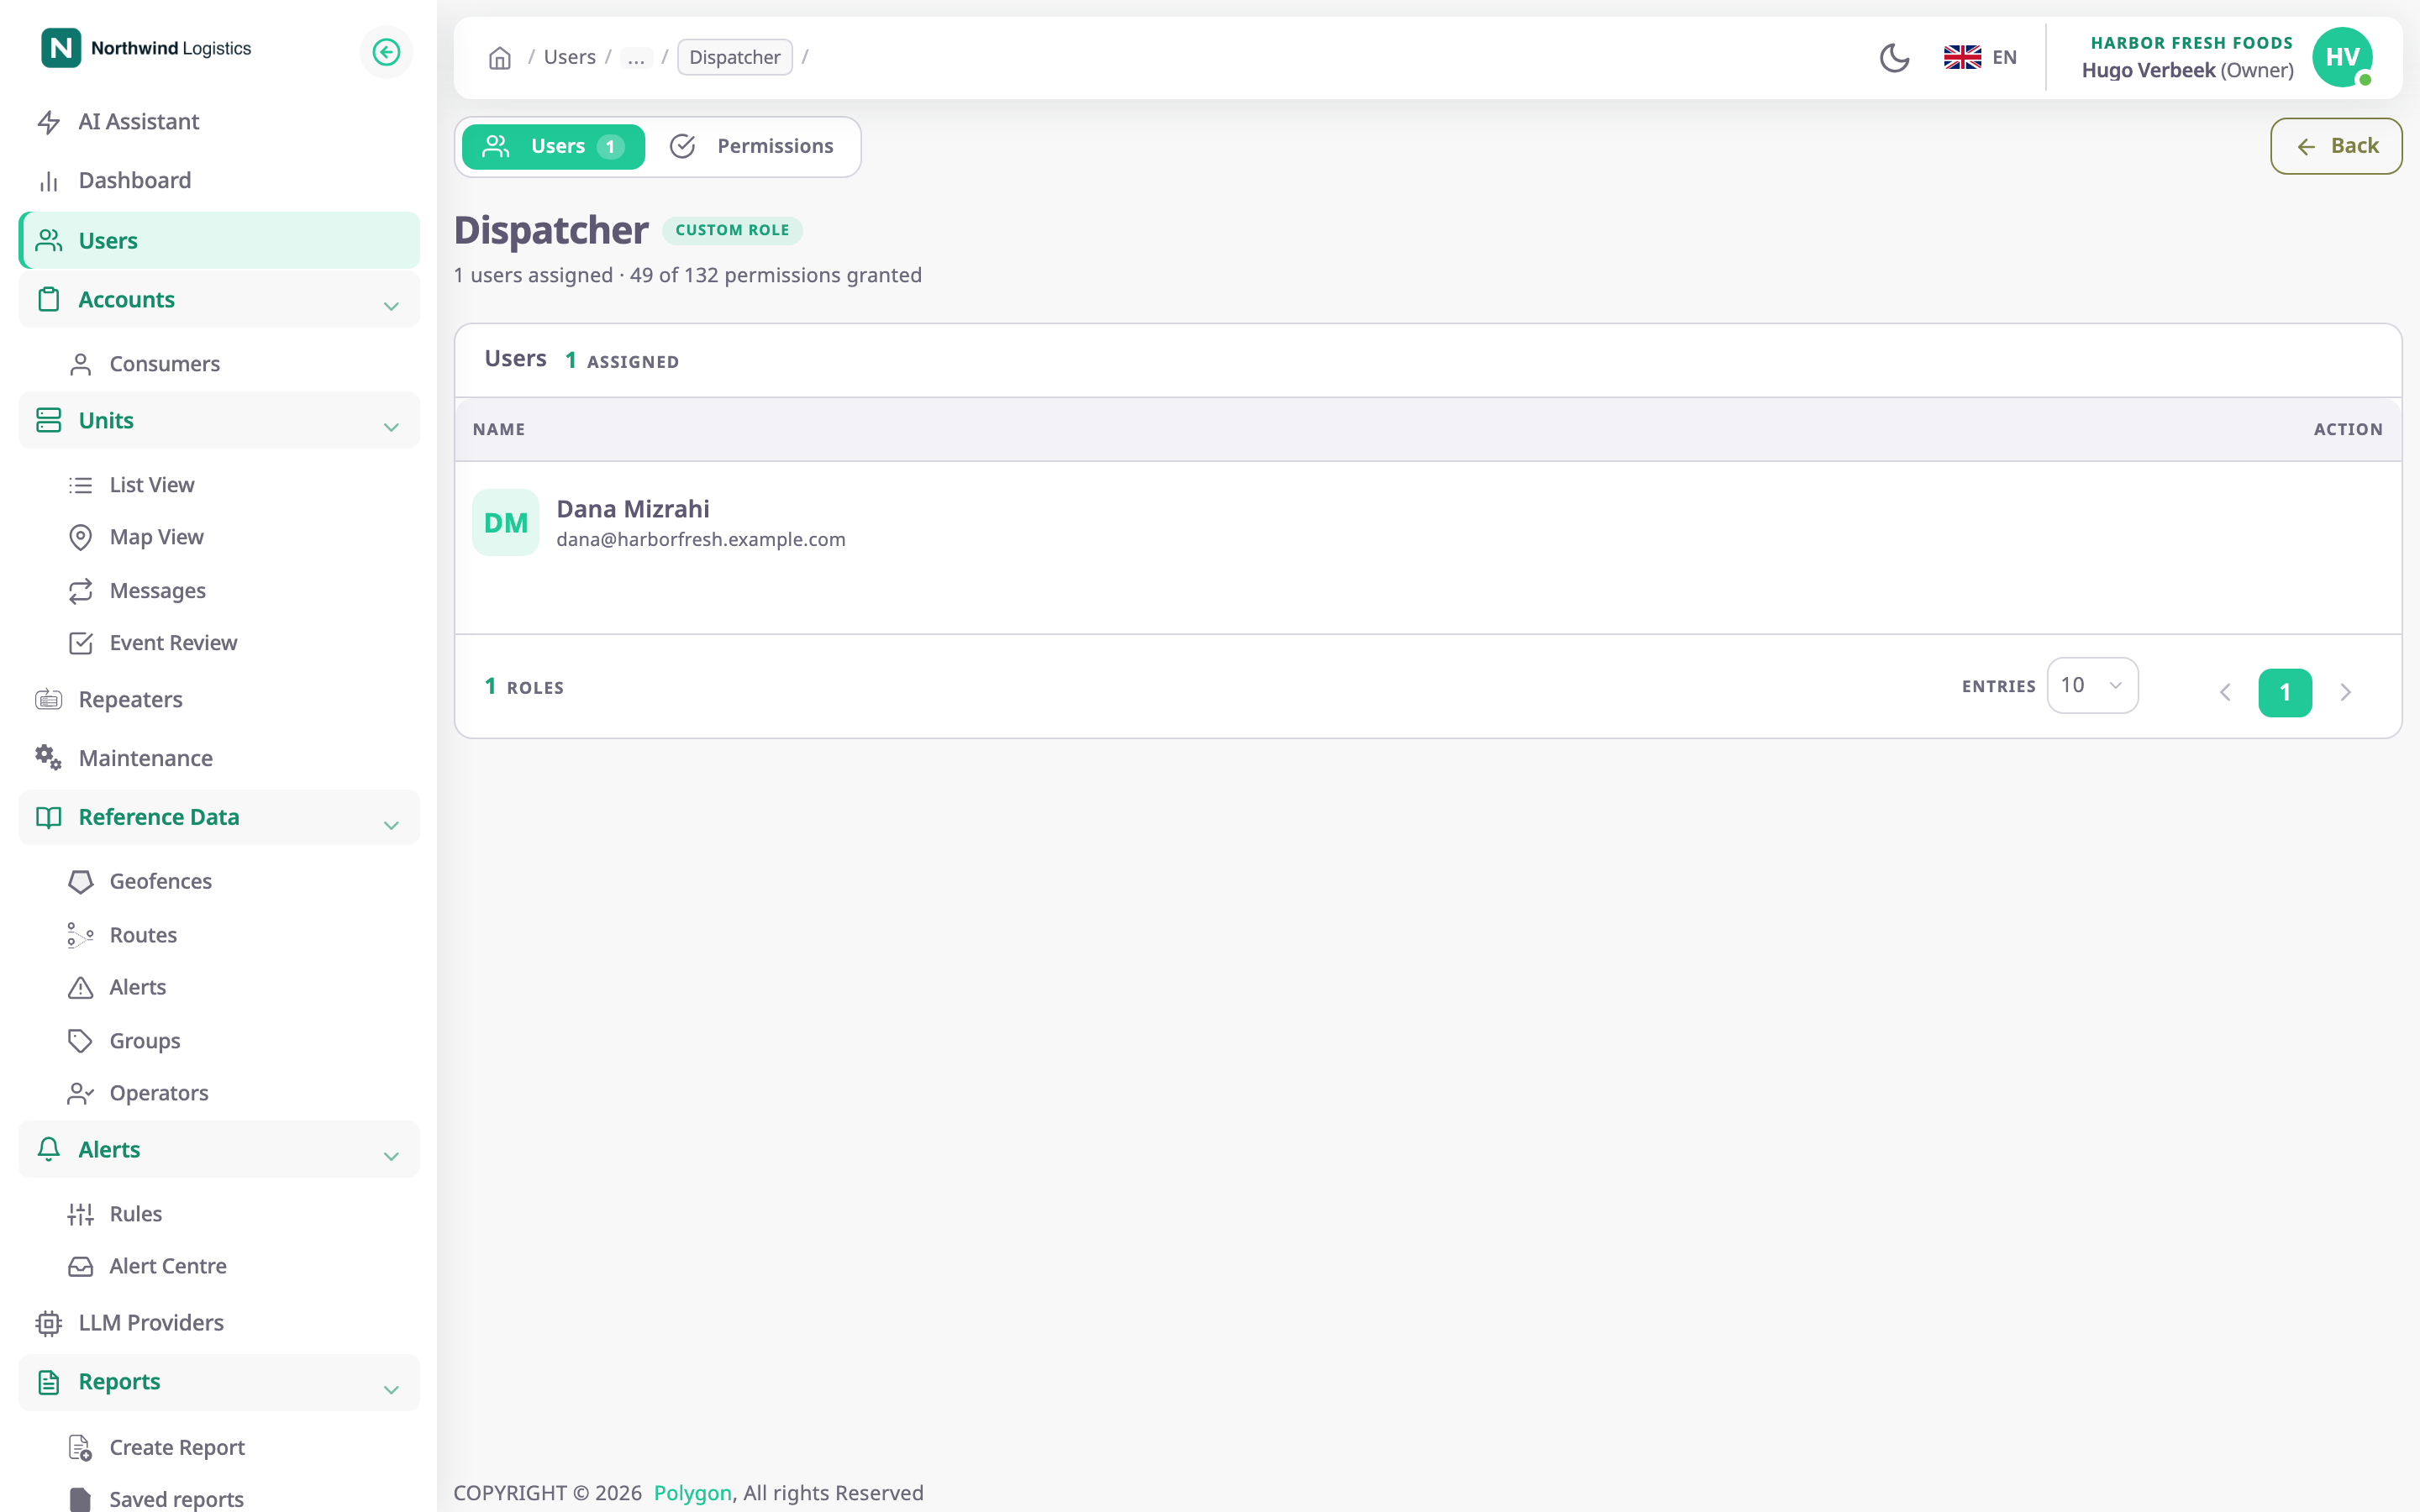
The role page shows the role's name and whether it is a Custom role or a Built-in role. It also shows how many users hold it and how many permissions it has. It has two tabs:
- Users lists who holds the role.
- Permissions shows the same matrix as step 2 of the wizard.
View opens the page read-only. Edit opens it with these controls:
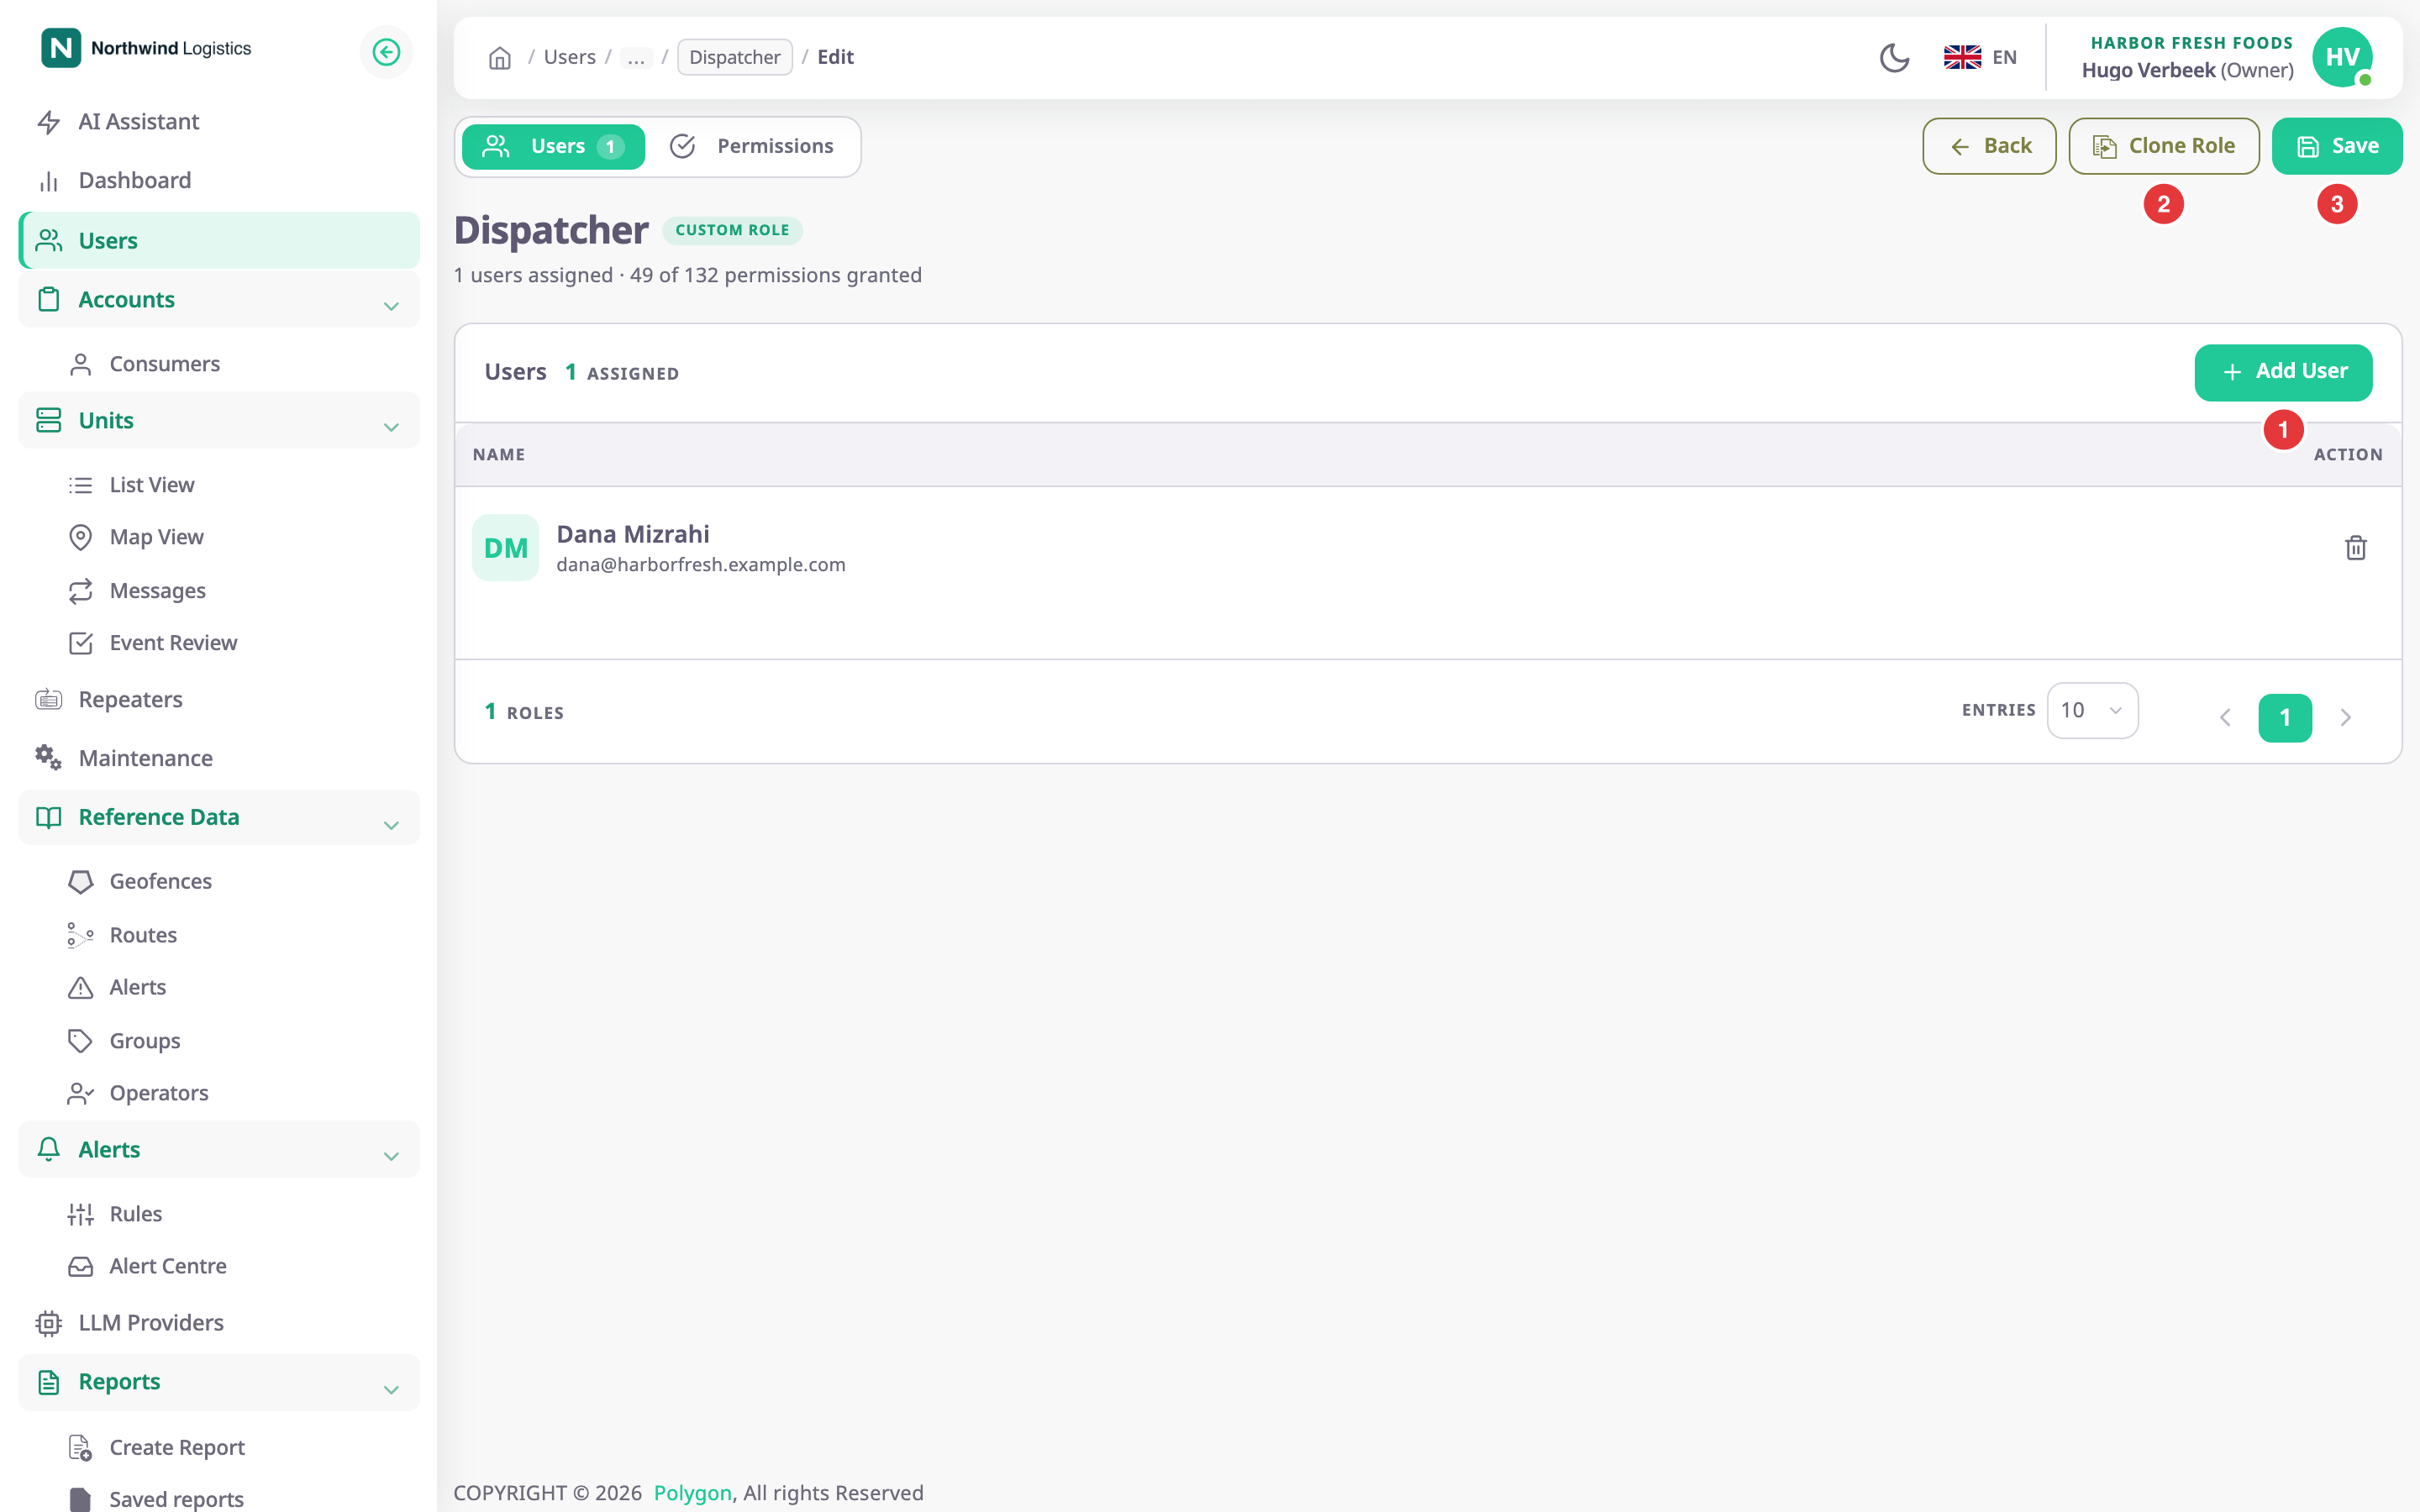
| Action | What happens |
|---|---|
| Add User (marked 1) | Opens a dialog to add users of the account to the role. |
| Bin icon on a user row | Removes the user from the account, not only from the role, after you confirm. |
| Clone Role (marked 2) | Opens the wizard filled in with this role's permissions, to make a new role. |
| Save (marked 3) | Saves the permissions and users. The app shows "Role updated successfully." |
| Back | Returns without saving. |
You can change the permissions but not the name. Taking a permission away also takes it away from every role below this one.
¶ Clone a role
Clone on the Roles tab, or Clone Role on the role page, opens the wizard with the role's permissions already set. Give the copy a new name and save it as a new role. You can clone a built-in role too, so you can start from Owner and remove what you do not want.
¶ Permissions
| To | You need |
|---|---|
| Open the wizard, clone | Roles > Add |
| Open the role page read-only | Roles > Read |
| Edit a role | Roles > Update |
| See the users to add | Users > Read |
Built-in roles and your own role open read-only for everyone. The built-in Owner role has every permission above.