A role gives a group of people the same access, for example dispatchers who plan routes but never manage users. You create it once and give it to as many users as you need.
¶ Before you start
- You need Roles > Add. The built-in Owner role has it.
- Know which role the new one reports to. It can never do more than that parent role.
- The Permissions reference lists what each permission unlocks.
¶ Name the role and pick its parent
-
In the side menu, select Users.
-
Select the Roles tab.
-
Select Add Role, marked 1.

The New role wizard opens on step 1, Role Name.
-
In Role Name, enter a name of 3 to 20 characters, for example Yard planner.
-
In Select Parent Role, choose the role it reports to, for example Owner.
-
Select Next, marked 1.
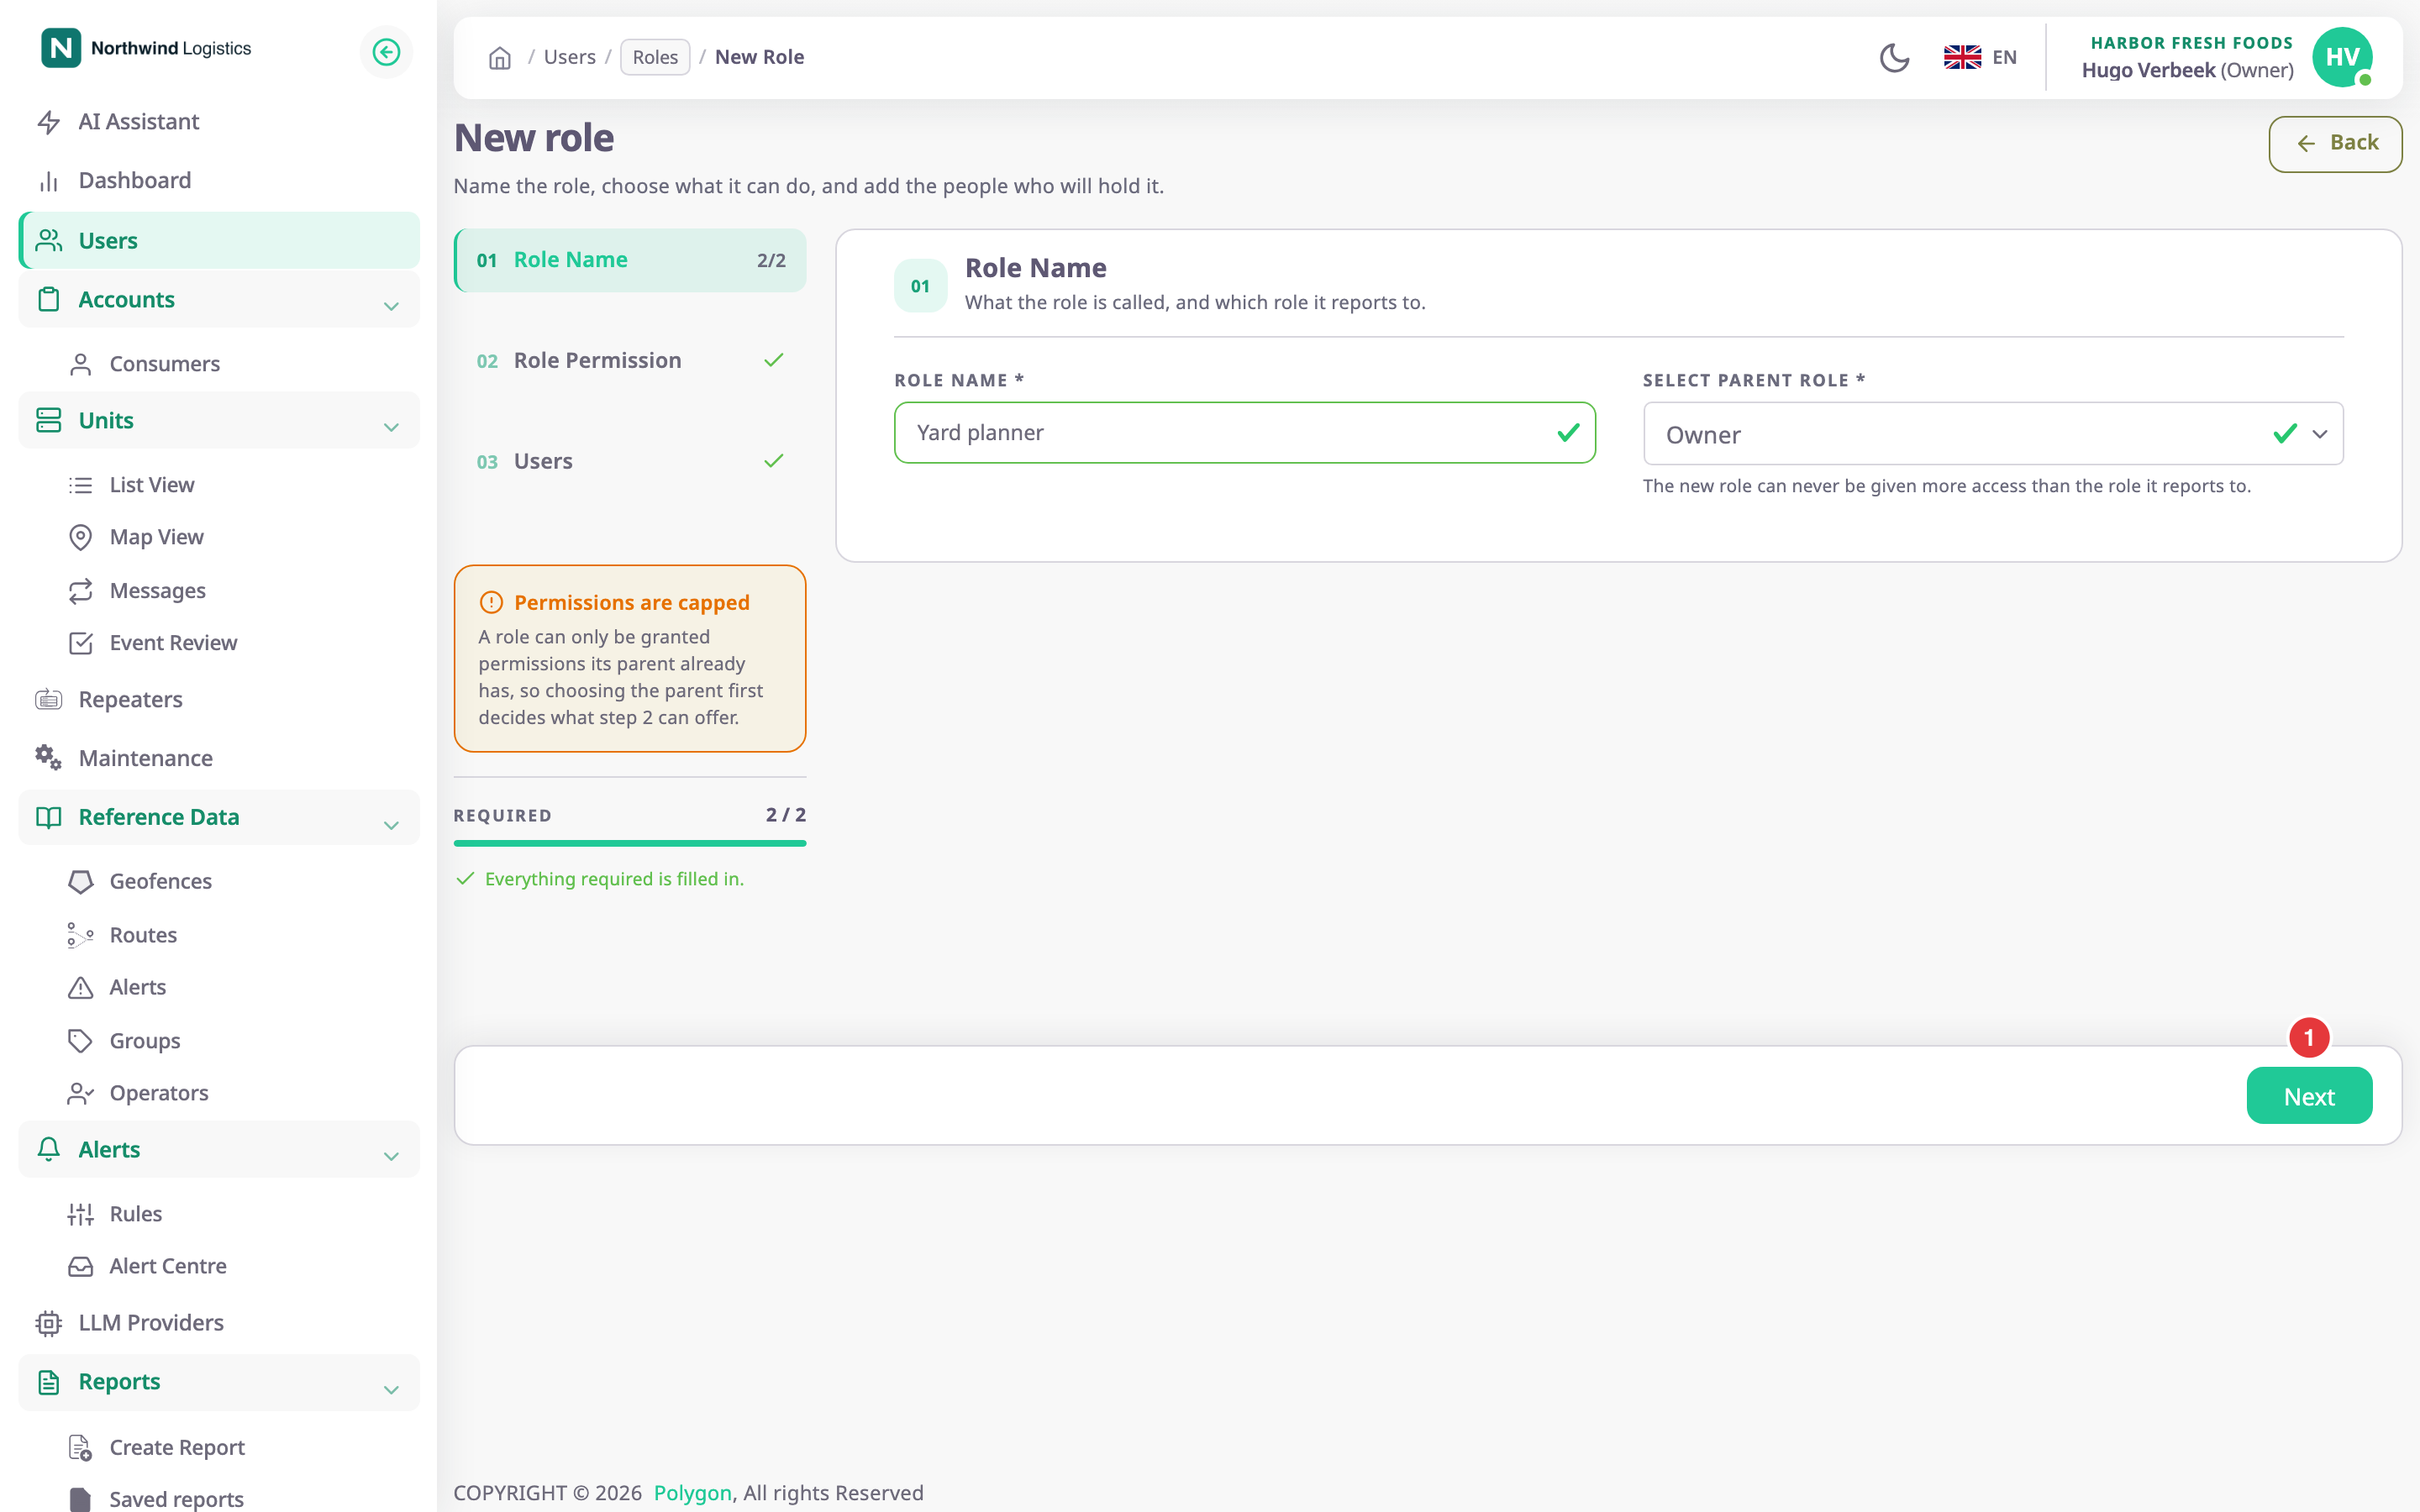
Step 2, Role Permission, opens with every permission of the parent role turned on.
¶ Choose permissions
-
In the group list on the left, select a group, for example Fleet.
-
Clear the checkboxes of the actions the role must not have.
-
Optional: to see a module's extra actions, select its count in More.
-
Turn the extra actions on or off.
-
Repeat for the other groups.
-
Select Save & Add Users, marked 1.
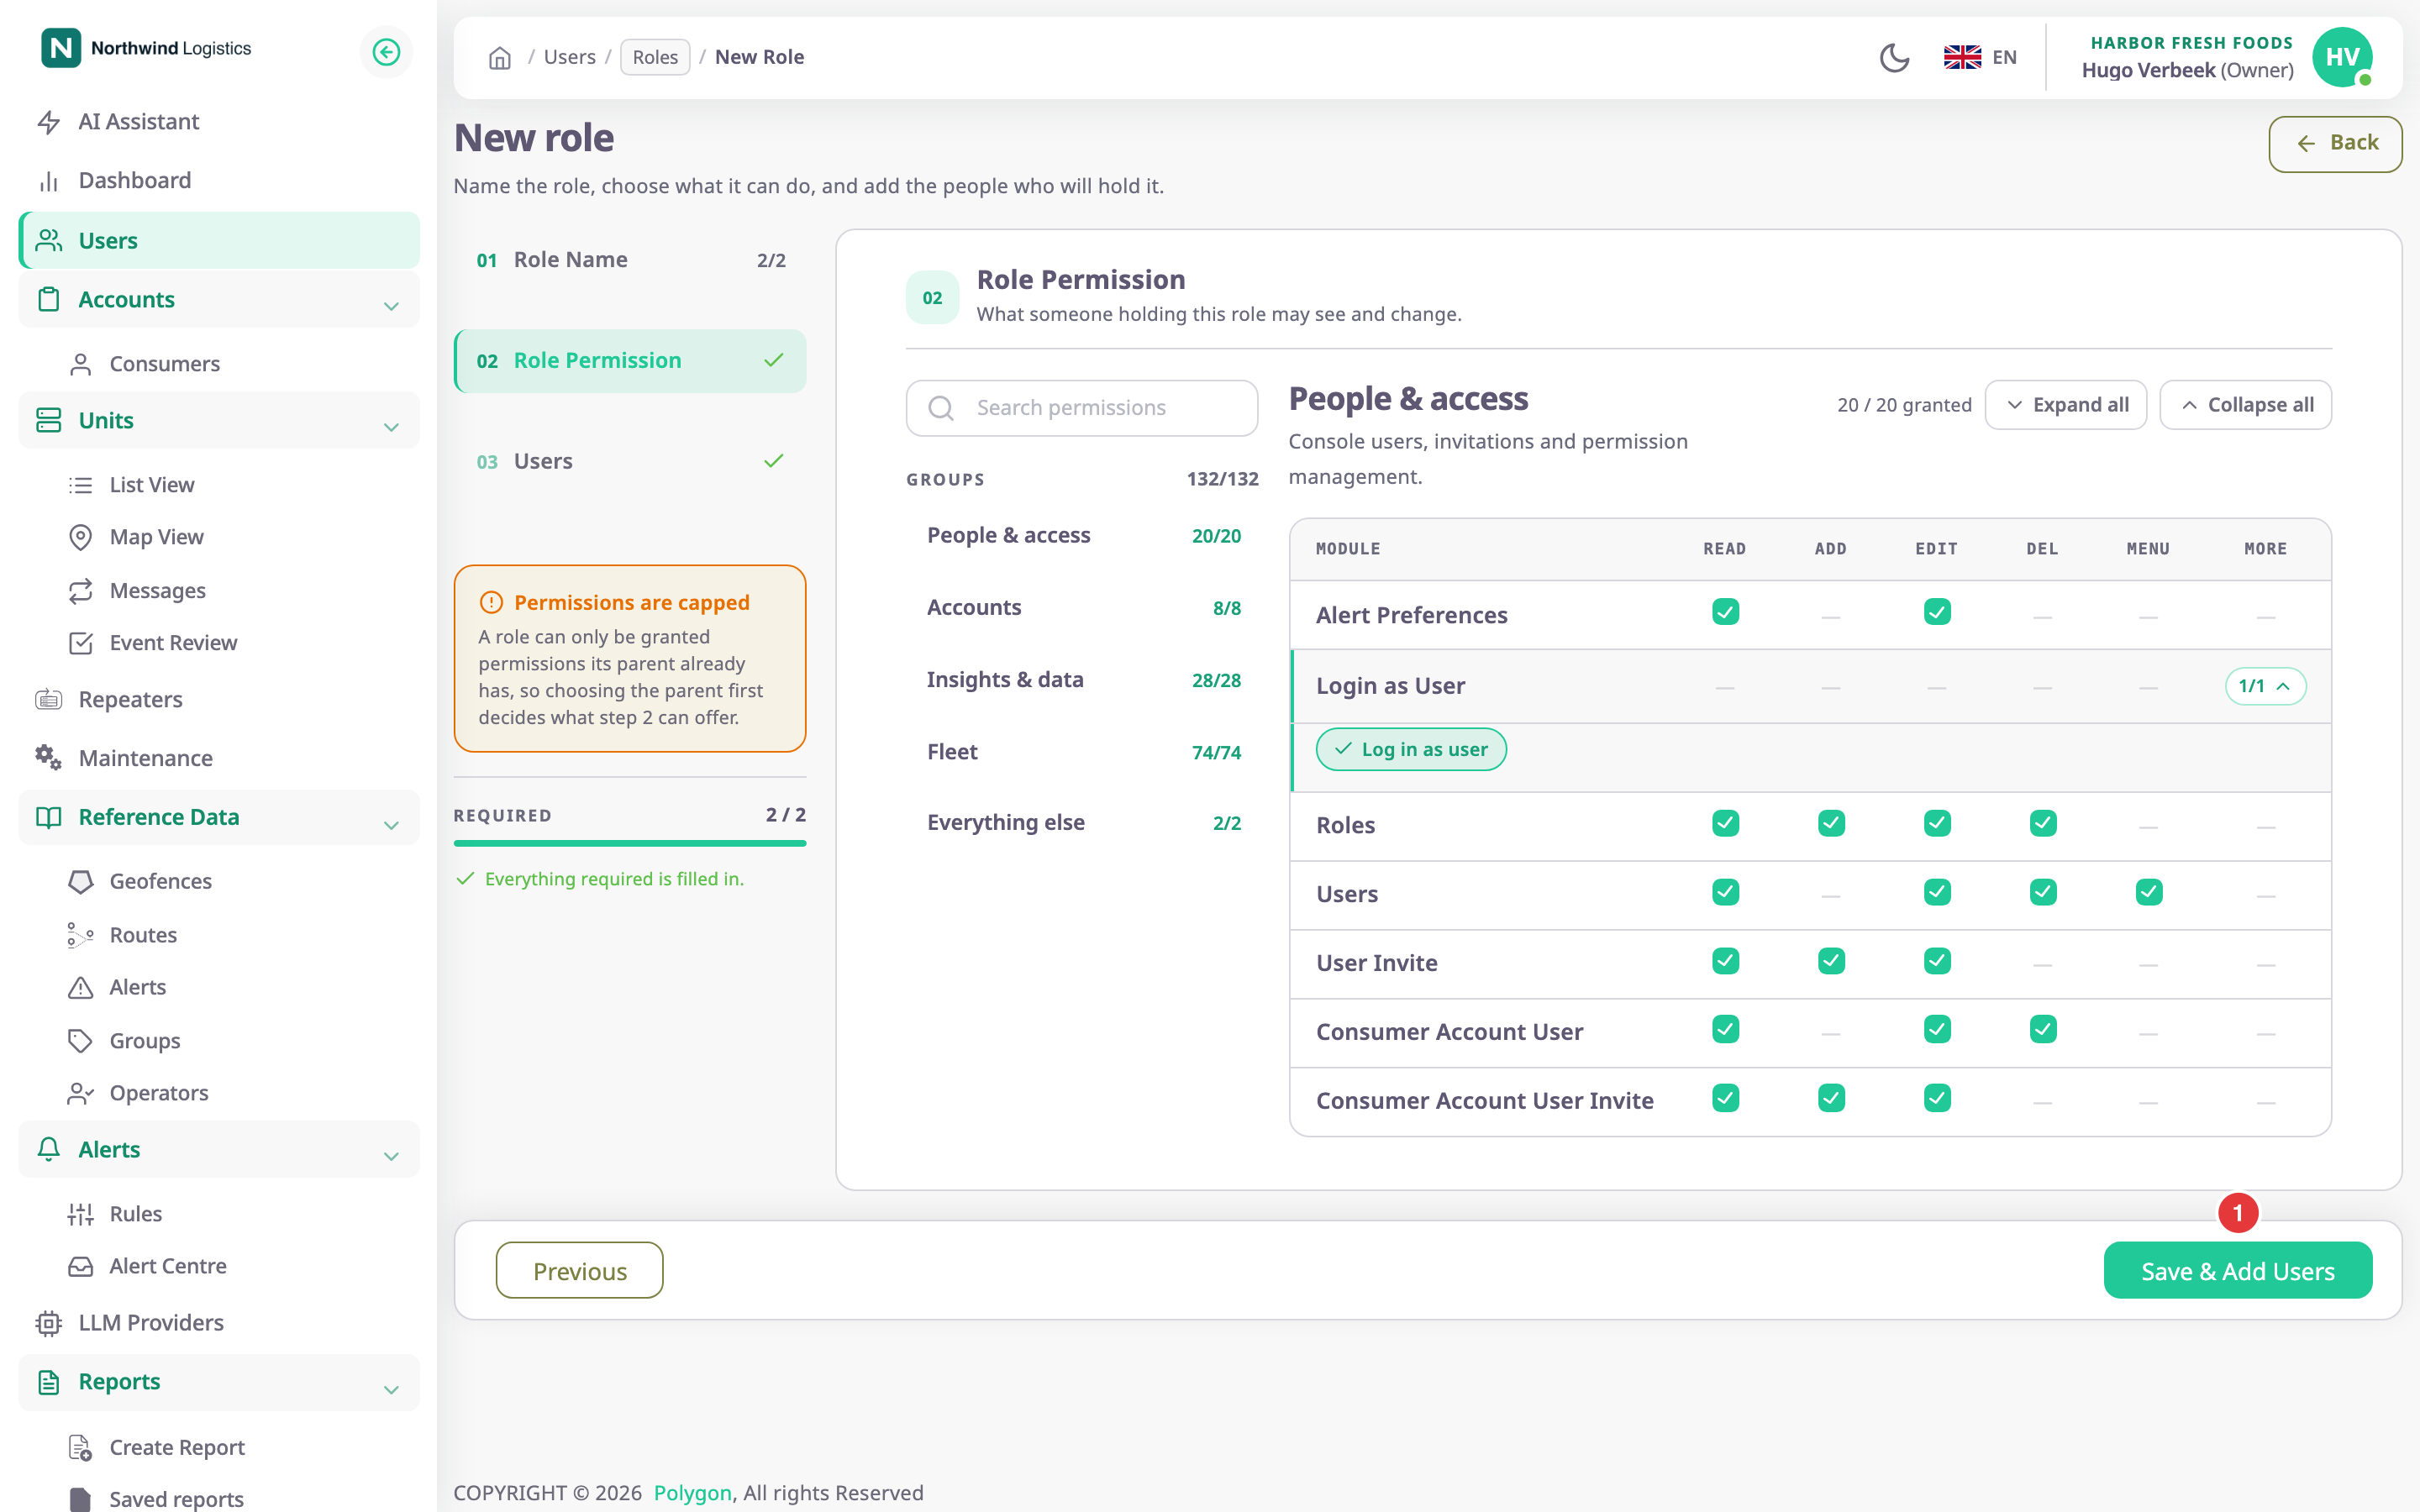
The app saves the role and shows "Role Created Successfully. You can continue with adding users". Step 3, Users, opens.
Give each module both Read and Menu if users should find it in the side menu. See How roles and permissions work.
¶ Add users to the role
- In Select Users, choose a user.
- Select the plus button.
The user shows in the list below. Repeat for more users. - Select Submit.
The app saves the users and returns to the Roles tab.
A user holds one role per account, so adding them here replaces their current role. You can also skip this step: select Submit with no users and give the role to people later.
¶ Clone an existing role instead
- On the Roles tab, select Clone on the role to copy.
The wizard opens with that role's permissions. - In Role Name, enter a new name.
- Continue as above.
Cloning Owner gives you a role with every permission, to remove from.
¶ What happens next
The role shows on the Roles tab with its parent ("Reports to") and its number of users. You can choose it when you invite people or change a user's role.
If another role already has the name, saving fails with "Role with the same name or permissions already exists. Please create a unique role."