The Unit Creation wizard creates a unit in two steps: what the unit is, then which account it belongs to and which devices report for it. To open it, in the side menu, select Units > List View, then select Add Unit. The edit screen of a unit shows the same fields; see Unit details screen.
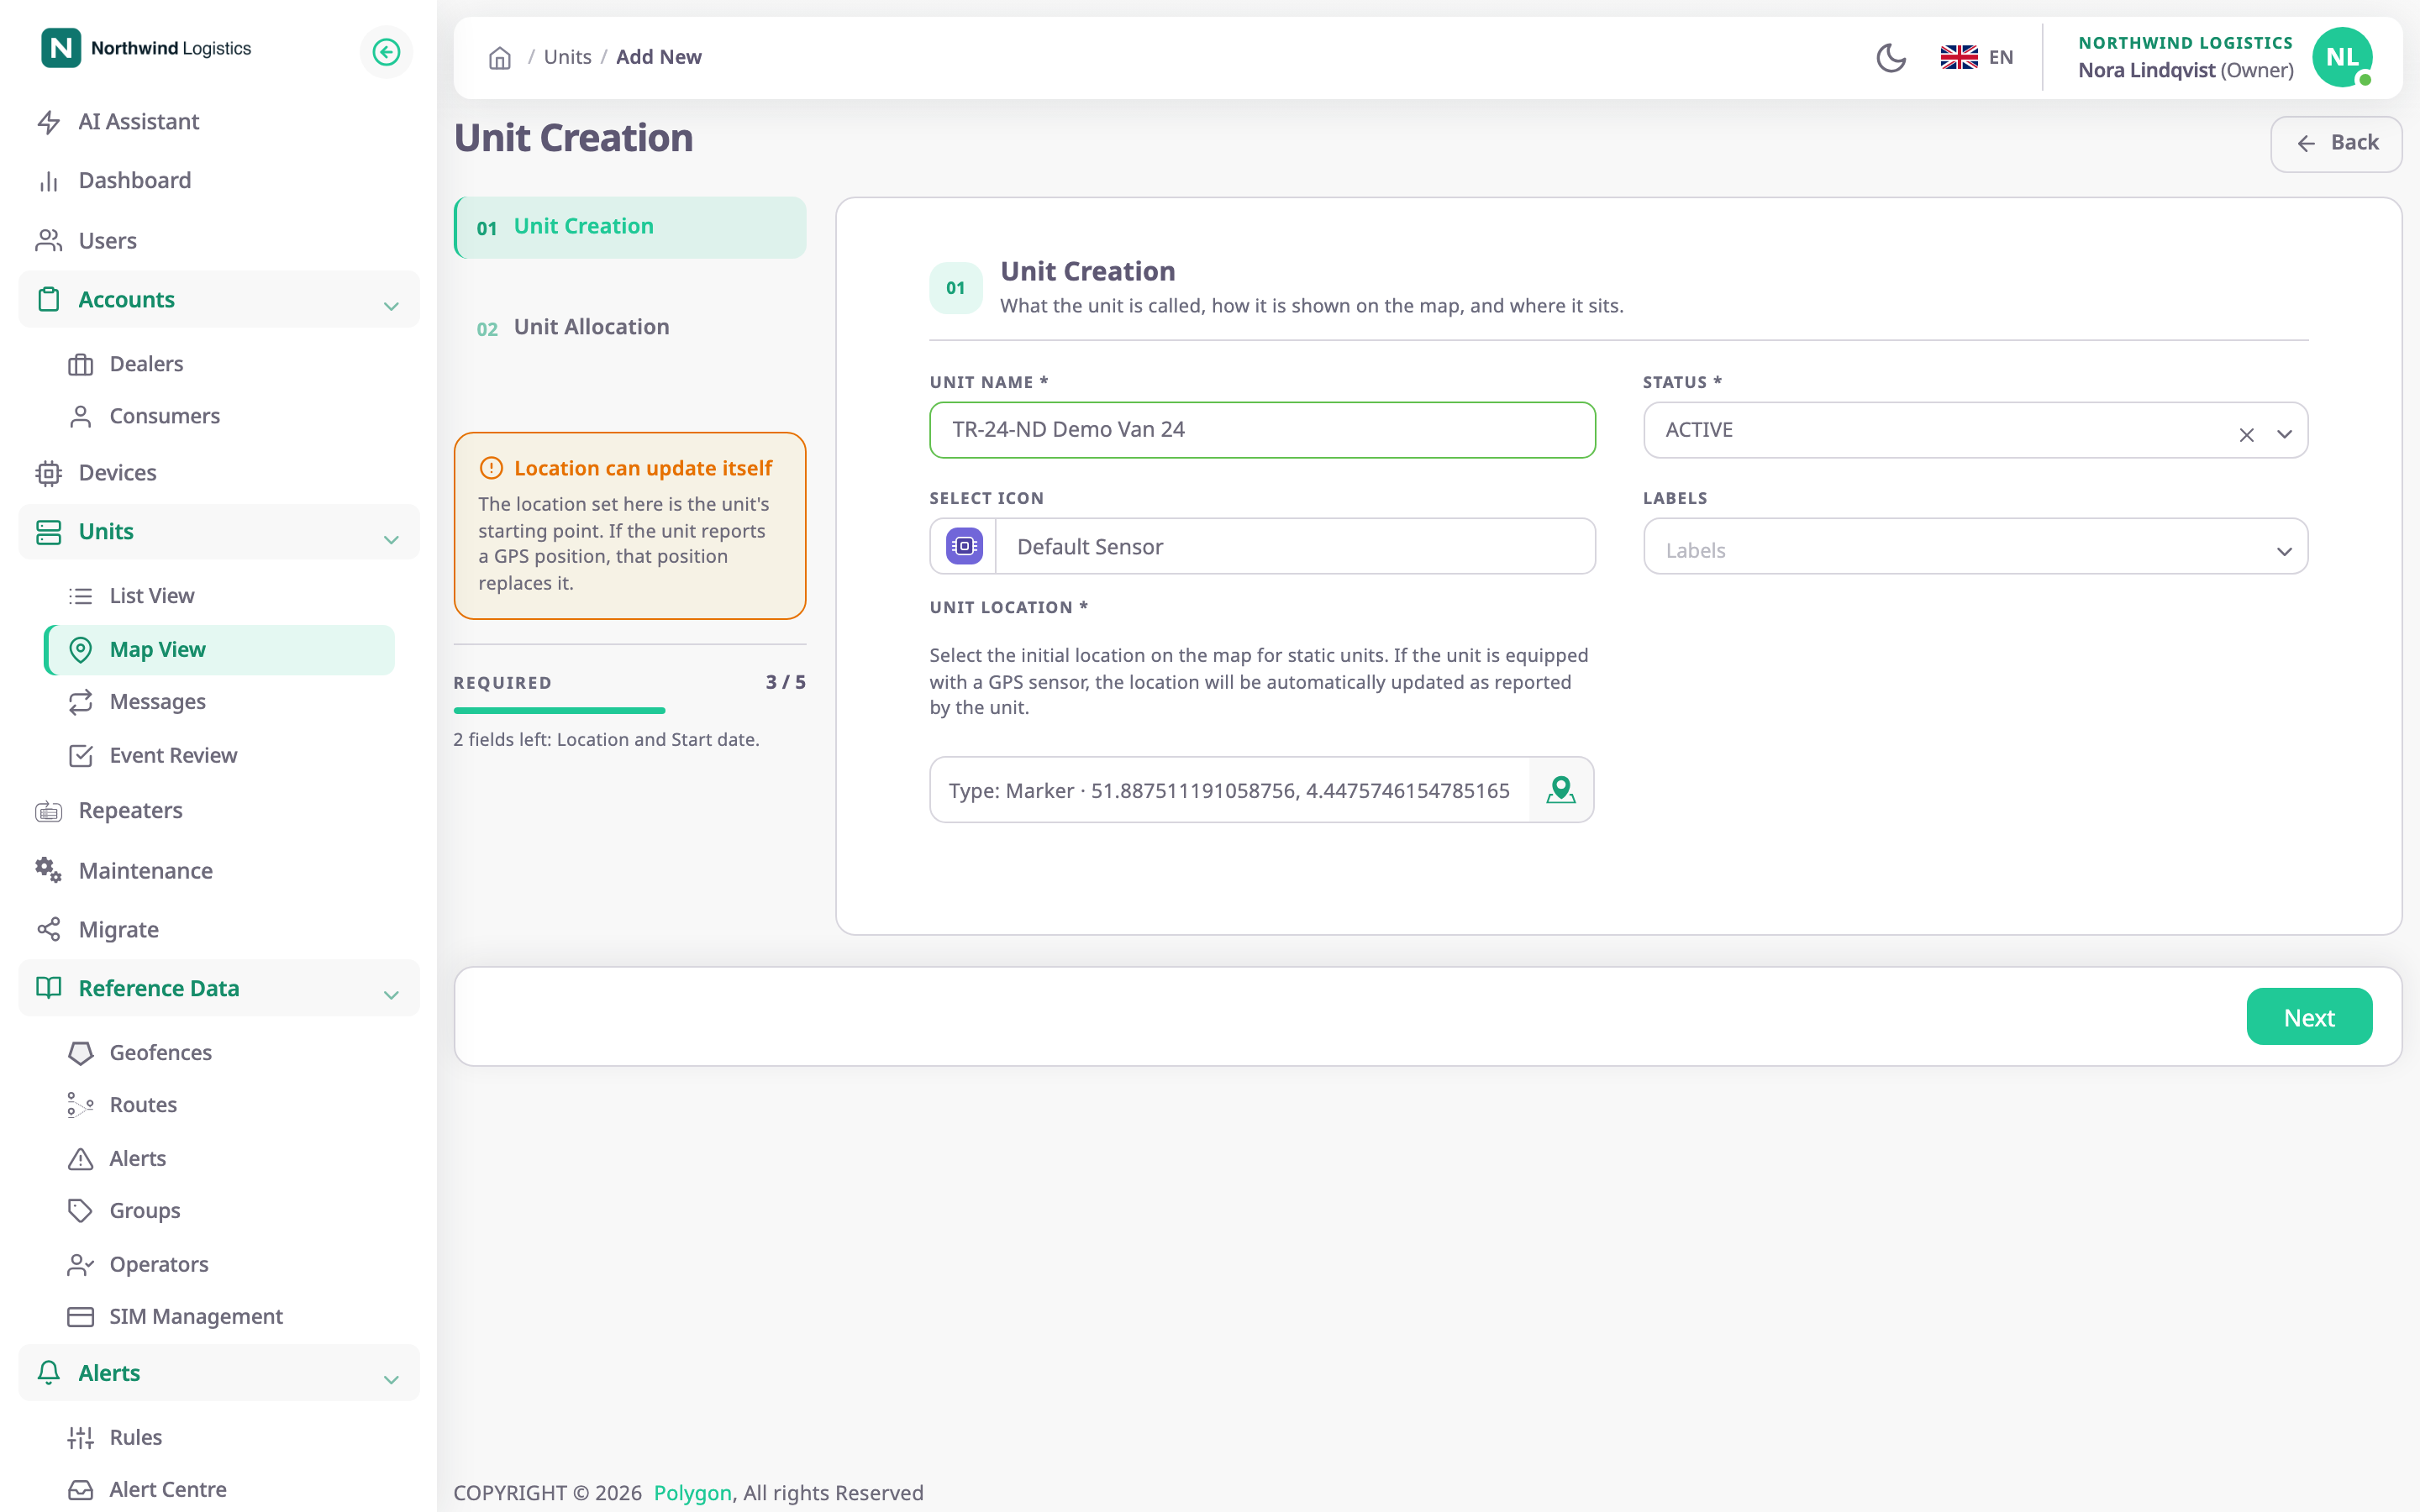
¶ Step 1 Unit Creation fields
| Field | Required | What it does | Allowed values / example | Notes |
|---|---|---|---|---|
| Unit Name | Yes | Names the unit in lists, on the map, in reports and in alerts. | 3 to 50 characters. Example: TR-24-ND Demo Van 24 | Two units can have the same name. Start with the plate if you track vehicles; the app has no separate plate field. |
| Status | Yes | Records whether the unit is in service. Shown in the units list. | ACTIVE, INACTIVE, DAMAGED or BLOCKED. Default: ACTIVE | It does not stop tracking. It is not the movement state on the map. |
| Offline after | No | Sets how long the unit may stay silent before it shows as Offline. | A whole number with minutes, hours or days, from 1 minute to 7 days. Example: 2 hours | Empty uses the platform default, shown as Platform default. A value out of range gives "Enter a whole number from 1 minute to 7 days". |
| Select Icon | No | Sets the icon for the unit in lists and on the map. | An icon from the gallery; search by name. Default: Default Sensor | — |
| Labels | No | Puts the unit in groups, so you can filter and report on several units together. | Existing groups, or type a new name and press Enter. | Appears only if your role can read groups. A new group is created in your own account. |
| Unit Location | Yes | Places the unit on the map until its device reports a GPS position. | One marker on the map. Example: a depot in Rotterdam | Select the field, select the marker tool, select a point on the map, then select Save. You cannot change it after the unit exists. |
Next stays unavailable until the unit has a name of at least 3 characters, a status and a location.
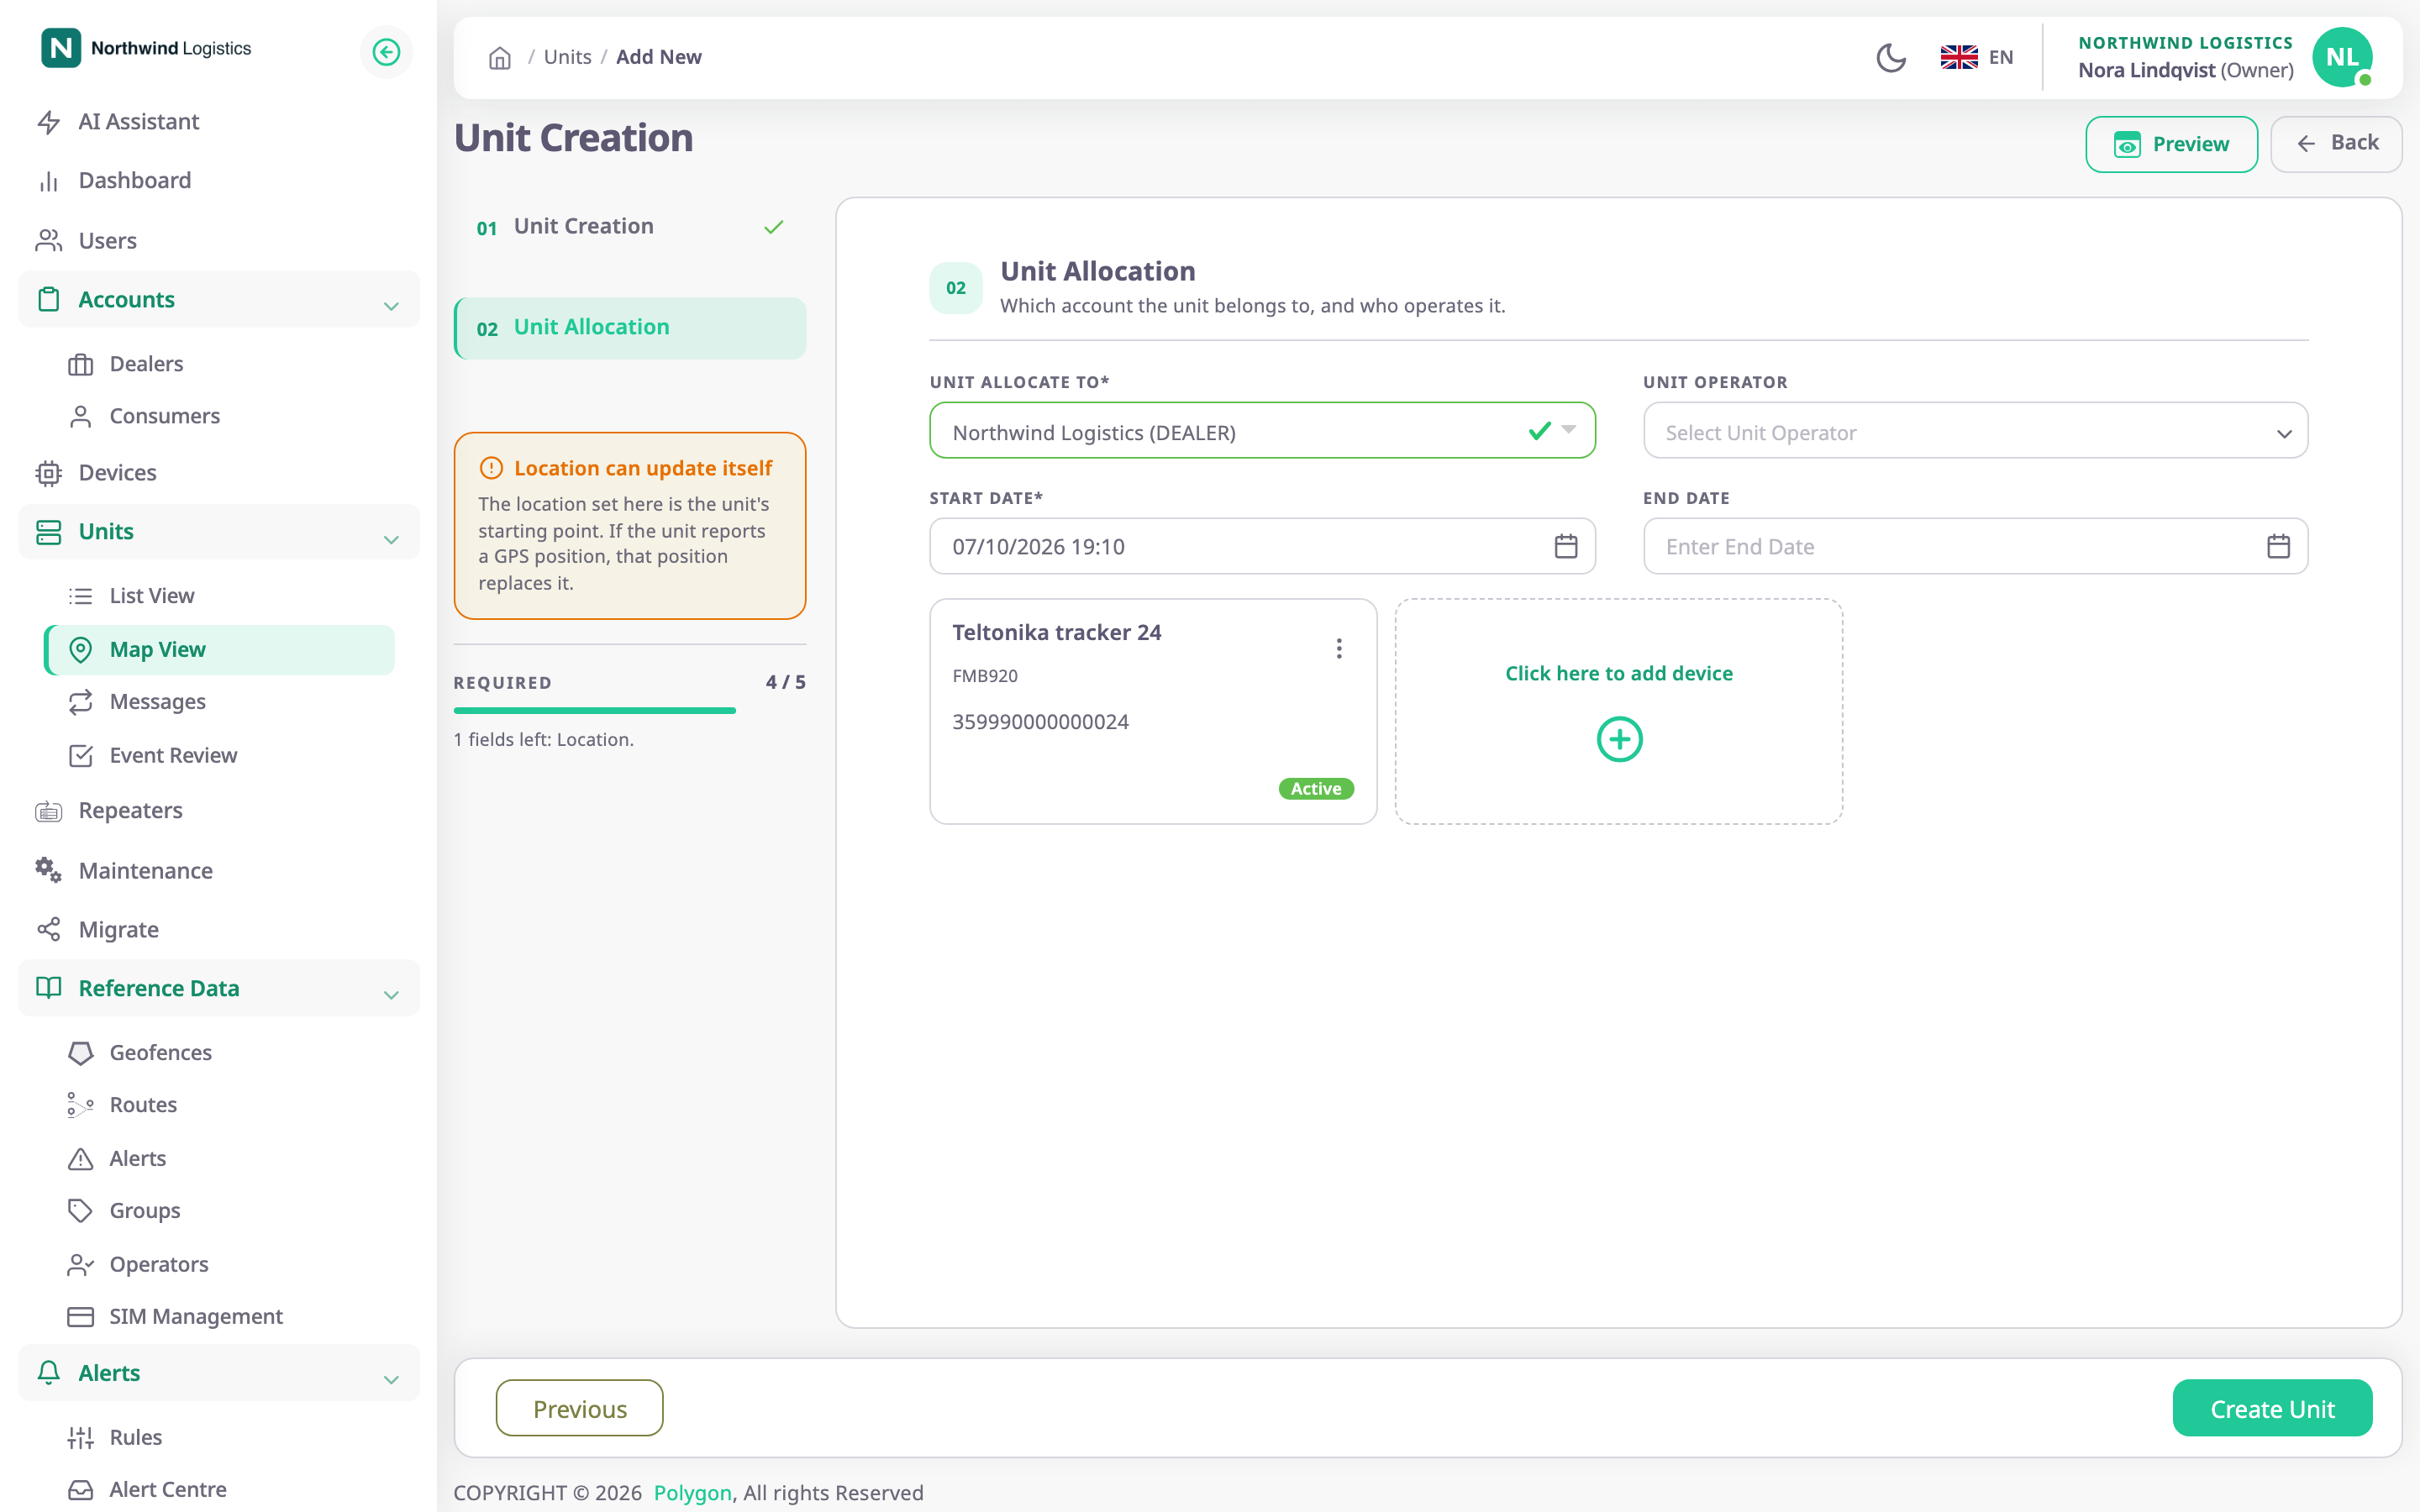
¶ Step 2 Unit Allocation fields
| Field | Required | What it does | Allowed values / example | Notes |
|---|---|---|---|---|
| Unit Allocate To | Yes | Chooses the account the unit is allocated to. Users in that account see the unit. | Your account or an account below yours. Example: Harbor Fresh Foods (CONSUMER) | Default: your own account. Changing it clears Unit Operator. |
| Unit Operator | No | Assigns an operator (driver) to the unit. | Operators of the chosen account. | The list reloads when you change the account. |
| Start Date | Yes | Sets when the allocation starts. | Now or later. Example: 04/10/2026 05:47 | Default: now. The picker does not offer past dates. |
| End Date | No | Ends the allocation at this time. | Later than Start Date. | Empty means no end. An earlier date gives the message "End time must be greater than start time". |
¶ Custom fields step
If your account defines custom fields for units, the wizard has a third step, Custom fields, after Unit Allocation. It lists the extra details your account records against every unit. Fill in the required ones before you select Create Unit. An account without custom fields keeps the two-step wizard.
¶ Devices on the unit
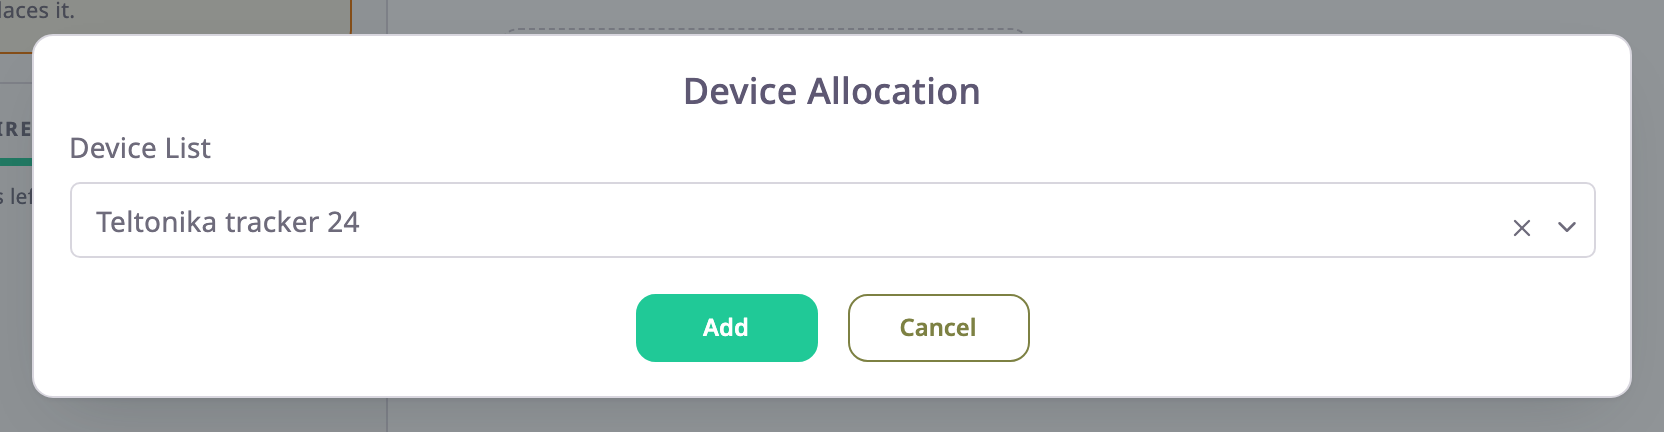
Under the step 2 fields, a card reads "Click here to add device". Select it to open Device Allocation.
| Field | Required | What it does | Allowed values / example | Notes |
|---|---|---|---|---|
| Device List | No | Adds a device that reports for the unit. | Devices linked to your account; search by name, identifier, model or SIM number. Example: Teltonika tracker 24 | The list also shows devices that already report for another unit. |
- Select Add to put the device on a card. You can add several devices, one at a time.
- If the device already reports for another unit, a question asks whether to reallocate it. Yes takes it off the other unit at once, even if you never create this unit. No leaves it where it is.
- Adding the same device twice shows "You can't allocate same device".
- Drag the cards to change their order. A card's menu has Remove from Unit and Visibility Control.
A unit without devices is allowed. It stays at its Unit Location until you add a device.
¶ Required-fields panel
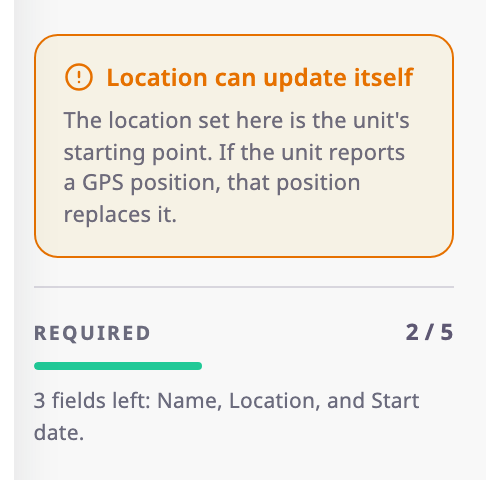
The panel beside the steps counts the five required values: Name, Status, Location, Account and Start date. It also reminds you that a GPS position replaces the location you set.
The counter can show Location and Start date as missing after you have filled them in. Trust the Next and Create Unit buttons instead: they become available when the step is complete.
¶ Buttons
| Action | What happens |
|---|---|
| Next | Checks step 1 and moves to step 2. |
| Previous | Returns to step 1 without losing what you entered. |
| Create Unit | Creates the unit and returns to the units list with the message "Unit created successfully". |
| Preview | Appears once a device is on the unit. Opens a sensor panel with the unit name and the latest values of the sensors of the devices you added. |
| Back | Leaves the wizard without creating anything. |
¶ Permissions
- To open the wizard you need Units with Add. The server also checks Devices > Read.
- Labels needs Labels > Read to appear, and Labels > Add or Edit to change.
- The Owner role has all of these.