A route lists the places a unit should visit, in order. You build it from checkpoints and, later, add a schedule to track rides against it.
¶ Before you start
- You need the Routes > Add permission. The Owner role has it.
- To use geofences as checkpoints, draw them first.
¶ Create the route
- In the side menu, select Reference Data > Routes.
The Routes tab opens beside the map. - Select New route.
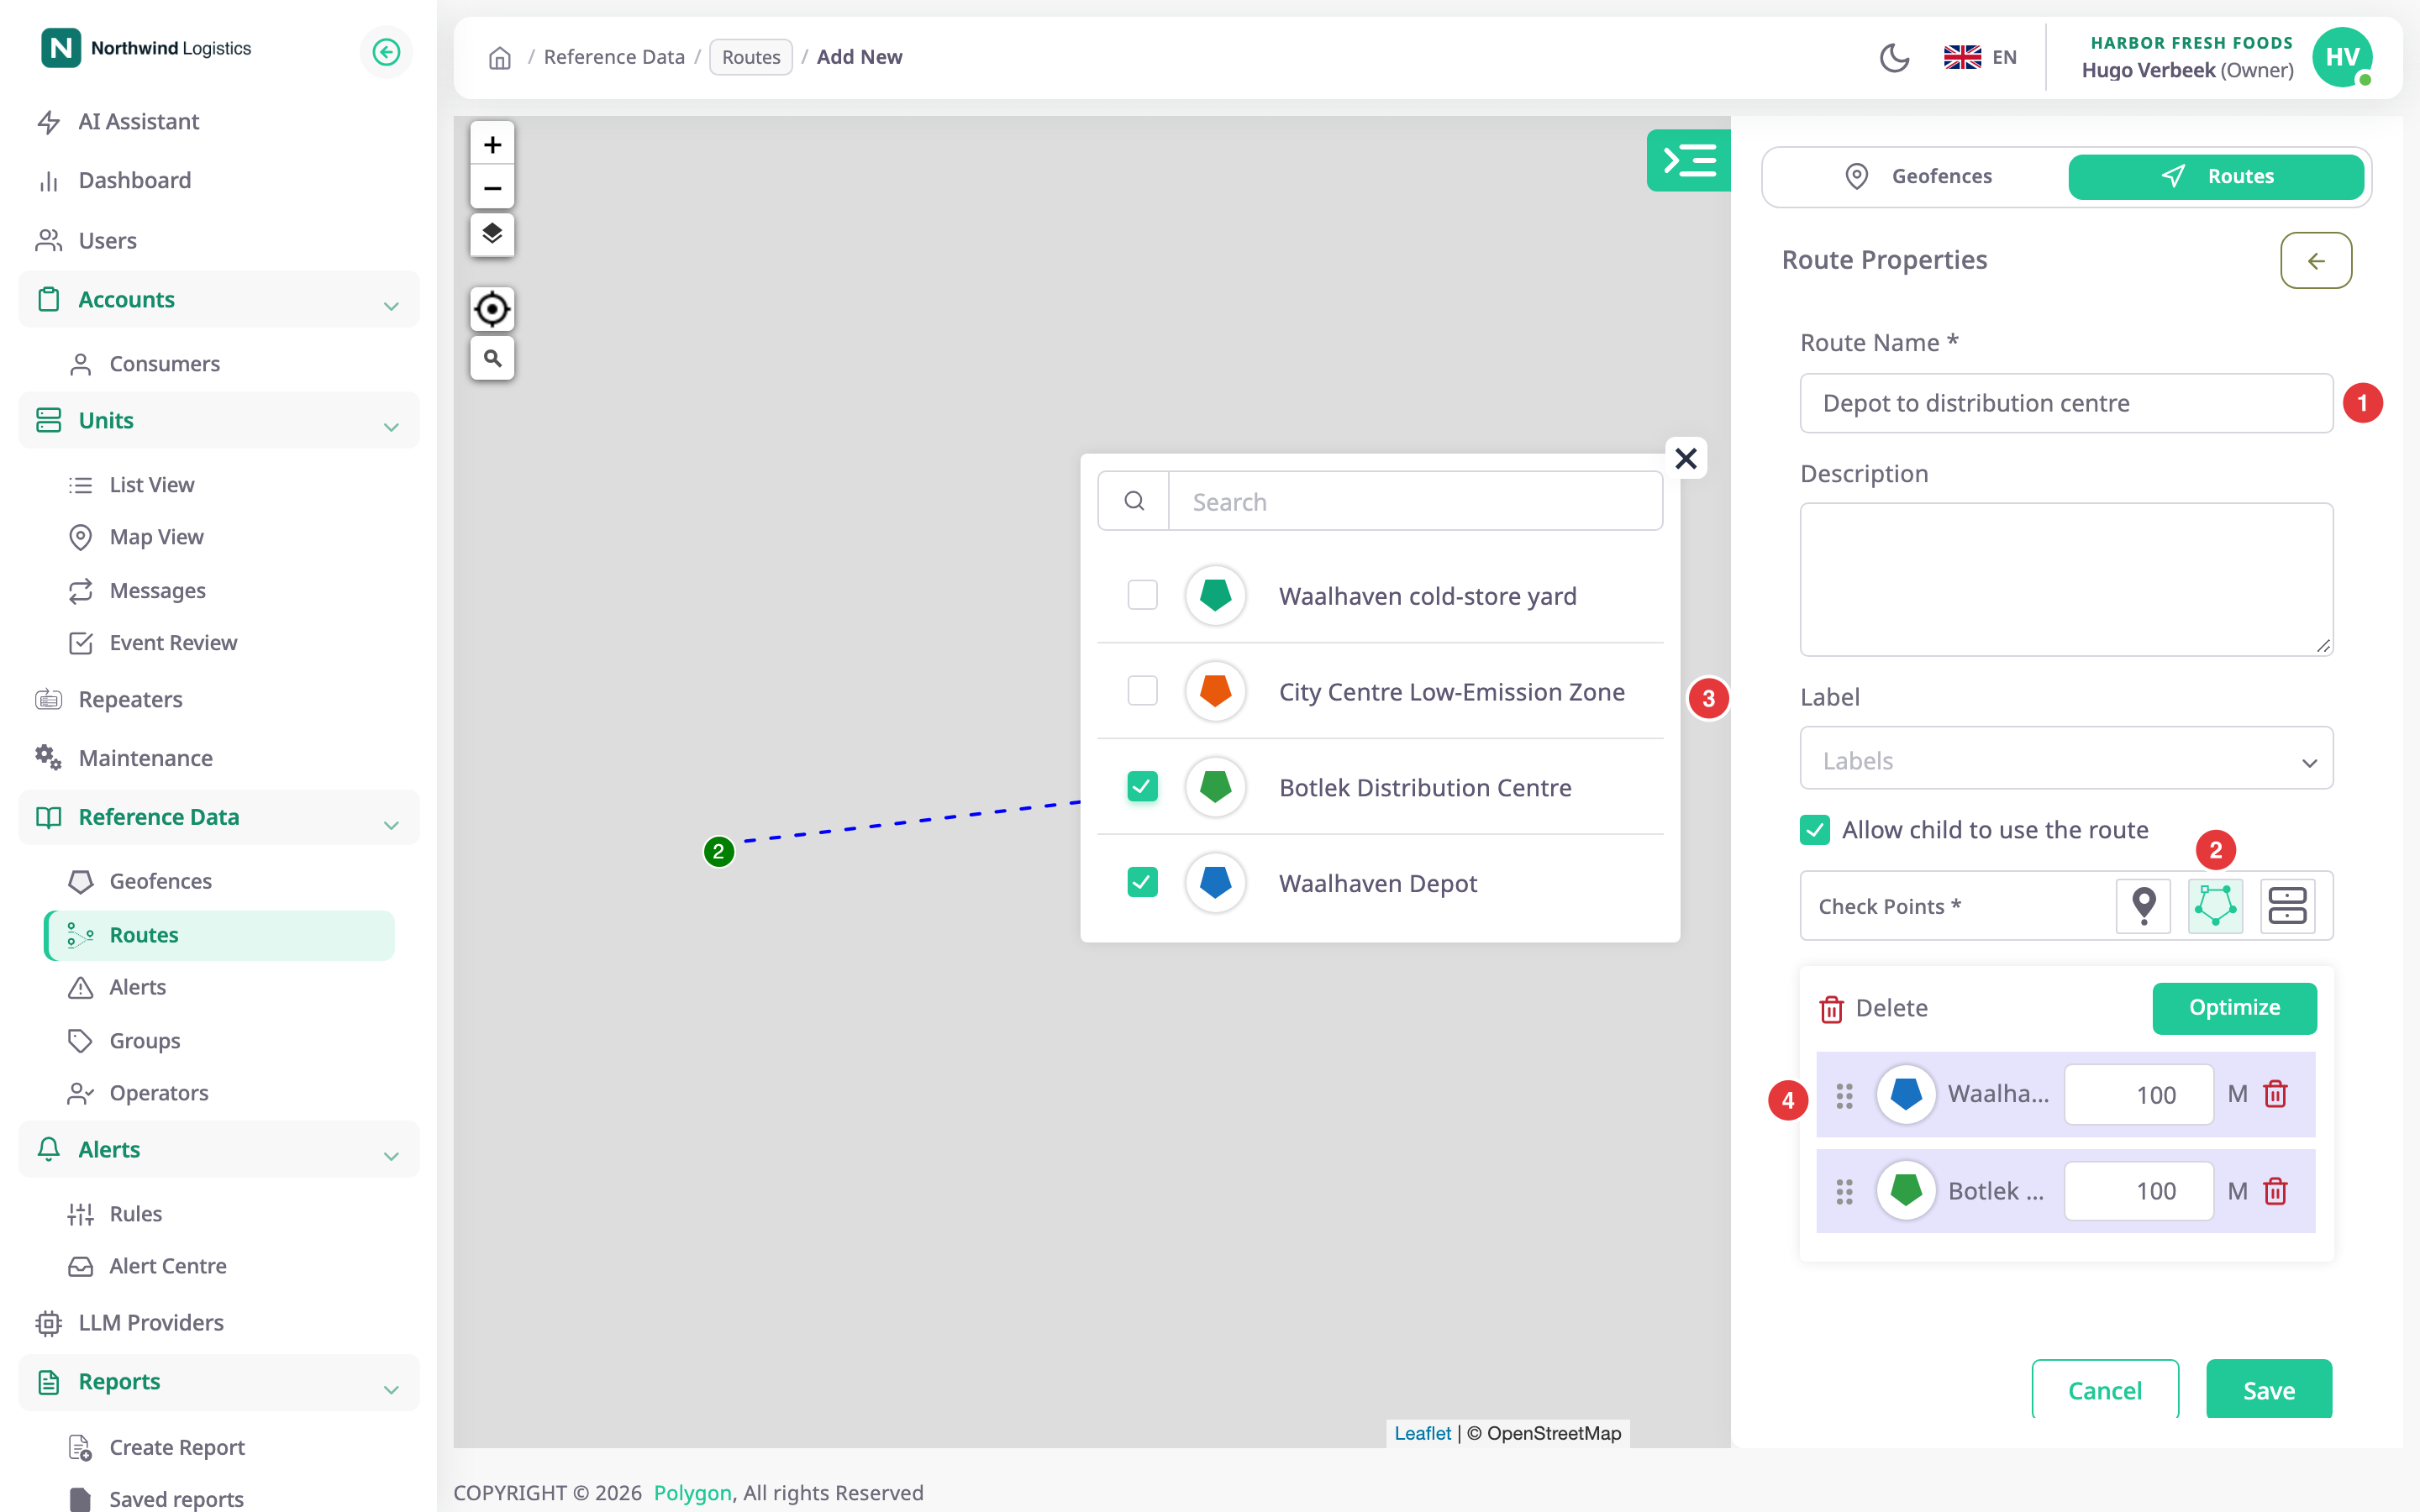
The New route form opens. - In Route Name, enter Depot to distribution centre.
- Under Add checkpoints, select Geofences.
The Add geofences panel opens over the map. - Tick Waalhaven Depot.
It becomes checkpoint 1, tagged Start, with a radius of 100 m. - Tick Botlek Distribution Centre.
It becomes checkpoint 2, tagged End. A dashed line joins the two on the map. - Select Done.
The panel closes. - Optional: add more checkpoints with Point on map, Units or Import. In point mode, each map click adds a checkpoint; select Done in the hint bar to stop.
- Optional: drag the rows into visiting order, or change a radius with the r button on a row.
- Select Save route.
The message "Route created successfully" appears and the route is in the list.
¶ Check the order
The order of the list is the order of the route, and the dashed line on the map follows it. To find a shorter order, select Optimize order (three or more checkpoints). It previews the shortest order by straight-line distance, keeping the first and last checkpoints in place. Select Apply to use it. See About routes and checkpoints.
¶ What happens next
The route can have schedules straight away. Select the Add Schedule icon in its row. See Schedule a route.