The Sensors tab lists every sensor of one device: what each reads and whether the customer sees it. It also has the actions to add, change or copy sensors. To open it, select Devices in the side menu and Edit on the device's row. Then select the Sensors tab.
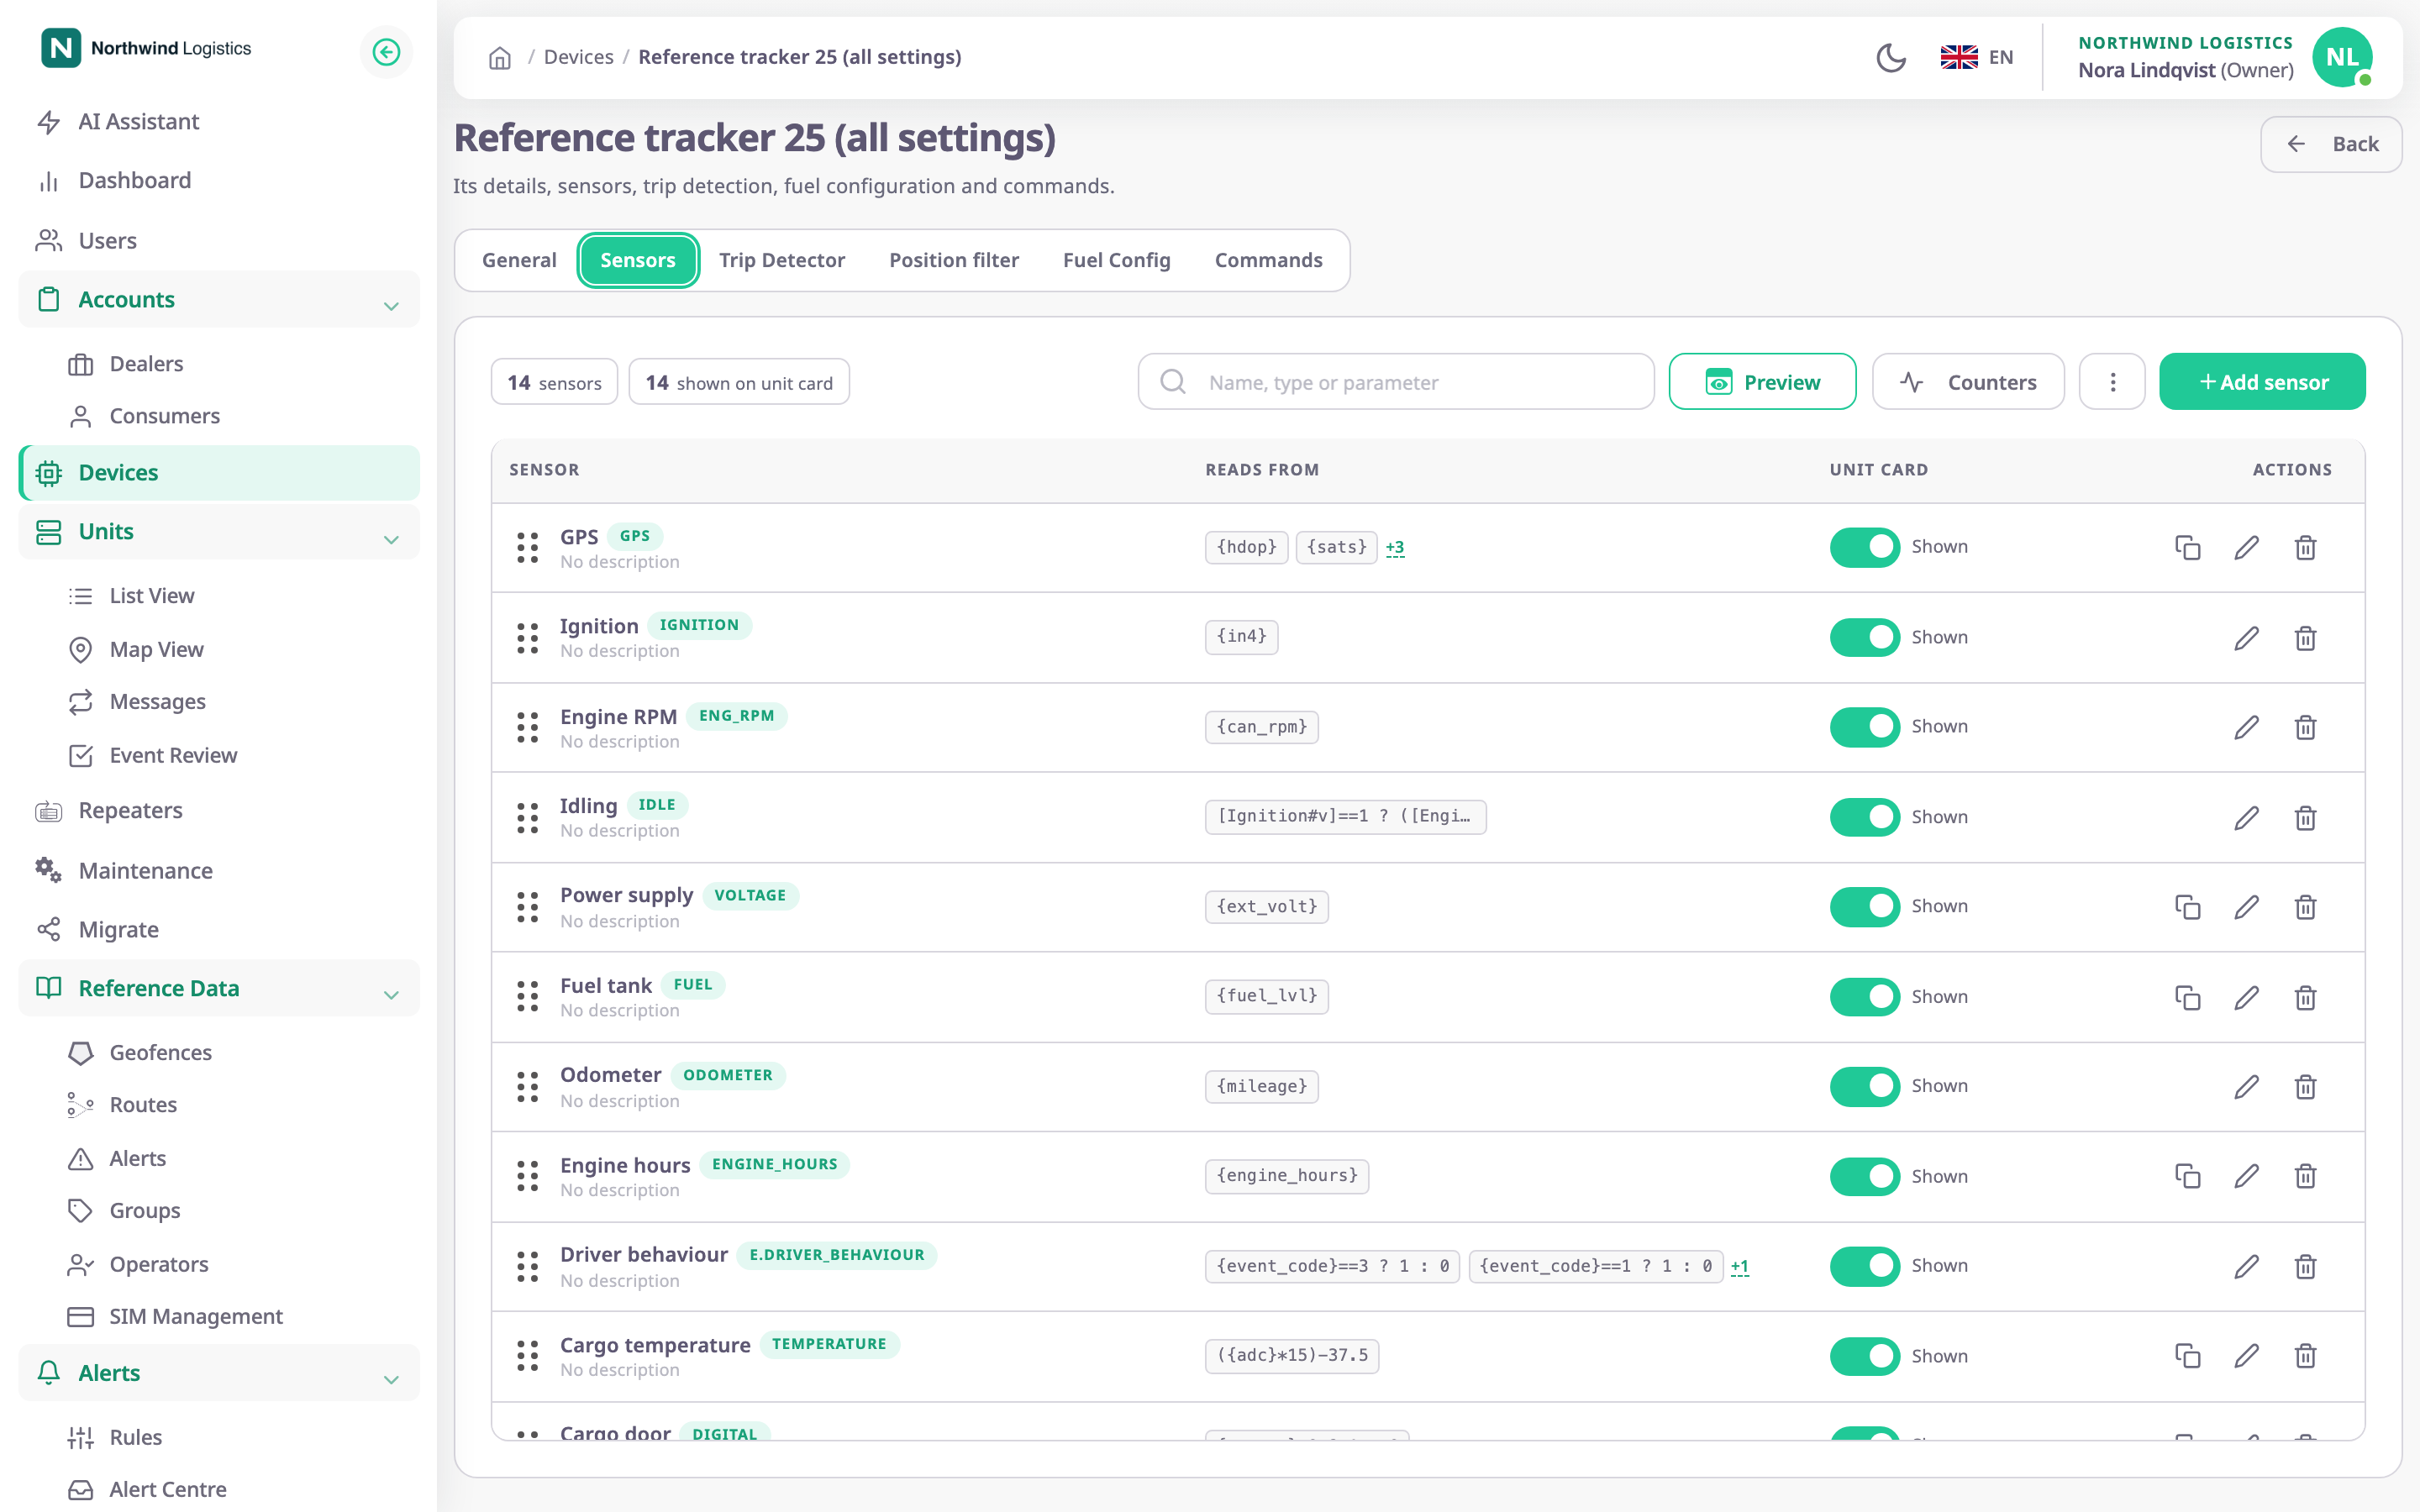
¶ The screen
The page header names the device and has the one Back button, which returns to the Devices list. Below it the device's tabs run from General to Commands. Trip Detector shows only when the device has a GPS sensor, and Fuel Config only when it has a FUEL sensor.
Changes on this tab save at once, and the list has no Save button of its own. Adding, editing, deleting and reordering sensors each save the device's whole sensor list. So does the Unit card switch.
¶ Toolbar

| Control | What it does |
|---|---|
| Sensor counts (marked 1) | "14 sensors" counts every sensor on the device; select it to list them all with their types. "shown on unit card" counts the sensors set to Shown. "not mapped" appears when a sensor has no telemetry parameter yet. "Fuel aggregate" names the FUEL sensor that feeds fuel reports, when one has Use sensor in reports turned on. |
| Search (marked 2) | Shows only the sensors whose name, type, description or mapped parameters contain the text, for example fuel_lvl. The counts still cover every sensor. |
| Preview (marked 3) | Opens a sample unit card built from this device's sensors, described below. |
| Counters (marked 4) | Opens the Counters dialog, where you choose the mileage and engine-hours sources. See Counters. |
| Import / export (marked 5) | A menu with Download Sensors and Upload Sensors. Download saves the listed sensors as a JSON file; Upload replaces every sensor on the device with the sensors in a file. See Copy sensors between devices. |
| Add sensor (marked 6) | Opens the New Sensor dialog. See Sensor dialog. |
¶ Columns
| Column | What it shows |
|---|---|
| Sensor | The sensor's name, a tag with its type code (for example FUEL), and its description, or "No description". An "Aggregate" tag marks the FUEL sensor with Use sensor in reports turned on. |
| Reads from | The protocol parameters or expressions in the sensor's telemetry fields, for example {fuel_lvl}. Two fit on the row; select the "+N" badge to see the rest. A dash means the sensor type has no telemetry fields. |
| Unit card | A switch: Shown puts the sensor on the unit card the customer sees, Hidden keeps it off. The change saves at once and the app shows "Sensor updated successfully." |
| actions | The row actions below. |
Each row starts with a drag handle. Drag a row to change the order of the sensors on the unit card; the new order saves when you drop it.
¶ Not mapped
A sensor whose telemetry fields are all still empty shows a "Not mapped" tag in Reads from and a warning stripe on its row. Such a sensor gives no values. Open it with Edit and map at least one field. A sensor whose type has no telemetry fields is never flagged.
¶ Row actions

| Action | What happens |
|---|---|
| Clone (marked 1) | Opens New Sensor filled in with a copy of the sensor. The name gets "clone" added to its end, for example Cargo temperatureclone. Only types that allow several sensors per device have it. |
| Edit (marked 2) | Opens Update Sensor for the sensor. |
| Delete (marked 3) | Asks "Are you sure?" and "Do you really want to remove the record of" the sensor. Remove deletes it at once; the app shows "Sensor removed successfully." |
| View | In view-only mode, replaces Edit and opens the sensor in View Sensor, where nothing can change. |
You cannot delete a sensor that another sensor's expression reads. The app refuses with "Sensor already used." and names both sensors, for example:
"Sensor Ignition is used by: Idling"
Change or delete the sensor that reads it first.
¶ Preview
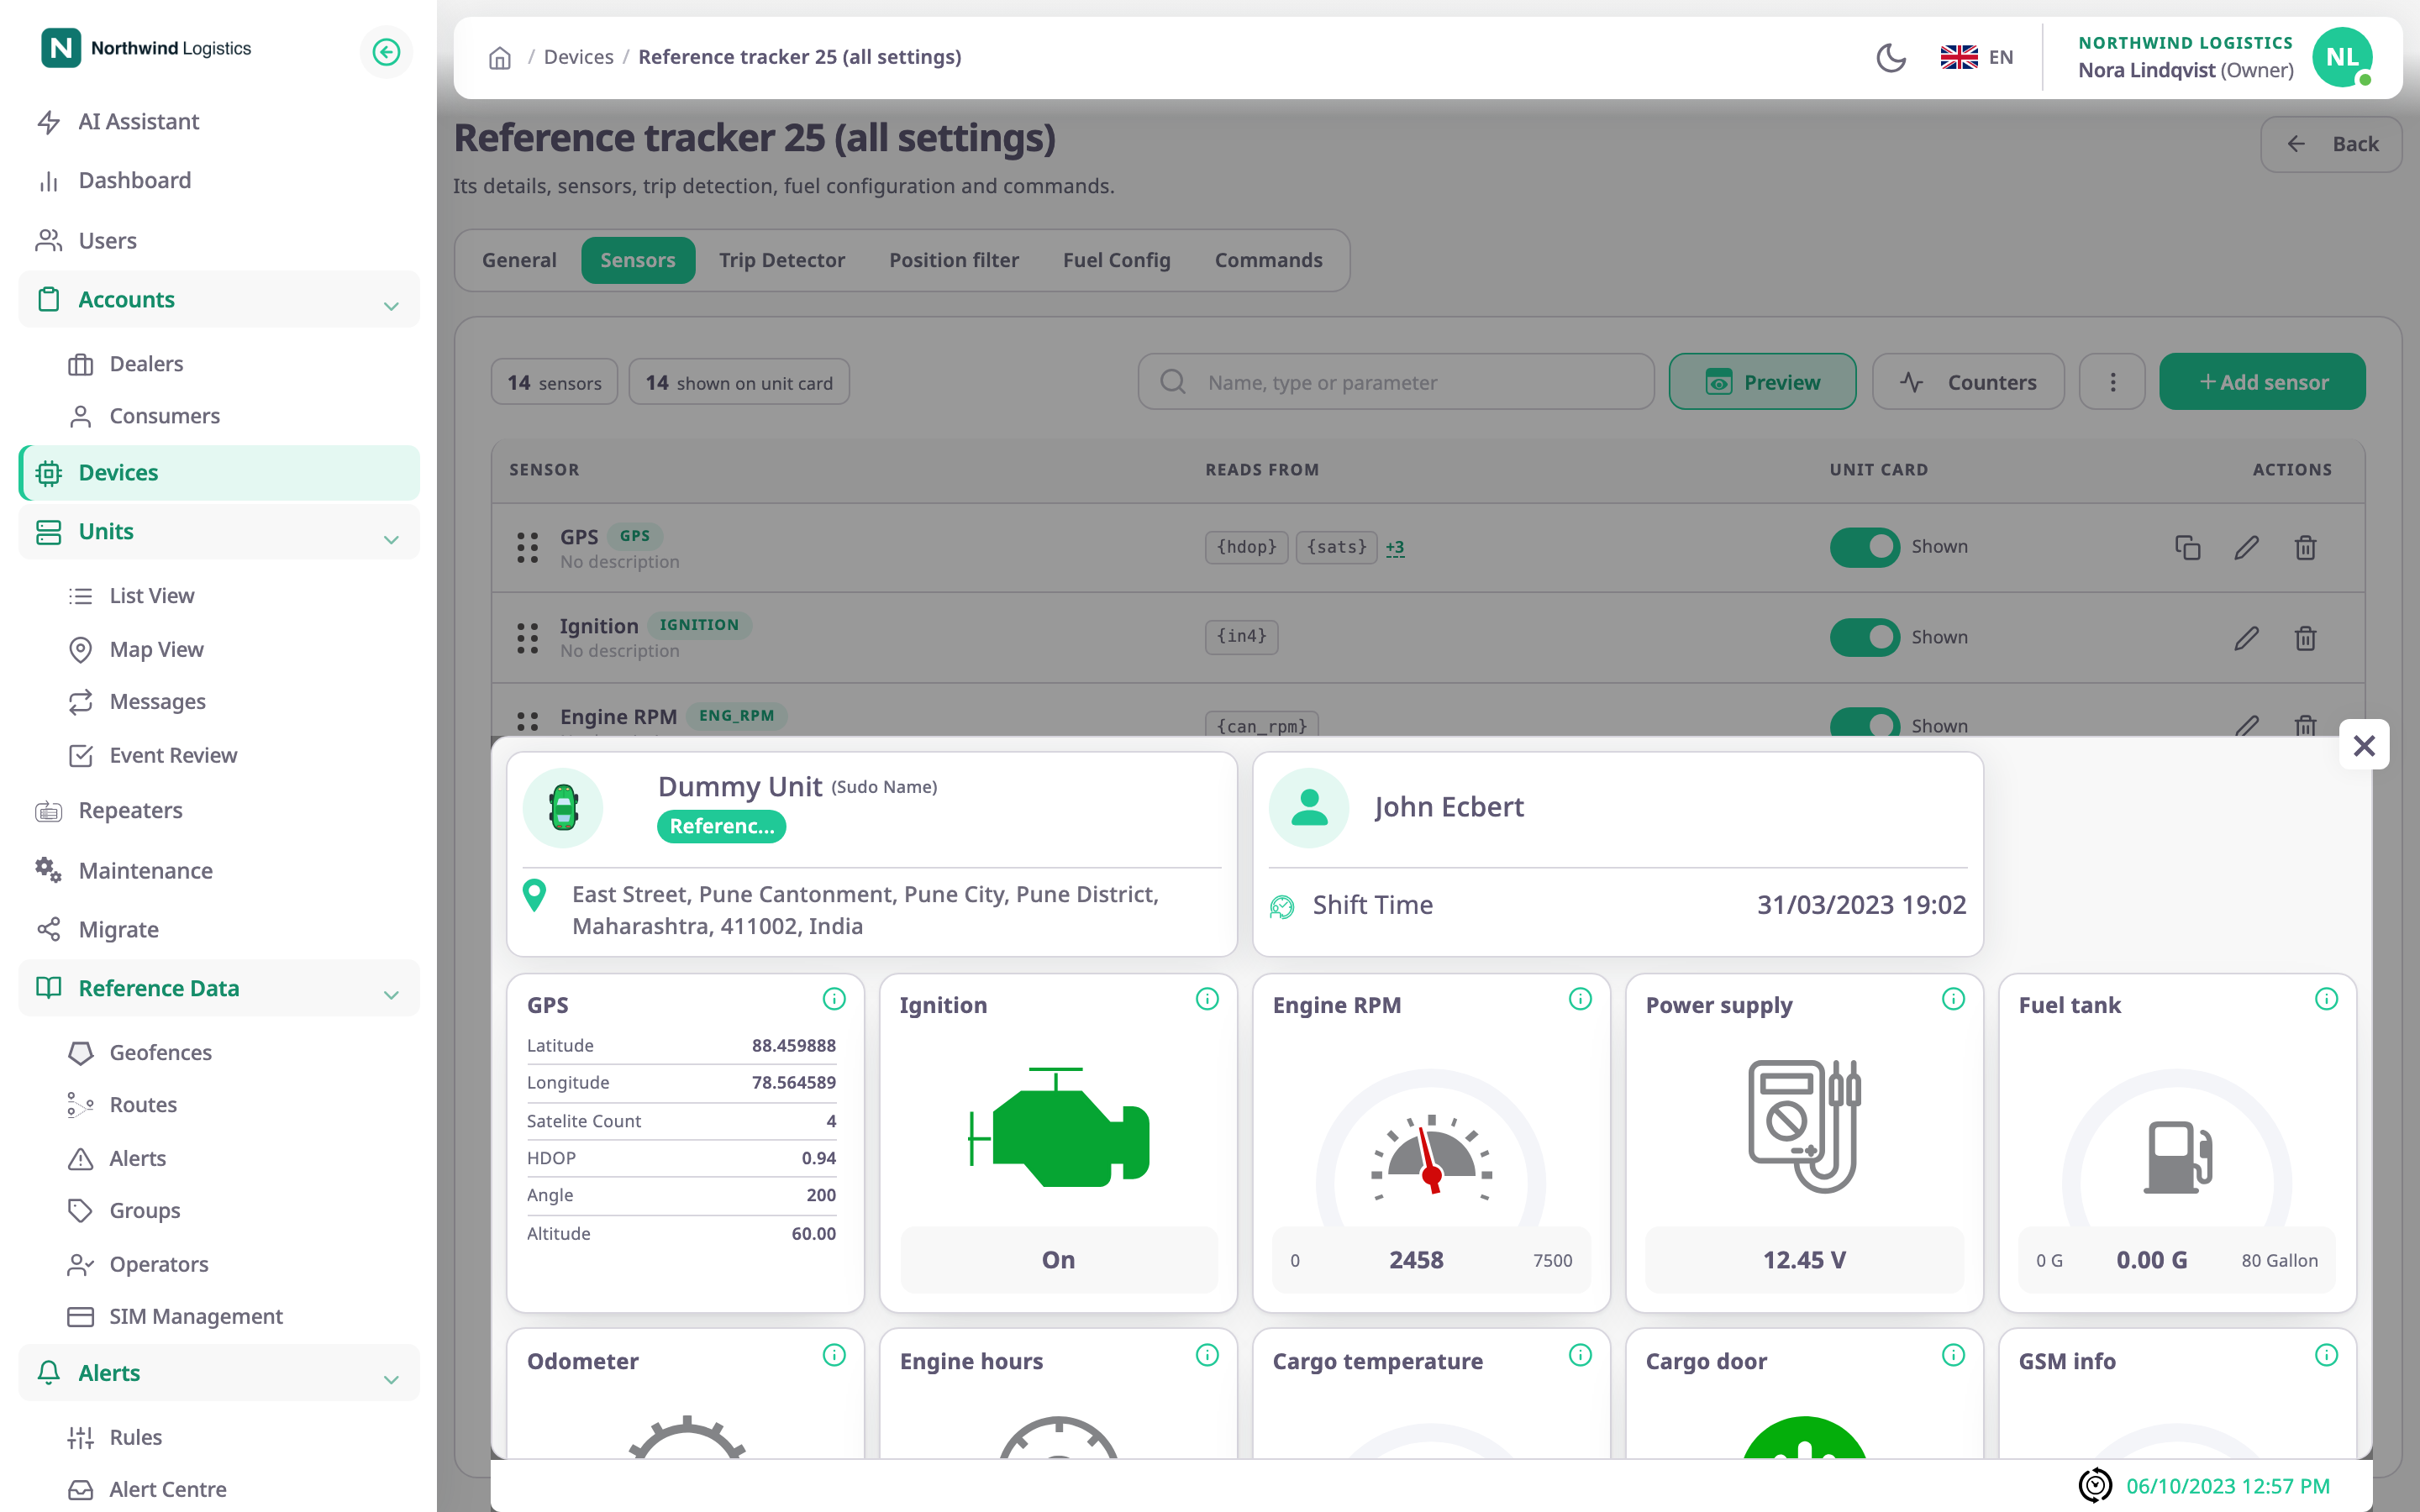
Preview shows how the unit card lays out this device's sensors for the customer. It lists only the sensors set to Shown, in the order of the table. The unit name, account, operator and address are placeholders, and the sensor values are sample values for each type, not the device's readings. Close the card to return to the list.
¶ View-only mode
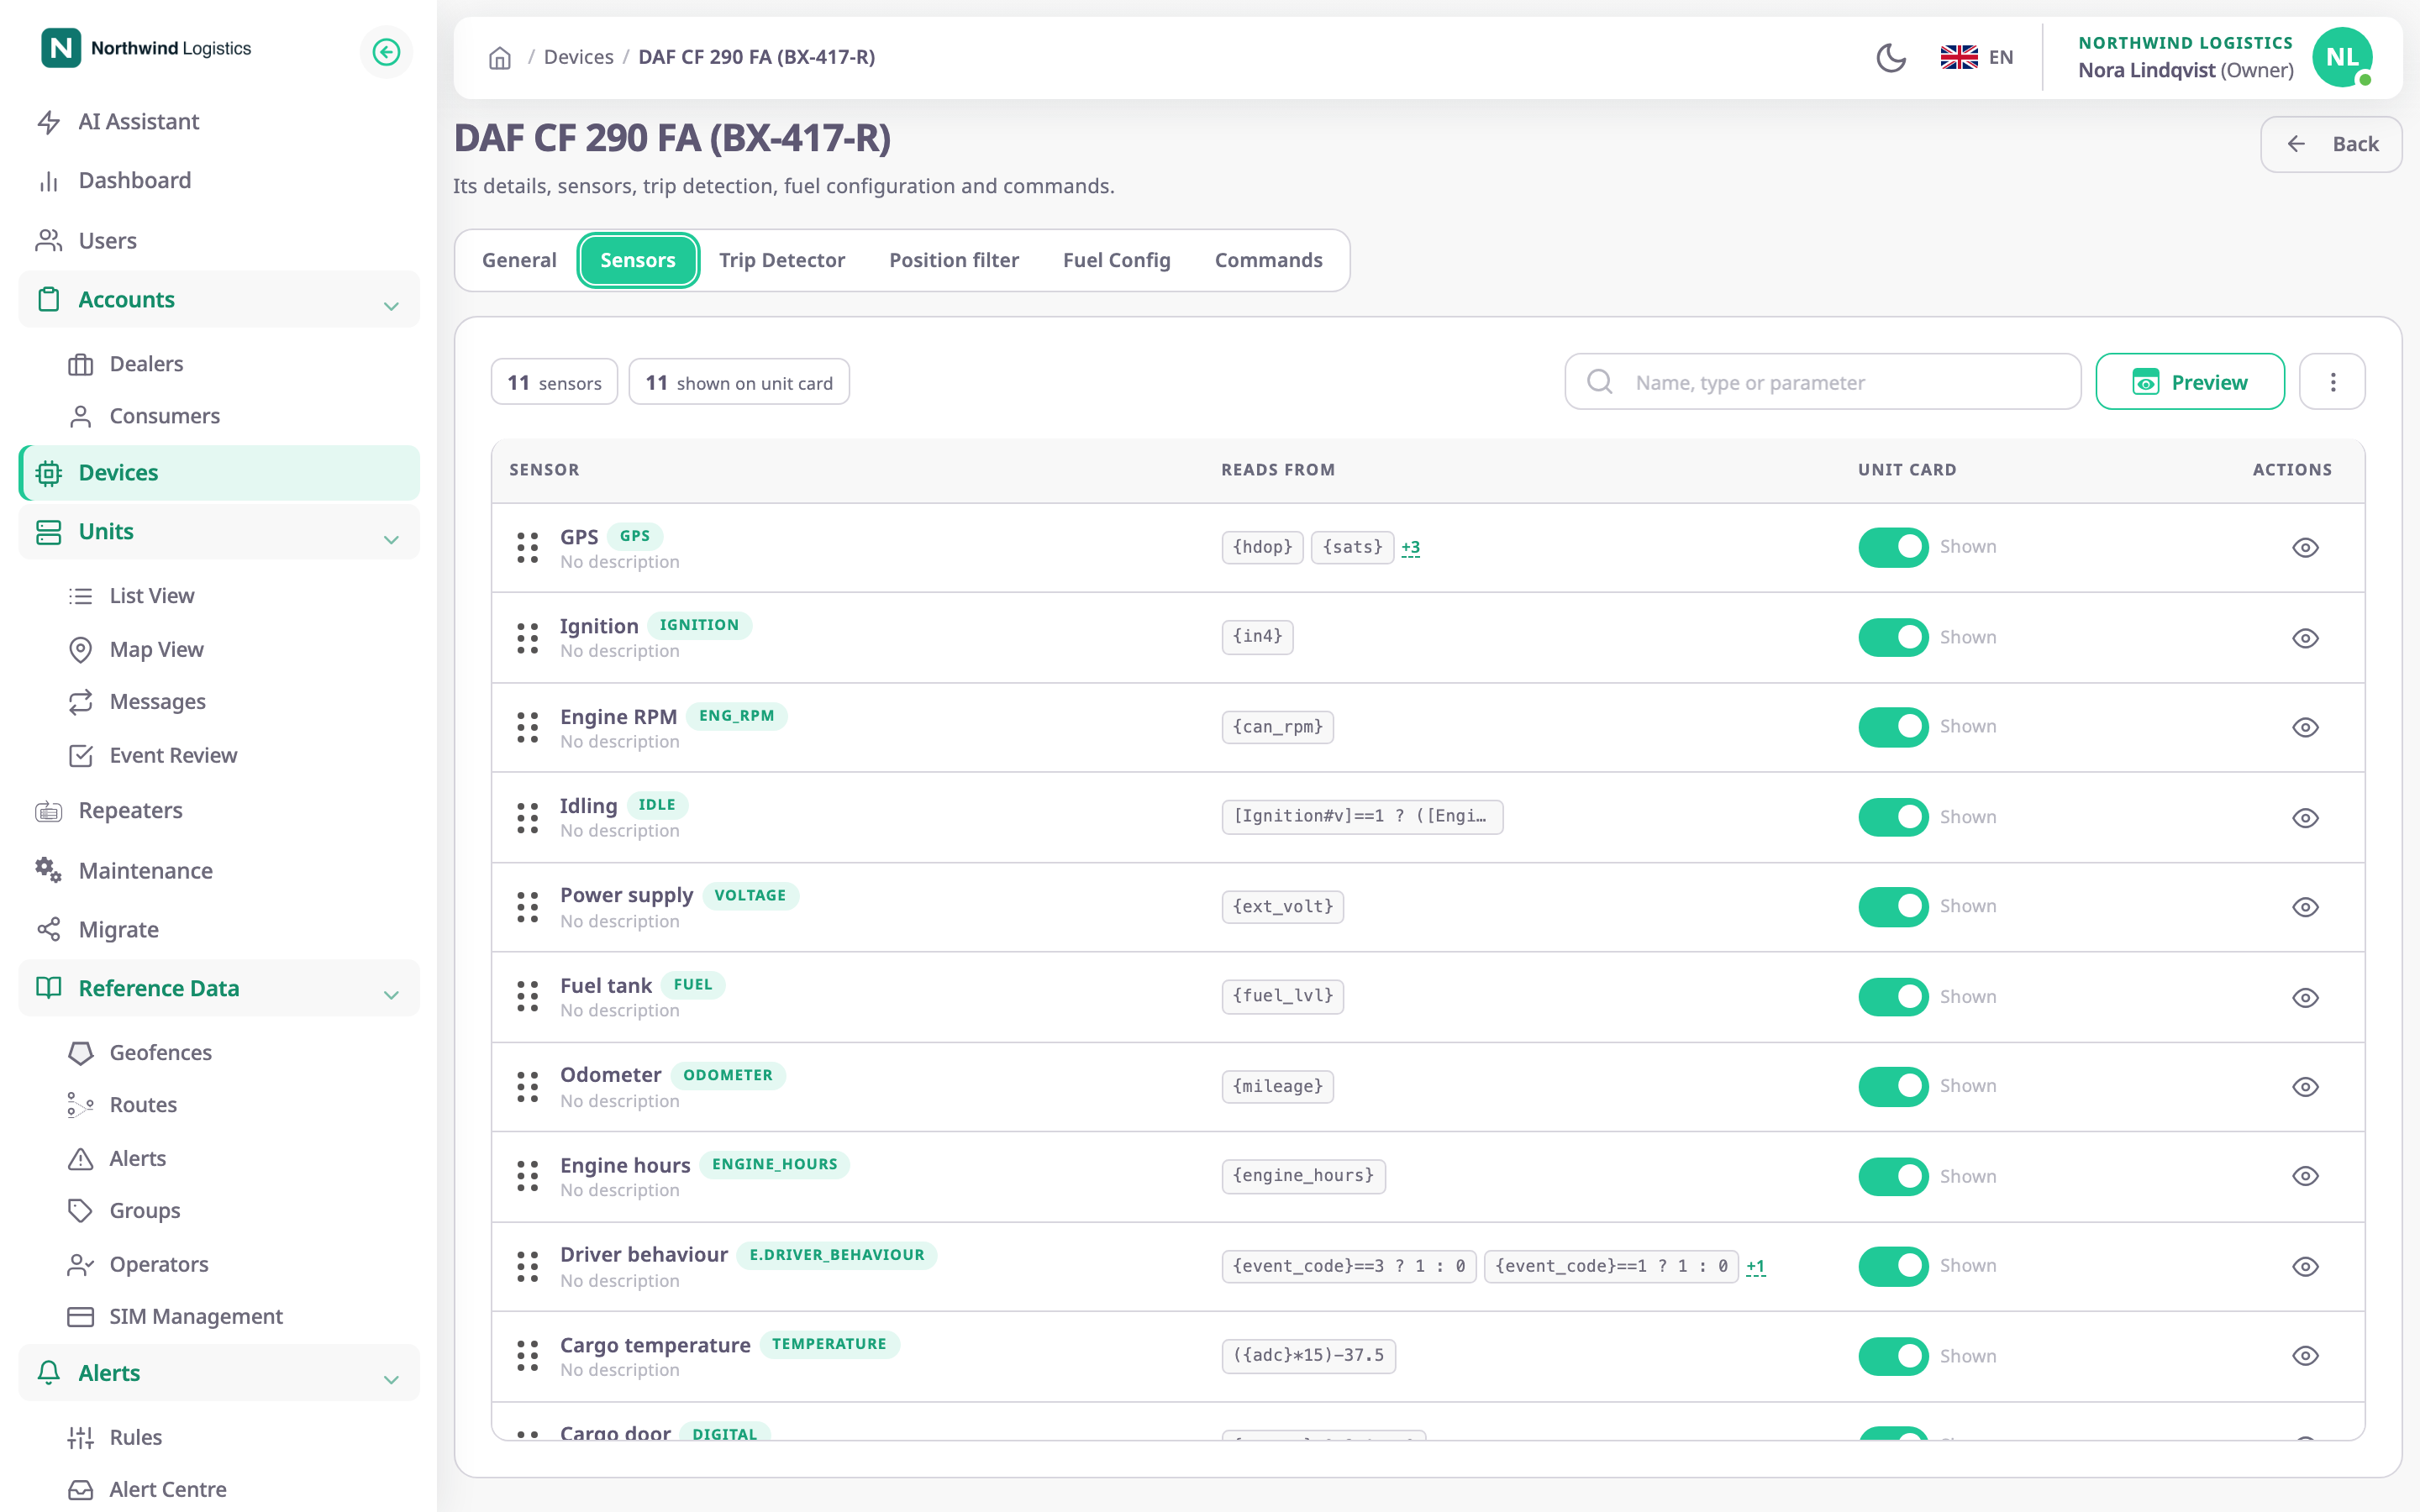
You cannot change anything on the tab when you open a device with View on the Devices list. The same applies when your account may not edit the device. The page header then reads "View" instead of "Edit". In this mode:
- Add sensor, Counters and Upload Sensors are gone. Download Sensors and Preview still work.
- Each row has View instead of Clone, Edit and Delete.
- The Unit card switches turn grey and do not respond.
- The drag handle shows only for a role with Modify Card Order.
¶ Permissions
- To open the tab for editing, you need Devices > Edit. To open it read-only, you need Devices > Read. The built-in Owner role of a dealer account has both.
- Modify Card Order lets a role reorder sensors on a device it can only view.
- Customer (consumer) accounts cannot open devices, so only dealers use this tab. See the Permissions reference.