A sensor turns a raw parameter the device sends, such as adc, into a named reading your customer understands, such as "Cargo temperature". You add it once per device; every unit the device reports for then shows it.
¶ Before you start
- You need Devices > Edit. The built-in Owner role of a dealer account has it.
- Know which sensor type fits the reading. Sensor types lists them.
- Know which parameter of the device carries the reading. Choose lists every parameter of the device's protocol, so you can look it up during the steps.
¶ Choose the type and name
-
In the side menu, select Devices.
-
Select Edit on the device's row.
The device opens on the General tab. -
Select the Sensors tab.
-
Select Add sensor, marked 1.
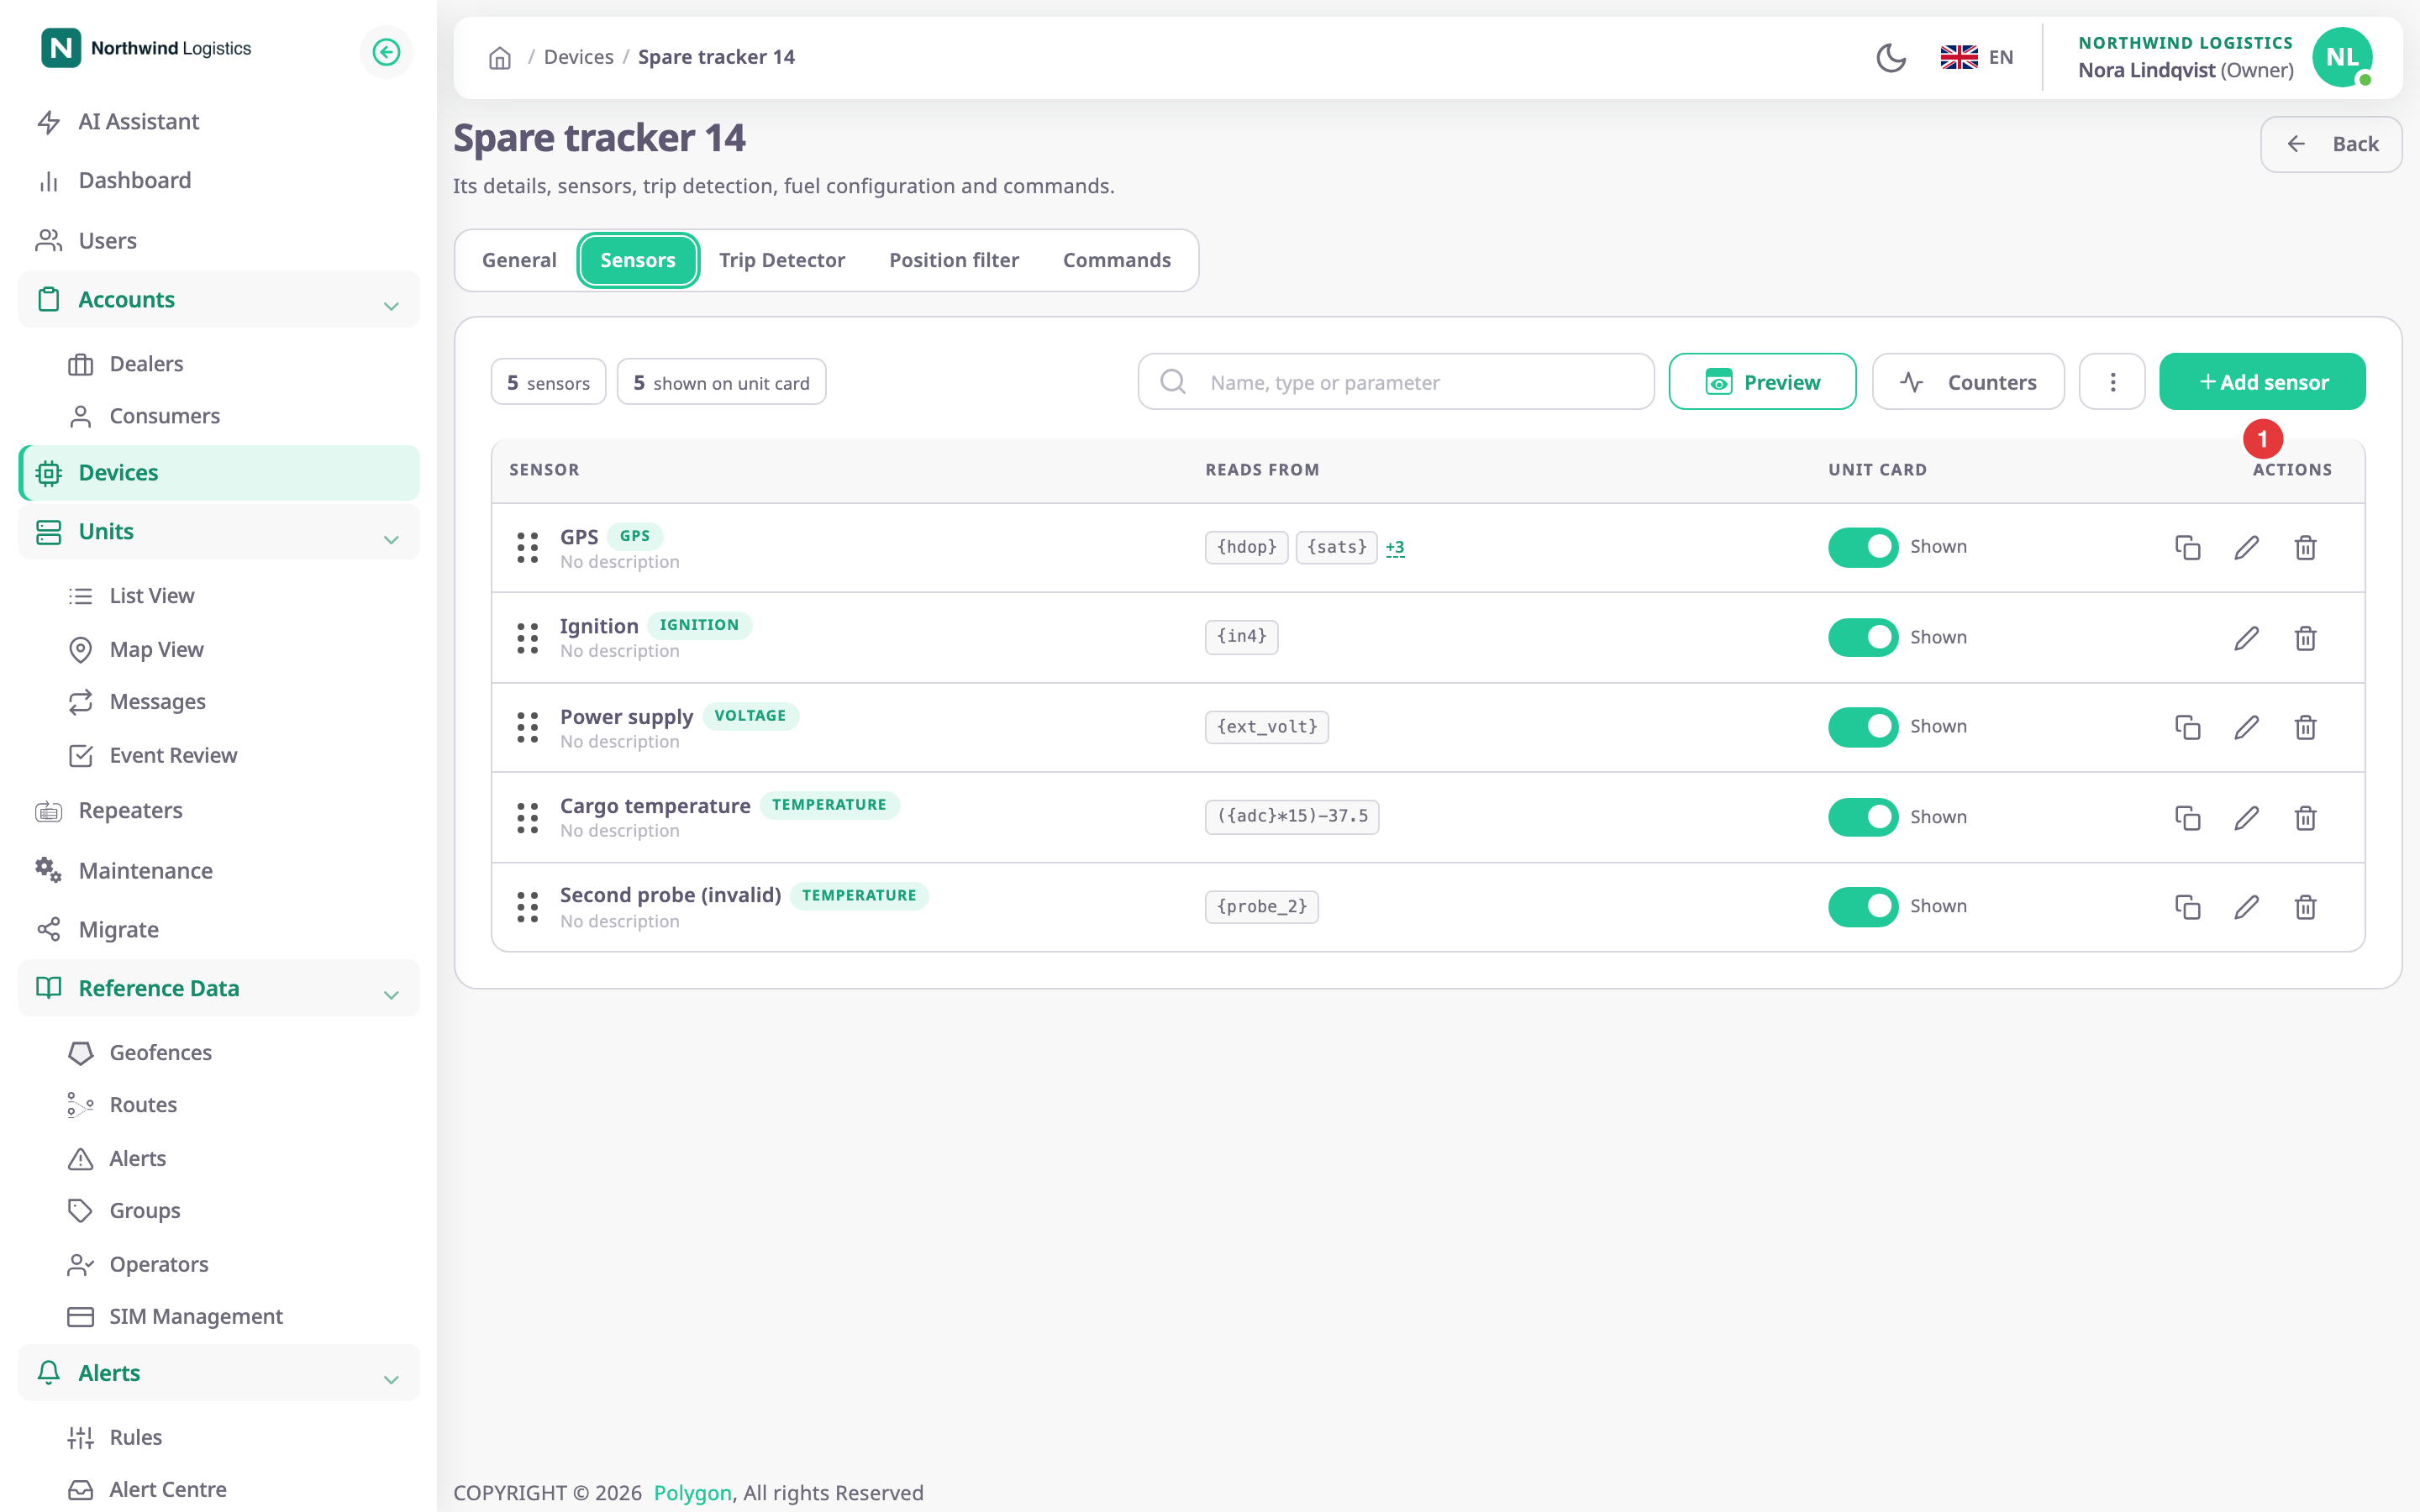
The New Sensor dialog opens.
-
In Type, choose the sensor type, for example TEMPERATURE.
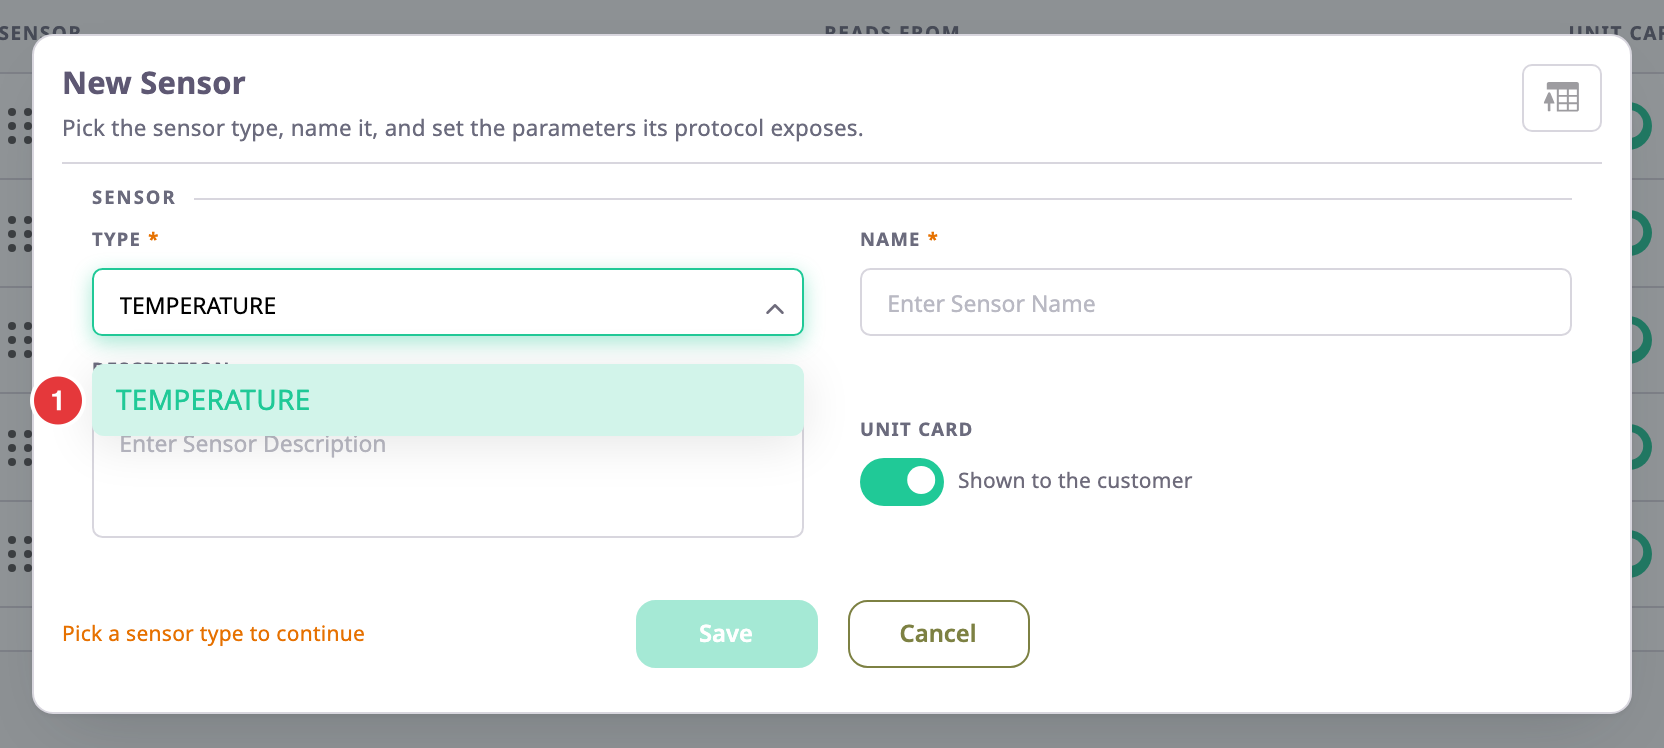
The dialog adds the type's Settings and Telemetry mapping groups.
-
In Name, enter a name your customer recognises, for example Cargo temperature.
-
Optional: In Description, enter a note for your own team, for example Probe at the rear door.
¶ Fill in the settings
If the type has a Settings group, fill in each field with an asterisk. For example, a VOLTAGE sensor asks for a voltage unit and a FUEL sensor asks for the tank capacity and the fuel unit. A TEMPERATURE sensor has no settings.
¶ Map the telemetry parameters
-
In the Telemetry mapping group, select Choose on the field to map, for example Temperature.
The Choose a parameter picker opens with the protocol's parameters. -
In the search box, enter part of the parameter's key or name, for example adc.
-
Select the parameter's row.
-
Select Insert, marked 1.
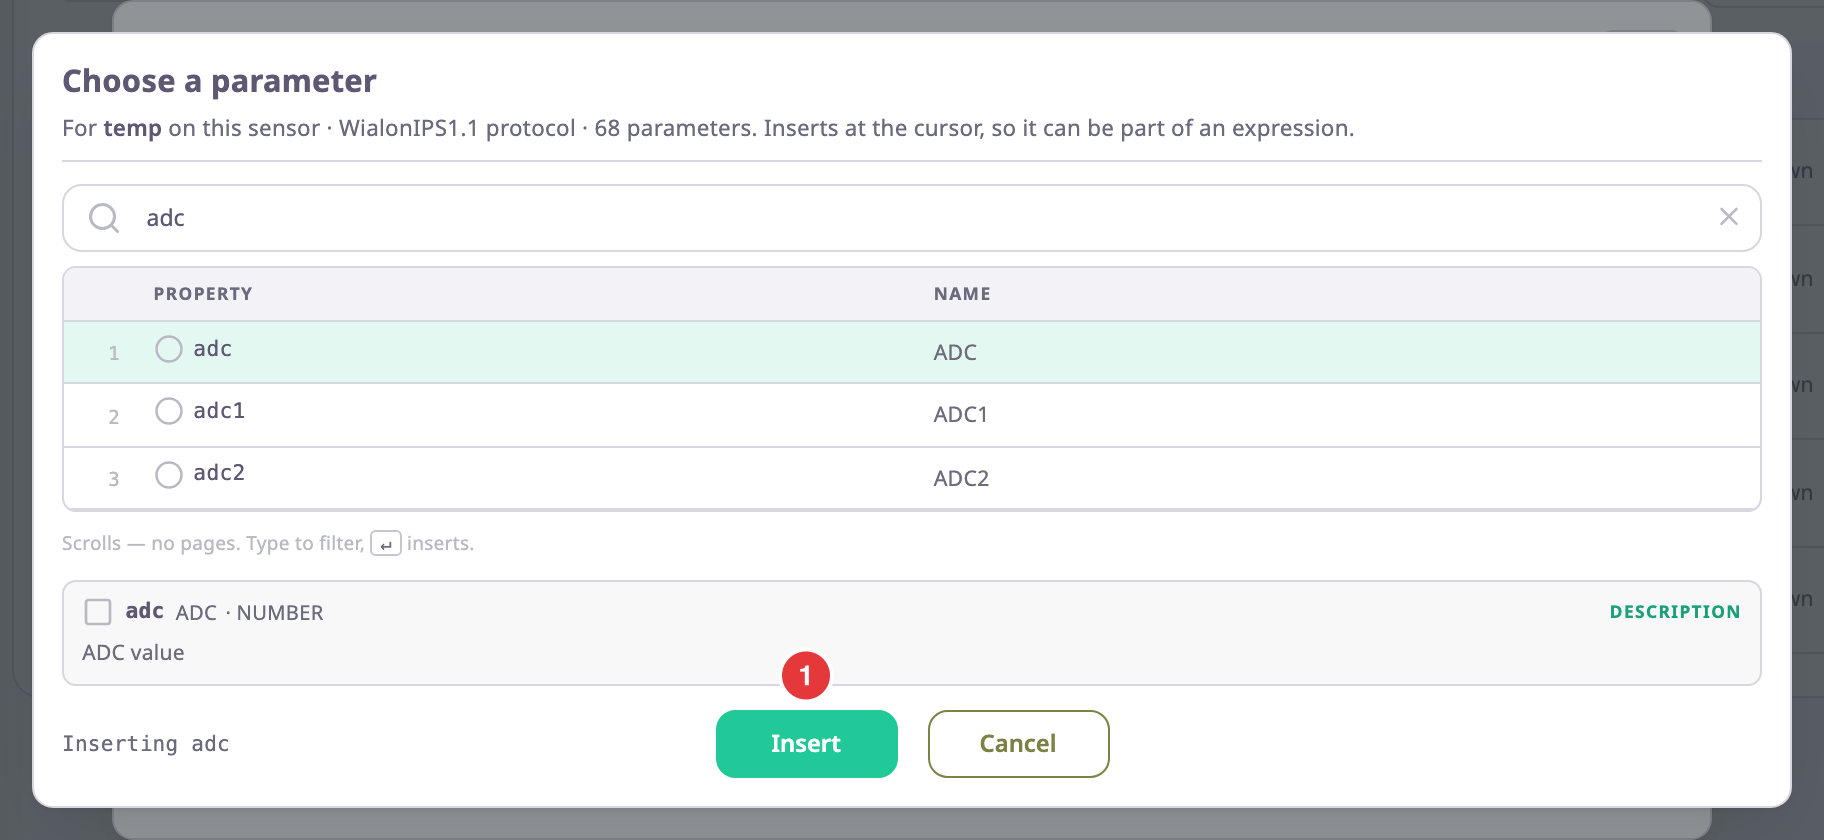
The field shows
{adc}. -
Optional: Turn the raw value into the unit you want with an expression. In the field, enter for example
({adc}*15)-37.5.
The line under the field says "Valid expression · returns number".
-
Repeat for every other field you need. You must map every field with an asterisk.
Insert replaces the whole field. To combine parameters, insert the first one and type the rest. The Expression reference explains the syntax, and a field that needs a calibration table uses its Calibration table link. See Create a calibration table.
¶ Show or hide it on the unit card
Shown to the customer is on for a new sensor, so the sensor appears on the unit card. Turn it off for a sensor that only feeds other sensors, alerts or reports, such as a raw input that an Idling sensor reads.
¶ Save the sensor
-
Select Save.
The app shows "Sensor added successfully." and the sensor appears at the end of the list.
If Save stays grey, the line beside it names what is missing. If the app says "Not allowed multiple IGNITION sensors", the device already has a sensor of that type and the type allows only one. See the Sensor dialog for every message.
¶ Clone a sensor
For a second sensor like an existing one, for example a second temperature probe:
- On the sensor's row, select Clone.
New Sensor opens with a copy of the sensor. Its name ends in "clone". - In Name, enter the new name, for example Cargo temperature 2.
- In Telemetry mapping, change the field to the second probe's parameter.
- Select Save.
Clone shows only on types that allow several sensors per device.
¶ What happens next
The device's next messages fill in the sensor, and every unit the device reports for shows the new value. Saving a sensor also makes the app recalculate the last two months of report data for those units. Reports reflect the new sensor after a while. Saving a GPS sensor makes the Trip Detector tab available, and a FUEL sensor the Fuel Config tab.